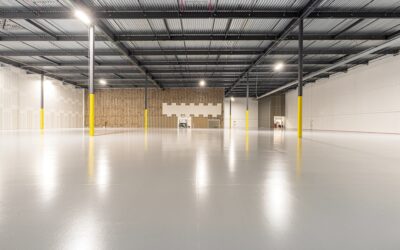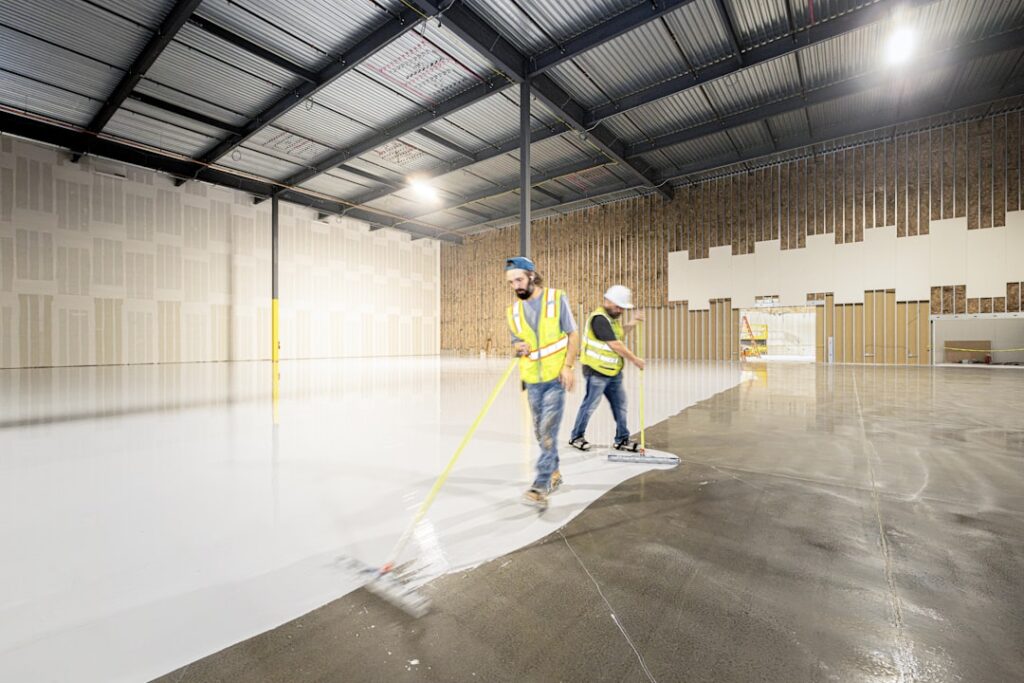
The glossy gray floor in every new brewery, big-box store, and loft conversion is not a coating — it is the slab itself, ground and burnished like granite. Concrete polishing mechanically refines a slab through successively finer diamond grits, hardens it chemically with a densifier, and leaves a surface that never peels, never needs waxing in the residential sense, and outlasts every flooring you could install over it. At $3 to $8 per square foot, it is often cheaper than the flooring it replaces. Here is the process, the choices you will be asked to make, and where polishing does and does not belong.
- What Polishing Actually Is
- The Process, Grit by Grit
- Sheen Levels: 1 Through 4
- Aggregate Exposure: Cream, Salt-and-Pepper, or Full
- What Concrete Polishing Costs
- Living Through the Project: Timeline, Dust, and Noise
- Preparing a Slab You Plan to Polish Someday
- Where Polishing Works — and Where It Doesn’t
What Polishing Actually Is
True polished concrete is a mechanical process, not a product. Planetary grinding machines — 700-pound units spinning diamond-embedded tooling — cut the slab surface flat, then refine the scratch pattern step by step until it reflects light. Midway through, the floor is flooded with a chemical densifier (typically lithium silicate, such as Consolideck LS or Ameripolish 3D SP) that reacts with the concrete to grow additional crystals in the surface pores, hardening it 30 to 50 percent and enabling the final gloss. The result is not shiny paint on concrete; it is concrete transformed into its own finished floor. That distinction is why polish cannot peel, blister, or delaminate the way coatings can.
The Process, Grit by Grit
A full polish runs through six to ten passes:
- Metal-bond grinding (30/40 then 80 then 150 grit): heavy diamonds cut the cap, flatten high spots, remove old coatings and adhesives, and expose whatever aggregate depth the spec calls for.
- Repair and grout: cracks and pinholes get filled — surface prep standards similar to those in our concrete patch guide apply, and patches will always read slightly different in the finished floor.
- Densify: the lithium silicate soak, applied once transitional grinding is done.
- Resin-bond polishing (100/200 through 400, 800, 1,500, 3,000 grit): progressively finer resin pads refine the surface to the specified sheen.
- Stain guard: a penetrating guard product is burnished in as the final step — polished concrete is dense but not stainproof, and the guard buys cleanup time against wine, oil, and pet accidents.
Dyes go in before or during resin steps if you want color; integrally colored or previously stained slabs polish beautifully, and color options overlap with those in our concrete stain colors guide.
Sheen Levels: 1 Through 4
The industry specifies finish by final grit, and it is the first question a contractor will ask:
- Level 1 — flat (ground, ~100/200 grit): matte, no reflection; really a prep grade or an honest industrial look.
- Level 2 — satin (~400 grit): soft sheen, slight overhead reflection. The workhorse residential choice — forgiving of dust and footprints.
- Level 3 — semi-gloss (~800-1,500 grit): clear overhead reflections; the standard retail and showroom spec.
- Level 4 — high gloss (~3,000 grit, burnished): mirror-like clarity. Stunning, and it shows every paw print and dust bunny — choose it for show spaces, not mudrooms.
Aggregate Exposure: Cream, Salt-and-Pepper, or Full
The second spec decision is how deep to grind, which determines what the floor looks like:
- Cream finish: minimal grinding, keeping the smooth troweled paste at the surface — uniform, subtle, and the least expensive, but only possible on flat, well-finished slabs.
- Salt-and-pepper: grinding 1/16 inch or so exposes fine sand speckle — the most popular look and the most forgiving of slab irregularity.
- Full aggregate exposure: cutting 1/4 inch reveals the stone itself, terrazzo-style. Dramatic, and the most labor (and money) of the three.
You do not fully control this choice: a wavy slab may force deeper cutting for flatness, and shallow slabs over post-tension cables limit it.
What Concrete Polishing Costs
National 2026 ranges: $3 to $5 per square foot for a Level 2 salt-and-pepper polish on a decent slab; $5 to $8 for higher sheens, dyes, or full exposure; $8 to $15 for decorative work with saw-cut patterns, multiple colors, or heavy repair. Small residential rooms price above these ranges because mobilization is fixed — many polishers carry $1,500 to $2,500 job minimums. Compare that against mid-range LVP or tile installed at $5 to $10 per square foot, remember the polish has no material to wear out, and the economics explain the brewery floors. Grinder-and-tooling DIY rental exists (about $300 to $500 per weekend), but rental machines and fixed-grit passes produce a ground floor, not a polished one; this is one of the trades where the equipment gap is decisive.
Living Through the Project: Timeline, Dust, and Noise
A residential polishing job moves faster than most flooring installs. A 600-to-1,000-square-foot basement or garage typically takes two to four days: one day of heavy grinding and repairs, a densifier soak (often overnight), and one to two days of resin polishing and guard. The floor is walkable immediately after each pass — there is no cure-out period like coatings — so a polished basement can host furniture the evening the crew leaves.
Dust is the question everyone asks, and modern rigs answer it well: grinders run tethered to HEPA vacuum systems, and a professional crew leaves less airborne dust than a drywall patch. Wet-grinding is the alternative where vacuums cannot keep up, at the cost of slurry disposal. Noise is the honest disruption — planetary grinders run loud for hours — so plan the grinding day around anyone working from home. Ask two logistics questions when booking: who moves and stores the contents of the room, and whether baseboards stay (grinders reach within about a quarter inch of walls; edges are finished with hand grinders, and installing base trim after polishing hides the transition entirely).
Preparing a Slab You Plan to Polish Someday
If a future polished floor is even a possibility — in a basement buildout or new garage — protect the slab now. Keep paint, drywall mud, and adhesive off the bare concrete during construction, or every spill becomes a grinding pass. Ask the finisher for a hard steel-trowel finish and consistent technique, since finishing marks show through cream polishes. Skip the curing compound in favor of wet curing where the spec allows, because cure-and-seal films must be ground off entirely. Ten minutes of planning at pour time saves a dollar per square foot at polish time.
Where Polishing Works — and Where It Doesn’t
Good candidates: basements, garages and shops, main-level slab-on-grade living spaces, and commercial floors — any sound, dry slab at least a few weeks old (new pours should cure 28 days). Poor candidates: slabs with extensive patching or shallow cracks everywhere (every repair shows), floors with moisture problems pushing vapor (test first — though polish handles vapor far better than epoxy, which it simply blisters), badly out-of-flat slabs on a tight budget, and heaved or settled sections, which need concrete leveling before any grinder touches them. A slab too damaged to polish honestly can be overlaid with a polishable topping — a premium version of the approach in our concrete resurfacing guide at $7 to $12 per square foot.
Slip resistance deserves a straight answer, since glossy floors look treacherous: dry polished concrete tests at or above common flooring standards for traction, and honed (Level 1-2) finishes are specified in wet-area commercial kitchens. Wet high-gloss is slick, though — for pool baths, entries, and garages in snow country, spec Level 2 or ask for a micro-etch additive in the guard coat, and put walk-off mats at exterior doors.
Versus epoxy, the other garage-floor finalist: epoxy wins on chemical resistance and uniform color, polish wins on longevity, zero peeling risk, and lifetime cost. Maintenance for polish is a dust mop, neutral-pH cleaner (never vinegar or bleach), and a guard re-burnish every few years in hard-use spaces. Done once, it is the last floor that room will ever need.