When people search for concrete vinyl, they’re usually asking about two related but distinct things: installing vinyl plank or tile directly over a concrete subfloor, and choosing vinyl products that mimic the look of polished concrete without the cost or weight of the real material. Both projects are common in basements, garages-turned-living-space, condos on slab foundations, and industrial-style renovations. This guide walks through the practical side of each: what concrete flooring conditions require before vinyl goes down, which vinyl products replicate concrete’s aesthetic most convincingly, and where homeowners typically run into trouble.
- Vinyl Over Concrete Subfloors: What the Slab Needs First
- Rigid Core vs. Flexible LVP for Slab Installations
- Concrete-Look Vinyl: Getting the Aesthetic Without the Slab
- Grout Lines, Seams, and Realistic Detailing
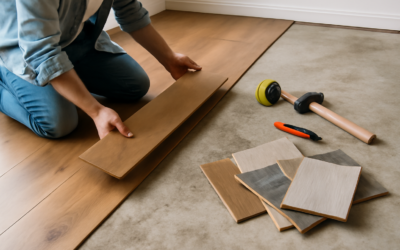
- Installation Steps for Vinyl Over Concrete
- Common Problems and How to Avoid Them
- Cost Summary and Final Considerations
Vinyl Over Concrete Subfloors: What the Slab Needs First
Concrete is one of the best subfloors for vinyl because it’s flat, rigid, and dimensionally stable compared to wood-framed floors that flex and expand. But “good subfloor” doesn’t mean “ready subfloor.” Before any luxury vinyl plank (LVP) or luxury vinyl tile (LVT) goes down, the slab needs a moisture test. Concrete slabs, especially those poured within the last two to five years or sitting below grade, can wick moisture upward through capillary action even when the surface feels bone dry.
A calcium chloride test (ASTM F1869) or an in-situ relative humidity probe (ASTM F2170) tells you what’s actually happening inside the slab, not just at the surface. Most manufacturers cap acceptable moisture vapor emission at 3-5 lbs per 1,000 sq ft per 24 hours for standard glue-down vinyl, and relative humidity readings should generally sit below 75-85% depending on the adhesive or click-lock underlayment system specified. Skipping this test is the single most common reason vinyl flooring fails over concrete — moisture trapped underneath causes adhesive breakdown, plank cupping, or a musty odor within a year or two.
Flatness matters almost as much as dryness. Most vinyl manufacturers require the slab to be flat within 3/16 inch over a 10-foot span, or roughly 1/8 inch over 6 feet for rigid core products. Low spots get filled with a cementitious self-leveling compound; high spots get ground down with a diamond grinder. Skipping this step telegraphs every dip and hump through thin LVP, and it accelerates wear at the seams.
Rigid Core vs. Flexible LVP for Slab Installations
Concrete floors run cooler and can transmit more moisture than wood subfloors, so product selection matters. Rigid core vinyl — SPC (stone plastic composite) or WPC (wood plastic composite) — is generally the better fit for concrete because its dense core resists indentation from furniture and handles minor subfloor imperfections better than thinner flexible vinyl. SPC in particular, at 4-7mm thick with a stone-based core, performs well over slabs in basements where temperature swings are more pronounced.
Flexible LVP (the older-style vinyl plank without a rigid core) can still be glued directly to concrete and is often cheaper per square foot — typically $1.50-$3.50 versus $2.50-$5.00 for rigid core — but it telegraphs subfloor flaws more readily and generally needs a smoother, more meticulously prepped slab.
- Glue-down flexible LVP: lowest profile, best for commercial or high-traffic residential use, requires full-spread adhesive and a well-prepped, primed slab.
- Rigid core click-lock (SPC/WPC): floats over a thin foam or cork underlayment, tolerates minor imperfections, easier DIY installation, adds sound dampening.
- Loose-lay vinyl plank: uses friction and weight (backed with a heavier vinyl backing) rather than full adhesive, good for spaces where future removal is likely.
Concrete-Look Vinyl: Getting the Aesthetic Without the Slab
The other meaning behind concrete vinyl is purely visual — vinyl tile or plank printed and embossed to replicate poured concrete, complete with subtle color variation, faint trowel marks, hairline cracking patterns, and a matte or low-sheen finish. This has become popular in kitchens, lofts, and commercial-style bathrooms where homeowners want an industrial look without the cold surface, higher installation cost, or crack risk of actual polished concrete.
Real polished concrete runs $3-$8 per sq ft for materials and finishing labor on an existing slab, or considerably more for a new pour, plus it’s unforgiving underfoot and cold in winter. Concrete-look LVT delivers a visually close match for $2-$6 per sq ft installed, with the added benefit of slight cushioning, warmth, and easier replacement if a section gets damaged. Large-format tiles (18×36 or 24×24 inches) tend to sell the illusion better than plank formats, since real concrete slabs don’t come in narrow board shapes.
Quality varies significantly between products. Cheaper concrete-look vinyl uses a repeating print pattern that becomes obvious across a large room — look for products with at least 6-8 unique tile faces in the pattern repeat to avoid a visibly tiled look. Better lines also vary grout-line width and depth slightly from tile to tile for a more convincing seam.
Grout Lines, Seams, and Realistic Detailing
Manufacturers achieve the concrete illusion partly through registered embossing — texture that lines up with the printed pattern so light catches surface variation the way it would on real concrete. Some premium lines add a very light bevel or micro-groove at tile edges to mimic control joints, the intentional cuts poured into real concrete slabs to manage cracking. If you’re set on the concrete look, ask for samples under your actual room lighting; concrete-look finishes can read as gray plastic under warm incandescent bulbs but convincing under daylight-balanced LED.
Installation Steps for Vinyl Over Concrete
- Test moisture with calcium chloride or RH probe; remediate with an epoxy moisture barrier if readings exceed manufacturer limits.
- Grind high spots and pour self-leveling compound over low spots; let cure per product instructions, typically 24-72 hours.
- Sweep and vacuum thoroughly; concrete dust left behind prevents adhesive bond and telegraphs through thin vinyl.
- Acclimate the vinyl planks or tiles in the room for 24-48 hours at normal living temperature.
- Install underlayment (for floating floors) or apply adhesive per trowel size specified by the manufacturer (for glue-down).
- Lay flooring with a 1/4-inch expansion gap at walls, staggering seams at least 6 inches between rows.
Common Problems and How to Avoid Them
The most frequent complaint with vinyl over concrete is a soft or hollow spot developing months after installation. This usually traces back to incomplete adhesive coverage or a low spot that wasn’t leveled. A secondary issue is edge curling near exterior walls or garage doors, which often signals unaddressed moisture intrusion rather than a defective product. If a musty smell develops, that’s a strong signal moisture is trapped beneath the vinyl and the installation needs to be pulled up and the slab re-tested.
Basement installations deserve extra caution. Below-grade slabs are more prone to hydrostatic pressure from groundwater, so a vapor barrier — either a separate 6-mil poly sheet under a floating floor or an epoxy-based moisture mitigation coating under glue-down vinyl — is worth the added cost even when initial moisture readings look acceptable.
Cost Summary and Final Considerations
Budget roughly $3-$8 per sq ft installed for standard rigid core vinyl over a concrete slab that needs moderate prep, and add $1-$3 per sq ft if moisture mitigation or significant self-leveling is required. For concrete-look vinyl purely as a design choice, expect $2-$6 per sq ft installed depending on tile size and pattern variety. Either way, the subfloor prep is where the real work — and the real cost of skipping steps — lives. A slab that’s tested, flat, clean, and properly sealed will let almost any quality vinyl product perform for 15-20 years, while shortcuts on prep tend to surface as problems within the first heating season.