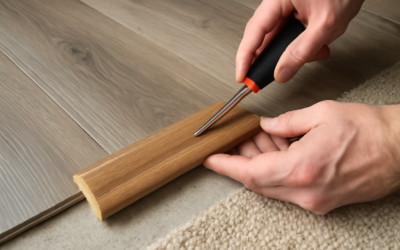
Look at the exposed end of a laminate countertop, where it stops beside a range or at the end of a run, and you will often see the giveaway of an unfinished job: a raw, particleboard edge or a mismatched strip. The countertop end cap is the small piece that fixes this, sealing that exposed end with a finished, color-matched surface so the counter looks complete and stays protected from moisture. It is one of the most overlooked details in a laminate countertop, and getting it right is the difference between a clean, professional result and an obvious DIY tell.
Part of our Countertops guide — explore the full guide →
- What a Countertop End Cap Is
- Why End Caps Matter
- Types of Countertop End Caps
- Matching the Cap to Your Counter
- Installing an Iron-On End Cap
- Installing a Preformed End Cap
- Common Mistakes to Avoid
- Cost and When to Call a Pro
- Alternatives to a Standard End Cap
- How Granite Countertop Ends Are Finished Compared With Laminate
- The Bottom Line
What a Countertop End Cap Is
An end cap is a piece of laminate or molded material that covers the exposed short end of a countertop, the cut edge that is not against a wall. On a post-form laminate counter, the top and front are wrapped in a continuous sheet, but the ends are cut open during installation, exposing the raw particleboard core. The end cap finishes that edge with matching laminate, giving the counter a complete, sealed appearance. Without it, the core is not only ugly but vulnerable, since exposed particleboard swells and crumbles the moment water reaches it.
Why End Caps Matter
End caps do two jobs, and both are important. The obvious one is appearance: a color-matched cap makes the counter look finished and intentional rather than cut off. The less obvious but equally critical job is protection. The particleboard core of a laminate counter acts like a sponge; if the end is left raw, splashes and spills wick into the core, causing it to swell, bubble the laminate, and eventually rot. The end cap seals that vulnerable edge against moisture. Skipping it or installing it poorly is a leading cause of premature laminate-counter failure at the ends.
Types of Countertop End Caps
End caps come in a few forms, and the right one depends on your counter’s profile.
- Iron-on end caps: pre-cut strips of matching laminate with a heat-activated adhesive backing; you apply them with a household iron. The most common DIY solution.
- Preformed (contoured) end caps: molded pieces shaped to match a post-form counter’s rolled front edge and backsplash curve, giving a seamless wrap.
- Batch-matched kits: caps sold to match a specific laminate pattern and color so the finish blends with the counter surface.
Always confirm the cap matches your exact laminate color and pattern, since a near-miss looks worse than an obvious contrast.
Matching the Cap to Your Counter
The most important shopping step is getting an exact match. Note the laminate manufacturer and the specific color or pattern number, usually printed on the original invoice or sometimes on the underside of the counter. Big-box stores and laminate suppliers sell end cap kits keyed to popular patterns. For a post-form counter with a curved front edge and coved backsplash, buy a preformed contoured cap rather than a flat strip, because a flat piece cannot follow the rolled profile and will leave gaps. Bring a photo and the pattern name when you shop to avoid an obvious mismatch.
Installing an Iron-On End Cap
The iron-on process is genuinely beginner-friendly and takes about 15 minutes per end. Start by cutting the raw counter end clean and square, then sand it smooth so the cap sits flat. Position the end cap over the edge, adhesive side down, and run a household iron on a medium, dry setting slowly across the surface. The heat melts the glue and bonds the laminate to the core. Press it firmly with a block of wood as it cools to ensure full contact. Once set, trim the overhang with a file or a laminate trimmer, working from the top down to avoid chipping, and lightly ease the sharp corners.
Installing a Preformed End Cap
Contoured caps for post-form counters follow the same idea but wrap the whole profile. Dry-fit the cap first to confirm it matches the curve of the front edge and the coved backsplash. Some preformed caps are iron-on; others use contact cement. For contact-cement versions, apply adhesive to both the counter end and the cap, let it flash off until tacky, then press them together, since contact cement bonds instantly and does not allow repositioning. Clamp or press firmly, then trim any excess flush with a file. The result is a seamless wrap that follows the counter’s contour exactly.
Common Mistakes to Avoid
A few errors show up repeatedly. Using an iron set too hot scorches the laminate; keep it on medium and moving. Failing to sand the cut end flat leaves high spots that create bubbles under the cap. Trimming the overhang upward instead of downward chips the fresh laminate edge. And leaving the end raw temporarily, meaning to cap it later, invites water damage in the meantime. The most common mistake of all is a color mismatch, so verify the pattern before you buy rather than settling for close enough.
Cost and When to Call a Pro
End caps are inexpensive. Iron-on strips and preformed caps typically run $5 to $20 per end, making this one of the cheapest finishing details in a kitchen. The tools, an iron, a file, and fine sandpaper, are things most homeowners already own. For a straightforward laminate counter, this is a classic DIY task. Consider a professional if your counter is a specialty or discontinued laminate that is hard to match, or if the end is an unusual angle or shape that a stock cap will not fit cleanly. In most cases, though, capping an end is a quick weekend fix.
Alternatives to a Standard End Cap
The iron-on laminate cap is the most common finish, but it is not the only way to close off a counter end. Some homeowners prefer a wood edge, a strip of hardwood trim sealed and attached to the counter end, for a warmer, more custom look that suits cottage and farmhouse kitchens. Others choose a metal edge trim, similar to the profiles used on tile, for a modern, durable finish that resists chipping. A skilled fabricator can also create a beveled or wrapped laminate edge that hides the seam more completely than a flat iron-on strip. Each option changes the appearance and the cost, so pick the one that matches your kitchen’s style.
There is also the question of when an end cap is not the right tool at all. If the exposed end will sit against an appliance like a dishwasher or range, a small gap is normal and the cap simply finishes the visible edge. If the counter ends in a peninsula or an eating bar where both the end and the underside show, you may want a more finished waterfall or wrapped edge rather than a simple cap. And if the laminate is discontinued and unmatchable, painting or refinishing the whole counter may make more sense than chasing a cap that will never blend. Knowing the alternatives keeps you from forcing a stock cap onto a job it does not fit.
How Granite Countertop Ends Are Finished Compared With Laminate
End caps solve a laminate problem, but stone counters have their own version of the same question: what happens where the counter stops? Granite countertop ends are not covered with a separate strip. Instead, the fabricator shapes and polishes the stone itself, and the choices made at that end affect safety, appearance and how well the edge holds up over the years. Knowing the options helps you ask the right questions before a slab is cut.
Polished Ends That Match the Front Edge
On a well-fabricated stone counter, any exposed end gets the same edge profile and polish as the front. If you chose an eased, beveled or rounded front edge, that shape should wrap around the corner and continue across the end so the counter looks like one solid piece. Ask your fabricator to confirm which ends are exposed on the drawing. An end that was assumed to sit against a wall or appliance may be left with a rough, saw-cut face, which looks unfinished once a range is pulled out or a layout changes.
Corner Shapes and Family Safety
The corner where the front edge meets the end is the spot most likely to catch a hip or a small child’s head. Square corners look crisp but are sharp. A clipped corner, which trims the point at an angle, or a radius corner, which rounds it in a gentle curve, softens the impact and resists chipping better. Granite countertop ends at a walkway, a peninsula or the end of an island are the best candidates for a rounded corner, especially in homes with toddlers.
Waterfall and Mitered Ends
For an island or peninsula, the end can drop all the way to the floor as a waterfall panel. The fabricator miters the top and the side panel so the joint sits on the corner and the grain or speckle appears to fold over the edge. This option uses more stone, needs a level floor and careful support, and costs noticeably more than a simple polished end, but it protects the cabinet end panel from scuffs and gives the island a furniture-like finish.
Repairing and Maintaining Stone Ends
Exposed corners and ends take most of the bumps from pots, chairs and vacuum heads, so small chips are common over time. A stone repair technician can fill a chip with a color-matched epoxy or resin and polish it nearly invisible. Because natural granite is porous to varying degrees, reseal exposed ends along with the top whenever a water drop stops beading. Treat granite countertop ends as part of the regular care routine rather than an afterthought.
Silica Dust When Shaping Stone
Grinding or polishing granite creates fine crystalline silica dust, which can cause lasting lung damage. Leave profiling and chip grinding to professionals who use wet methods and dust control. For any small touch-up at home, work wet, wear a fitted P100 respirator and eye protection, and clean up with a HEPA vacuum.
The Bottom Line
A countertop end cap is a small piece that punches above its weight, finishing the exposed end of a laminate counter for a clean, professional look while sealing the vulnerable particleboard core against moisture. Match the cap exactly to your laminate pattern, choose an iron-on strip for a square edge or a preformed cap for a contoured post-form counter, sand the end flat, and trim carefully. For a few dollars and a few minutes with a household iron, you turn a raw, unfinished edge into a detail that looks like it came from the factory.