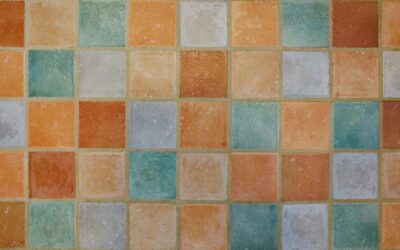
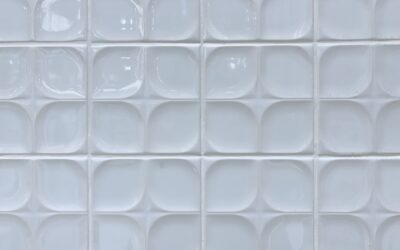
A kitchen backsplash is one of the highest-impact upgrades you can knock out yourself in a weekend, and it does not take a master tiler to get a clean result. A do it yourself backsplash protects your wall from splatters and water while completely changing the feel of the room, often for a few hundred dollars in materials. The big decision up front is whether to install real tile or go with peel-and-stick. I have done both, and this guide gives you the honest tradeoffs, the tools you need, and a step-by-step that gets you to a professional-looking wall.
Part of our Kitchen Remodeling guide — explore the full guide →
Real Tile vs Peel-and-Stick: The Honest Comparison
Both options have a place, and choosing wrong leads to regret. Here is the straight truth from someone who has installed each more than once.
Peel-and-Stick Pros and Cons
Peel-and-stick backsplash comes as adhesive-backed sheets or tiles, usually vinyl, gel, or thin composite. The upside is huge for renters and beginners: no thinset, no grout, no special tools, and you can finish a wall in a couple of hours. It is removable in many cases, which protects a security deposit. The downside is durability and authenticity. Peel-and-stick does not handle high heat directly behind a stove as well as real tile, the adhesive can fail over time near steam and grease, and up close it rarely looks as convincing as ceramic. Lifespan is typically a handful of years, not decades.
Real Tile Pros and Cons
Real tile, ceramic, porcelain, glass, or stone, is the gold standard. It is heat-resistant behind a range, fully waterproof when grouted and sealed, and lasts for decades while adding real resale value. The tradeoff is effort. You need thinset or mastic, spacers, a notched trowel, and grout, plus a way to cut tile. It takes longer, spans two days because thinset and grout need to cure, and the learning curve is steeper. For a forever home or behind a cooktop, though, real tile is worth it.
Tools and Materials
For a real tile backsplash, gather the following before you start:
- Tile of your choice, measured by square footage plus 10 to 15 percent for cuts and waste
- Thinset mortar or pre-mixed mastic adhesive
- Notched trowel (1/4-inch notch is common for mosaics)
- Tile spacers, a level, and a tape measure
- Tile cutter or wet saw, plus nippers for outlets
- Grout, a grout float, sponges, and a bucket
- Grout sealer and painter’s tape
For peel-and-stick, the list shrinks to the tiles, a utility knife, a straightedge, and a level. That simplicity is exactly why beginners love it.
Preparing the Wall
Good prep makes or breaks the job regardless of which product you choose. Turn off power to the outlets at the breaker, remove the outlet and switch cover plates, and unscrew the receptacles enough to tile behind them. Clean the wall thoroughly with a degreaser, since cooking grease ruins adhesion, and patch any holes.
For peel-and-stick especially, the wall must be smooth, dry, and grease-free or the adhesive will lift. Lightly sand glossy paint so the backing grips. Find your starting point by measuring and marking a level line; never assume your countertop is level, because most are not.
Installing Real Tile Step by Step
Take it in order and do not rush the cure times:
- Spread a thin, even layer of thinset or mastic on a small section with the notched trowel, holding it at about 45 degrees to create ridges.
- Press tiles or mosaic sheets into the adhesive with a slight twist, using spacers to keep gaps even.
- Check level frequently and wipe excess adhesive out of the joints before it sets.
- Cut edge and outlet tiles with your cutter or nippers for a snug fit.
- Let the adhesive cure fully, usually 24 hours, before grouting.
- Apply grout with the float, pushing it into the joints at a diagonal, then wipe the surface clean with a damp sponge.
- After the grout haze clears and cures, seal the grout to keep it stain and moisture resistant.
Sealing matters. Unsealed grout absorbs grease and water and discolors fast, so do not skip it. Reseal every year or two to keep the joints looking new.
Installing Peel-and-Stick Step by Step
The fast route still rewards care:
- Plan your layout dry on the counter so patterns line up at the corners.
- Start at your level reference line, peel the backing, and press the first tile firmly from the center outward to push out air.
- Overlap or butt seams per the product instructions, smoothing as you go.
- Cut around outlets and edges with a sharp utility knife and a straightedge.
- Press the entire surface hard, especially the edges, to set the adhesive.
Avoid placing peel-and-stick directly behind a gas burner where flames or extreme heat could reach it, and check that your product is rated for kitchen use.
What It Costs
Budget swings with your material. Peel-and-stick backsplash often runs $8 to $20 per square foot, and a typical kitchen backsplash of 30 square feet lands around $250 to $600 in materials. Real ceramic or porcelain tile can start as low as $5 to $15 per square foot for the tile, with thinset, grout, and sealer adding modest cost. Doing the labor yourself is where the real savings live, since pros often charge $40 to $60 per square foot installed.
Common Mistakes and How to Avoid Them
Most backsplash regrets come from a handful of avoidable errors. The number one issue is starting off level. If your first row follows a crooked countertop, every row above magnifies the lean, and by the time you reach the upper cabinets the gap is obvious. Always strike a level line and tile to it, shimming or cutting the bottom row as needed.
- Skipping wall prep: Grease and glossy paint kill adhesion, especially for peel-and-stick. Degrease and scuff first.
- Wrong trowel notch: Too much thinset oozes into joints; too little leaves tiles loose. Match the notch to the tile size.
- Grouting too soon: Let adhesive cure the full time or tiles shift while you grout.
- Forgetting expansion at the counter: Use flexible caulk, not grout, where tile meets the countertop so it does not crack.
- Not sealing grout: Unsealed joints stain fast in a kitchen; seal and reseal periodically.
Take your time on the first row and the outlet cuts, since those are the spots a guest’s eye lands on. Everything else is forgiving once your foundation is straight and your wall was prepped right.
Final Thoughts
A do it yourself backsplash is one of the best returns on a weekend you will find in home improvement. Choose peel-and-stick if you rent, want speed, or are nervous about tiling; choose real tile if you want durability, heat resistance behind the stove, and lasting value. Either way, prep the wall obsessively, start from a level line, and take your time on the cuts around outlets. Do that, and you will have a backsplash that looks like a pro hung it, at a fraction of the price.