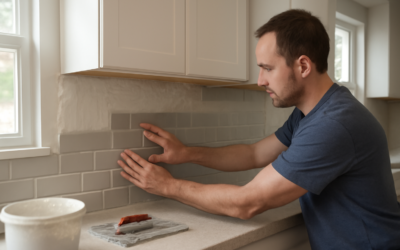
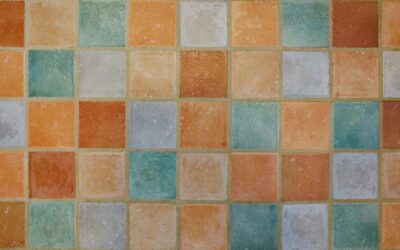
A kitchen backsplash is one of the highest-impact, lowest-cost upgrades you can make, and a DIY backsplash is genuinely within reach for most homeowners willing to spend a focused weekend on it. The area is small, the cuts are forgiving, and the payoff is a transformed kitchen for a fraction of what a contractor charges. With the right prep, the right tools, and a little patience, the results can look fully professional.
Part of our Kitchen Remodeling guide — explore the full guide →
This guide walks through choosing materials, gathering tools, and installing a tile backsplash step by step, including the mistakes that trip up first-timers.
Choosing Your Backsplash Material
Material choice drives both the look and the difficulty. The most DIY-friendly options include:
- Ceramic subway tile: The classic, cheapest, and most forgiving choice. Easy to cut and arrange.
- Mosaic sheets: Small tiles mesh-mounted on 12-inch sheets, which speeds installation and handles outlets easily.
- Glass tile: Bright and modern, but trickier to cut and requires white thinset.
- Peel-and-stick tile: The easiest of all, no thinset or grout needed, good for renters and quick refreshes, though less durable than real tile.
For a first project that still looks high-end, mosaic sheets or subway tile offer the best balance of affordability, ease, and durability.
Tools and Materials You Will Need
Gather everything before you start so you are not running to the store mid-project. A typical tile backsplash needs a notched trowel, a tile cutter or wet saw, a rubber grout float, tile spacers, a level, a tape measure, mixing buckets, sponges, and a margin trowel. Materials include thinset mortar or tile adhesive, the tile itself, grout, grout sealer, and painter’s tape.
Budget-wise, a typical kitchen backsplash uses 25 to 40 square feet of tile. Material costs often land between $200 and $600 total depending on the tile, which is a fraction of the $800 to $1,500 a pro might charge. Buy about ten percent extra tile for cuts and mistakes.
Prepping the Wall
Preparation makes or breaks the result. Turn off power to the outlets, remove the outlet covers, and loosen the outlets so they can be brought forward over the new tile thickness later. Clean the wall thoroughly to remove grease, since thinset will not bond to a greasy surface. Lightly sand glossy paint so the adhesive grips.
Find and mark your starting line. Counters are rarely perfectly level, so measure up from the lowest point and snap a level line to work from. Plan your layout so cut tiles fall at the edges and corners rather than in the most visible center, and dry-lay a row to check the spacing.
Installing the Tile Step by Step
With prep done, the install moves quickly:
- Mix thinset to a smooth, peanut-butter consistency, or use premixed adhesive for small jobs.
- Spread a section of adhesive on the wall with the notched edge of the trowel, holding it at a consistent angle.
- Press tiles into place with a slight twist, using spacers to keep gaps even.
- Check level frequently and wipe excess adhesive from tile faces before it sets.
- Cut edge and outlet tiles to fit using your cutter or wet saw.
- Let the adhesive cure fully, usually 24 hours, before grouting.
Work in manageable sections so the adhesive does not skin over before you place tiles. Keep a damp sponge handy to clean as you go.
Grouting and Finishing
Once the adhesive has cured, mix the grout and press it into the joints with a rubber float held at 45 degrees, working diagonally so you do not pull grout back out. Let it firm up for about 15 to 20 minutes, then wipe the surface with a damp sponge in light, single-direction strokes, rinsing often. A haze will form, which you buff off with a dry microfiber cloth once the grout dries.
After the grout cures, usually a couple of days, apply grout sealer to protect it from grease and stains, then run a bead of color-matched caulk along the seam where the backsplash meets the counter. Reinstall the outlet covers, and the kitchen is done.
Working Around Outlets and Corners
The trickiest parts of any backsplash are the outlets, switches, and inside corners, so plan for them. With the power off at the breaker, remove the cover plates and loosen the outlets, pulling them forward so they will sit flush over the added tile thickness. You may need outlet box extenders, inexpensive plastic spacers that bring the box forward to the new surface, to do this safely; if you are unsure about the electrical work, have an electrician handle it.
For tiles that meet an outlet, measure carefully and cut notches or L-shapes with your tile cutter or a tile nipper for small adjustments. Mosaic sheets make this easier, since you can remove individual small tiles to fit around the opening. Aim to keep cut edges where the cover plate will overlap and hide them.
Inside corners where two walls meet should not be grouted solid; instead, leave a small gap and fill it with color-matched caulk, which flexes as the walls move slightly and prevents cracking. The same applies where the backsplash meets the countertop and where it meets upper cabinets.
Peel-and-Stick: The No-Tile-Saw Option
If the idea of mixing thinset and cutting tile feels like too much, peel-and-stick backsplash tile is a legitimate shortcut. These products come as adhesive-backed sheets that press directly onto a clean, smooth wall, with no mortar, grout, or wet saw required. You cut them with scissors or a utility knife, which makes fitting around outlets and corners far simpler for a beginner.
Peel-and-stick is ideal for renters, quick refreshes, and anyone nervous about traditional tiling. The trade-offs are durability and authenticity: it does not last as long as real tile, can struggle behind a hot cooktop or in very humid areas, and the look, while improved in recent years, is not always identical to genuine tile up close. For a low-commitment, low-mess upgrade, though, it is a smart starting point, and you can always graduate to real tile later.
Avoiding Common Mistakes
The errors that catch first-timers are predictable and avoidable. Do not start without a level reference line, or the whole field will drift crooked. Do not skip cleaning grease off the wall, or tiles will pop loose. Do not flood the grout with water during cleanup, which causes blotchy color and pinholes. And do not rush the cure times, since fresh thinset and grout need their full window to set.
Take your time on the layout and the first row, since everything builds off it. Done with care, a DIY backsplash delivers a polished, custom look that adds real value to your kitchen for a weekend of work and a modest material budget.