Walk into almost any well-loved kitchen and you’ll spot the same workhorse behind the range: glazed ceramic. A ceramic tile backsplash kitchen project is one of the highest-return upgrades you can make, largely because the material shrugs off grease, tomato sauce, and daily splatter that would ruin painted drywall in a season. It photographs beautifully, wipes clean with a damp sponge, and costs a fraction of natural stone. Here’s how to plan one that still looks sharp a decade from now.
- Why Ceramic Holds Up Behind the Stove
- Choosing the Right Tile Size and Finish
- Layout Patterns That Change the Whole Room
- Grout: The Detail Everyone Underestimates
- Ceramic vs. Peel-and-Stick Backsplash
- What It Costs and Whether to DIY
- Prepping the Wall and Setting Tile
- Working Around Outlets and Corners
- Keeping It Clean Year After Year
Why Ceramic Holds Up Behind the Stove
Ceramic is fired clay finished with a hard, non-porous glaze. That glaze is the whole point in a cooking zone. Splattered oil sits on the surface instead of soaking in, so a quick wipe removes it before it stains. Compare that to unsealed grout lines or a raw wall, where every splash becomes permanent.
Heat resistance matters too. The area directly behind a gas or induction cooktop can hit surface temperatures well above 150°F during heavy use, and ceramic doesn’t warp, yellow, or off-gas the way a vinyl film eventually will. Most glazed wall tiles carry a low water-absorption rating, which is exactly what you want in a room full of steam and spills.
Choosing the Right Tile Size and Finish
Backsplash tile runs smaller than floor tile because the vertical space is shallow, usually 15 to 18 inches from counter to upper cabinets. Popular formats include:
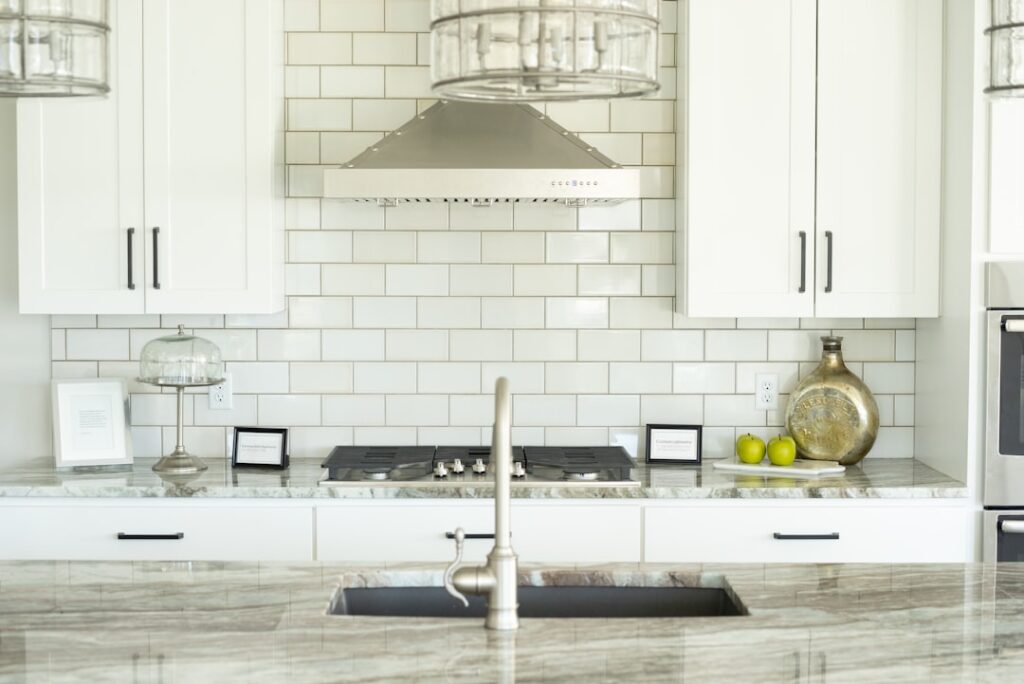
- 3×6 subway tile — the default classic, forgiving to install and easy to source.
- 4×4 squares — a retro look that suits cottage and farmhouse kitchens.
- Large-format 4×12 or 4×16 — fewer grout lines for a cleaner, modern wall.
- Mosaic sheets — 1-inch or penny rounds mounted on mesh for fast coverage.
Stick with a glossy or satin glaze near the range. Matte and textured surfaces look great in photos but trap grease in their micro-pores and take more scrubbing. Save the heavily textured or handmade zellige tiles for a coffee bar or a wall away from the burners.
Layout Patterns That Change the Whole Room
The exact same tile reads completely differently depending on how you set it. A standard running bond (each row offset by half) is timeless. A vertical stack stretches a low backsplash and feels contemporary. Herringbone and diagonal layouts add movement but waste roughly 10 to 15 percent more material in cut pieces, so buy extra.
Plan your focal point first. Many homeowners run a simple field tile across the counters, then break the space behind the cooktop with a framed panel or a shift in direction. That single move gives the eye somewhere to land without the cost of tiling the whole kitchen in a premium tile.
Grout: The Detail Everyone Underestimates
Grout color changes a backsplash more than the tile itself. White tile with bright white grout nearly disappears for a seamless look; the same tile with charcoal grout turns into a graphic grid. For a kitchen, lean toward a grout a shade or two darker than pure white so cooking grime doesn’t announce itself.
Always specify a stain-resistant grout. Modern single-component and epoxy grouts resist grease absorption far better than old-school sanded cement grout, and they never need periodic sealing. Keep joints tight, around 1/16 to 1/8 inch, for a crisp result behind the stove.
Ceramic vs. Peel-and-Stick Backsplash
Peel-and-stick tiles have exploded in popularity because they’re cheap and renter-friendly, but they’re a different category of product. Real ceramic wins on longevity, heat tolerance, and resale value; adhesive vinyl wins on speed and reversibility.
- Durability: Ceramic lasts decades; peel-and-stick edges lift and yellow within a few years near heat.
- Heat: Ceramic is safe directly behind a cooktop; most vinyl films are not rated for it.
- Cost: Peel-and-stick is cheaper upfront but rarely adds home value.
- Install: Vinyl needs no mortar or grout; ceramic requires thinset, spacers, and a day to cure.
If you own the home and cook regularly, a genuine ceramic tile backsplash is the smarter long-term buy. Reserve peel-and-stick for rentals or a quick refresh you plan to redo.
What It Costs and Whether to DIY
Ceramic field tile is among the most affordable backsplash materials, often running a couple of dollars per square foot for basic subway tile and climbing for decorative or specialty pieces. A typical kitchen backsplash covers 25 to 40 square feet, so material stays modest. Labor is where the number grows if you hire out.
This is a realistic weekend DIY if you can cut tile, handle a notched trowel, and take your time around outlets. Rent a wet saw for clean cuts, dry-lay your first row before committing, and start from the most visible corner. Seal any porous grout only if you didn’t choose an epoxy or pre-sealed product.
Prepping the Wall and Setting Tile
A backsplash is only as good as the surface behind it. Start with a clean, dry, and reasonably flat wall. In most kitchens you can tile directly over primed and sanded drywall, since a backsplash rarely sees standing water the way a shower does. Turn off power and pull the outlet covers, then back the outlets out slightly so the receptacles sit flush with the new tile thickness once you’re done.
Snap a level line as your guide, because kitchen counters are almost never perfectly level and you don’t want the whole wall to drift. Spread thinset or a quality mastic with a notched trowel, comb it in one direction, and press each tile with a slight twist to collapse the ridges and lock it in. Use spacers to keep joints consistent, and check your work with a level every few rows. Let everything set fully before you grout, usually overnight.
Working Around Outlets and Corners
The details are what separate an amateur job from a clean one. Outlets, window sills, and the ends of your tile runs all need thought. Measure carefully and cut tile to frame each outlet box so the gaps hide behind the cover plate. At an inside corner, stop your field tile and let the adjoining wall’s tile butt against it, then caulk that corner instead of grouting it, since walls flex and rigid grout there tends to crack.
Where the tile meets the underside of the upper cabinets or an exposed edge, plan a clean stopping point. A bullnose tile, a metal edge trim, or a mitered return gives a finished look rather than a raw cut edge staring out at eye level. Take your time on the visible ends; that’s where guests actually look.
Keeping It Clean Year After Year
The whole appeal of a ceramic tile backsplash kitchen wall is low maintenance. Wipe splatter with a damp microfiber and a drop of dish soap while it’s fresh. For baked-on grease, a paste of baking soda and water lifts it without scratching the glaze. Skip abrasive pads and harsh acids, which can etch grout over time. Done right, this surface will still look brand new long after your cabinets are due for a refresh.
Prefer to explore on your own?
See how new flooring looks in your actual room in seconds — free, no signup.
Try the free Floor Studio →