Setting individual tiles takes a weekend, a wet saw, and the patience to grout every joint — which is exactly why so many homeowners are switching to panels instead. Kitchen backsplash panels cover the wall in large sheets, cutting installation from days to hours and eliminating grout lines that trap grease and mildew. I have installed both traditional tile and modern panel systems, and for renters, quick refreshes, and DIYers who dread mortar, panels are hard to beat.
Part of our Kitchen Remodeling guide — explore the full guide →
What Backsplash Panels Are
Backsplash panels are large-format sheets that mount to the wall as a single piece or a few interlocking sections rather than dozens of small tiles. They range from thin peel-and-stick films to rigid 4-by-8-foot boards, and many mimic the look of subway tile, marble, or brick without the seams and setting time.
Because a panel covers a wide area at once, you get a nearly seamless surface. That means fewer joints to caulk, faster cleanup, and a wall that wipes down in one pass. For a standard 30-square-foot kitchen backsplash, a decent installer can finish paneling in an afternoon.
Common Panel Materials
The material drives durability, heat tolerance, and price. Here is how the main types stack up.
- PVC and vinyl: Lightweight, waterproof, and cheap at $8 to $20 per panel. Best behind sinks, not directly behind a gas burner.
- Acrylic and glass-look: Glossy, seamless, and modern. Runs $25 to $60 per square foot but reads as high-end.
- Stainless steel and metal: Commercial-kitchen durability and heat resistance behind ranges, roughly $20 to $40 per square foot.
- Peel-and-stick (gel or vinyl): The renter’s favorite at $6 to $15 per sheet, though the thinnest versions look flat up close.
- Laminate and PET boards: Rigid, scrubbable, and available in stone and wood patterns.
Match the material to the heat exposure. Anything behind a cooktop should be rated for high temperatures — PVC can soften and discolor above roughly 140 degrees Fahrenheit.
Panels vs. Traditional Tile
Tile still wins on longevity and resale value, but panels win on speed and mess. A tile backsplash involves thin-set, spacers, a wet saw, grout, and sealing — usually two working days plus cure time. Panels skip nearly all of that.
The tradeoff is repairability and perception. A cracked tile can be swapped one piece at a time, while a damaged panel often means replacing a whole sheet. And in a high-end kitchen, buyers and appraisers still recognize real tile or stone as the premium finish. For a rental, a starter home, or a quick style update, panels make more sense than a full tile job.
What Kitchen Backsplash Panels Cost
Budget peel-and-stick options can cover a small backsplash for $50 to $150 in materials. Mid-range PVC and laminate panels run $150 to $400 for a typical kitchen, while premium acrylic, glass-look, or metal systems climb to $600 to $1,500 installed.
Professional installation, when needed, adds $3 to $8 per square foot depending on wall prep and cutting around outlets. Compared to tile installation at $10 to $25 per square foot installed, panels usually deliver real savings, especially on labor.
Installing Panels Yourself
Most panel systems are DIY-friendly with basic tools. The wall surface matters more than anything — panels need a clean, dry, and reasonably flat backing to adhere.
- Clean the wall with a degreaser and let it dry fully; grease is the number one cause of peeling.
- Measure and mark outlet locations, then dry-fit each panel before committing.
- Cut panels with a utility knife (PVC, vinyl) or a fine-tooth blade and metal shears for rigid boards.
- Apply construction adhesive or peel the backing, pressing from the center outward to avoid bubbles.
- Seal edges and seams with color-matched silicone caulk, especially along the countertop and around the sink.
Turn off the power before working near outlets, and use spacer trim or caulk where the panel meets upper cabinets for a finished look.
Choosing the Right Style and Finish
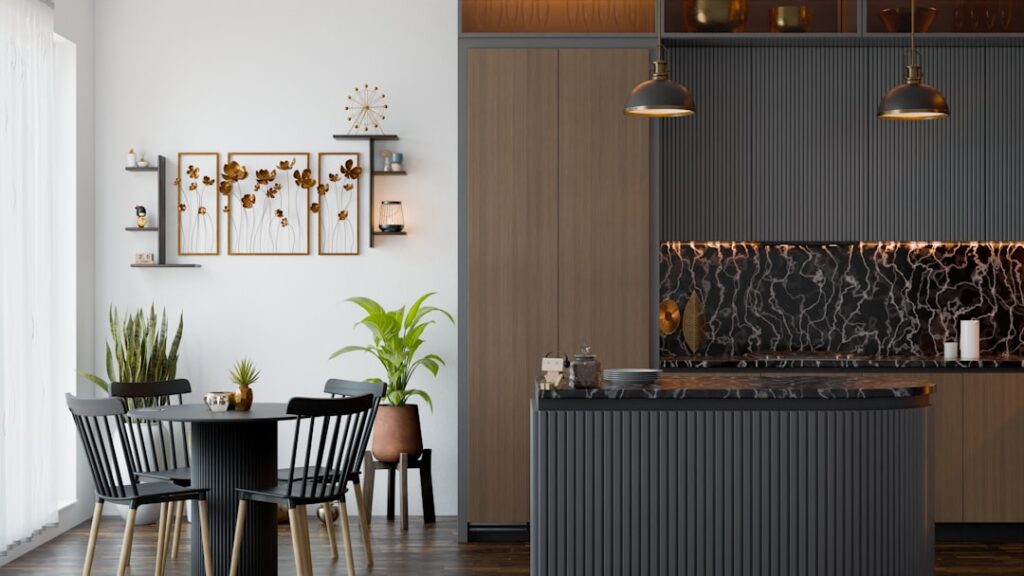
Panels come in more looks than most homeowners expect, so let the rest of the kitchen guide the choice. A high-gloss acrylic in a solid color bounces light and makes a small galley kitchen feel larger, while a matte stone-look laminate reads as calm and upscale next to quartz counters. Faux subway and brick patterns suit farmhouse and transitional kitchens, and brushed stainless leans industrial and modern behind a pro-style range.
Pay attention to scale and seams. Larger panels mean fewer visible joints, which is why a 4-by-8 sheet often looks more seamless than a run of smaller peel-and-stick tiles. Order a single sample before committing to a whole kitchen, because screens and print catalogs shift color, and hold it against your cabinets and countertop in the actual kitchen light — a panel that looks warm white in the store can turn gray under LED under-cabinet lighting.
Where Panels Work Best and Where to Skip Them
Panels are ideal in rentals, laundry rooms, secondary kitchens, and any refresh where speed and budget matter more than resale prestige. Behind a sink they excel, since the seamless surface shrugs off water and there is no grout to grow mildew. They are also a smart pick for renters, because peel-and-stick versions can be removed without wrecking the wall.
There are limits worth respecting. Directly behind a gas cooktop, use a metal or high-heat-rated panel rather than PVC, which can warp or discolor near sustained heat above 140°F. In a high-end remodel where you expect the kitchen to drive resale value, real tile or stone still carries more weight with buyers and appraisers. And on a badly bowed or textured wall, plan on skim-coating or backer board first, because panels telegraph every hump and dip beneath them.
Before you order, measure carefully. Accurate measurement keeps a panel job clean and cheap. Measure the width of each wall run and the height from countertop to the underside of the upper cabinets — a standard backsplash is 18 inches tall — then multiply to get square footage and add 10 percent for cuts around outlets, windows, and the range hood. Sketch the wall and mark every electrical box before you order.
Plan where the seams will fall. Locate them at inside corners or tuck them behind the range hood where they disappear, rather than dead center over the sink. Buy all your panels from the same production run so color and finish match, and let them sit flat in the kitchen for 24 to 48 hours so they reach room temperature and stop expanding before you glue them up. Remember to add outlet box extenders, since the added panel thickness pushes your receptacles back and the cover plates need to sit flush.
Cleaning and Maintenance
The grout-free surface is the whole selling point, so keep it that way. A soft cloth with warm water and dish soap handles daily grease, and most acrylic and PVC panels tolerate a mild all-purpose cleaner. Skip abrasive pads and harsh solvents that can scratch or cloud glossy finishes.
Check the caulk lines once or twice a year and re-run a bead wherever water could sneak behind the panel near the sink. With minimal upkeep, quality kitchen backsplash panels hold their finish for 10 years or more, giving you a clean, modern wall with a fraction of the effort a tile install demands.