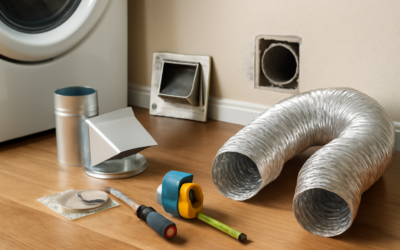
Your dryer exhaust vent does two jobs at once: it carries hot, humid air outside and it moves lint out of your home. When it works, you barely notice it. When it clogs or is built wrong, drying times double, energy bills climb, and lint becomes fuel for one of the most common house fires in America. This guide covers how to route, install, clean, and inspect a dryer vent the right way.
- How a Dryer Exhaust Vent Works
- Rigid Metal Duct, Not Foil or Plastic
- Length, Elbows, and Routing Rules
- The Exterior Termination
- Signs Your Dryer Vent Is Clogged
- How to Clean a Dryer Exhaust Vent
- Installing a New Dryer Exhaust Vent
- How Airflow Loss Costs You Money
- Common Installation Mistakes to Avoid
- Safety and Maintenance Schedule
How a Dryer Exhaust Vent Works
A dryer blower pushes about 150 to 200 cubic feet of air per minute out the back of the machine through a 4-inch duct. That air is hot, loaded with moisture from your wet clothes, and carries fine lint that slipped past the internal filter. The duct routes it to an exterior wall or roof cap, where a backdraft damper flaps open to let air out and closes to keep cold air, rain, and pests from coming in.
The whole system lives or dies on airflow. Every foot of duct, every bend, and every bit of lint buildup adds resistance. Choke that airflow and the dryer runs longer, the heating element overheats, and lint stacks up faster — a cycle that ends in either a broken dryer or a fire.
Rigid Metal Duct, Not Foil or Plastic
The single most important choice is duct material. Use rigid galvanized or aluminum metal duct for the concealed run, and semi-rigid metal for the short flexible connection behind the dryer. Never use white vinyl/plastic hose or thin foil accordion duct.
- Rigid metal has smooth walls that resist lint buildup and will not sag or crush. It is the code-preferred material.
- Semi-rigid metal is acceptable for the transition duct — the exposed 4-to-8-foot section between the dryer and the wall.
- Foil and plastic are banned in most jurisdictions. Their ridged interiors trap lint, they sag into low spots that collect water and lint, and they can melt or ignite.
Seal joints with UL-181 foil tape or clamps. Do not fasten joints with sheet-metal screws — the screw tips protrude into the airstream and snag lint, seeding a clog exactly where you cannot see it.
Length, Elbows, and Routing Rules
Building code (IRC M1502) limits the total developed length of a dryer exhaust vent, and the numbers matter:
- Maximum run is generally 35 feet of equivalent length.
- Subtract 5 feet for each 90-degree elbow and 2.5 feet for each 45-degree elbow.
- So a run with two 90-degree bends can be no longer than 25 feet of straight duct.
Some newer dryers list their own maximum lengths in the manual, which override the generic figure — always check. Keep the path as short and straight as possible. Route it to the nearest exterior wall or straight up through the roof. Avoid stacking multiple tight elbows; use two 45-degree bends instead of a single sharp 90 where you can. Support horizontal runs every 4 feet so the duct does not sag.
The Exterior Termination
Where the duct exits matters as much as the duct itself. Terminate outdoors with a dedicated dryer vent hood that includes a backdraft damper. Follow these points:
- Keep the termination at least 3 feet from any window, door, or fresh-air intake.
- Use a hood with a swinging damper flap, not a louvered grille that clogs.
- Never install a screen or mesh over the outlet — lint packs into it within weeks.
- On roof terminations, use a proper roof cap and keep it clear of snow load.
- The outlet should be at least 12 inches above ground and clear of shrubs.
A quality wall hood costs $15 to $40. Louvered “shutter” style covers are cheaper but jam with lint; a floating-damper or magnetic-seal cap (the kind that also blocks pest entry) is worth the few extra dollars.
Signs Your Dryer Vent Is Clogged
Watch for these warning signs, which usually appear gradually:
- Clothes take two cycles to dry or come out still damp.
- The dryer and laundry room feel unusually hot during a cycle.
- A burning or musty smell while running.
- The exterior damper barely opens or shows little airflow when the dryer runs.
- The dryer shuts off mid-cycle on a thermal safety trip.
- Visible lint around the outdoor hood or the lint filter area.
Any one of these means it is time to clean. A fully blocked vent forces the heating element to cycle on its high-limit thermostat repeatedly, which is exactly the condition that precedes a dryer fire.
How to Clean a Dryer Exhaust Vent
Plan on cleaning the full duct at least once a year, more often with a long run, a large household, or pets. You can DIY it in about an hour with a $20 to $40 lint-brush kit that attaches to a drill.
- Unplug the dryer (and shut off the gas valve if it is a gas model) before you move it.
- Pull the dryer out and disconnect the transition duct from the wall.
- Vacuum the lint from the dryer’s outlet and the first section of duct.
- Feed the flexible brush rod into the duct, spinning it with the drill, and work it through toward the exterior.
- Go outside, remove the vent hood, and clean the termination and damper from that end too.
- Reconnect everything, restore power and gas, and run a 10-minute air-fluff cycle to confirm strong airflow at the hood.
For runs over 25 feet, multiple elbows, or roof terminations, hire a pro. Professional dryer vent cleaning runs $100 to $200 and includes an airflow check.
Installing a New Dryer Exhaust Vent
If you are adding a vent where none exists, the job is a solid intermediate DIY or a $150-to-$600 handyman task. Cut a 4.25-inch hole through the exterior wall with a hole saw, mount the exterior hood and seal it with exterior caulk, then run rigid metal duct back to the dryer with as few bends as possible. Keep the total developed length within the 35-foot rule. Seal every joint with foil tape, support the horizontal runs, and finish with a semi-rigid metal transition to the appliance.
One material note: if your dryer sits in an interior closet with no realistic path outside, a ventless heat-pump or condenser dryer eliminates the exhaust vent entirely and may be the smarter buy.
How Airflow Loss Costs You Money
A restricted dryer exhaust vent does more than slow down laundry — it quietly inflates your utility bill and wears out the machine. When lint chokes the duct, the dryer runs longer to finish each load. A gas dryer burns more fuel; an electric dryer draws its 5,000-watt element for extra cycles. Doubling a 45-minute cycle to 90 minutes, load after load, adds up to real dollars over a year, easily $50 to $100 for a busy household. Worse, the trapped heat cooks the heating element and thermostats, which is why clogged vents are the leading cause of premature dryer failure. A clean, short, rigid-metal run is the cheapest efficiency upgrade in the laundry room, and it pays for itself in energy and repair savings.
Common Installation Mistakes to Avoid
Even handy homeowners trip over the same errors when building a dryer exhaust vent:
- Crushing the transition duct. Shoving the dryer tight against the wall kinks the flexible connector and chokes airflow. Leave a few inches of clearance.
- Using screws at the joints. The single most common lint-trap mistake — screw tips snag lint and seed clogs. Use foil tape or clamps.
- Too many tight elbows. Each 90-degree bend costs 5 feet of your length budget and creates a lint choke point.
- Reusing old foil hose. If the previous vent was vinyl or foil, replace it with metal now, not later.
- Screening the exterior hood. Bird screens pack solid with lint in weeks; use a damper-only cap.
- Ignoring the manual’s max length. Some dryers spec shorter runs than the generic 35 feet — always check.
Safety and Maintenance Schedule
Keep the system safe with a simple routine:
- Every load: clean the lint filter.
- Monthly: glance at the exterior hood while a cycle runs — you should feel steady warm airflow.
- Annually: clean the full duct and inspect all joints and the damper.
- Any time drying slows: check for a clog immediately rather than turning up the heat or running extra cycles.
A well-built, clean dryer exhaust vent dries clothes in one cycle, cuts your energy use, and removes the number-one dryer fire risk from your home. Rigid metal duct, a short straight run, a proper exterior hood, and an annual cleaning are all it takes to keep it that way.