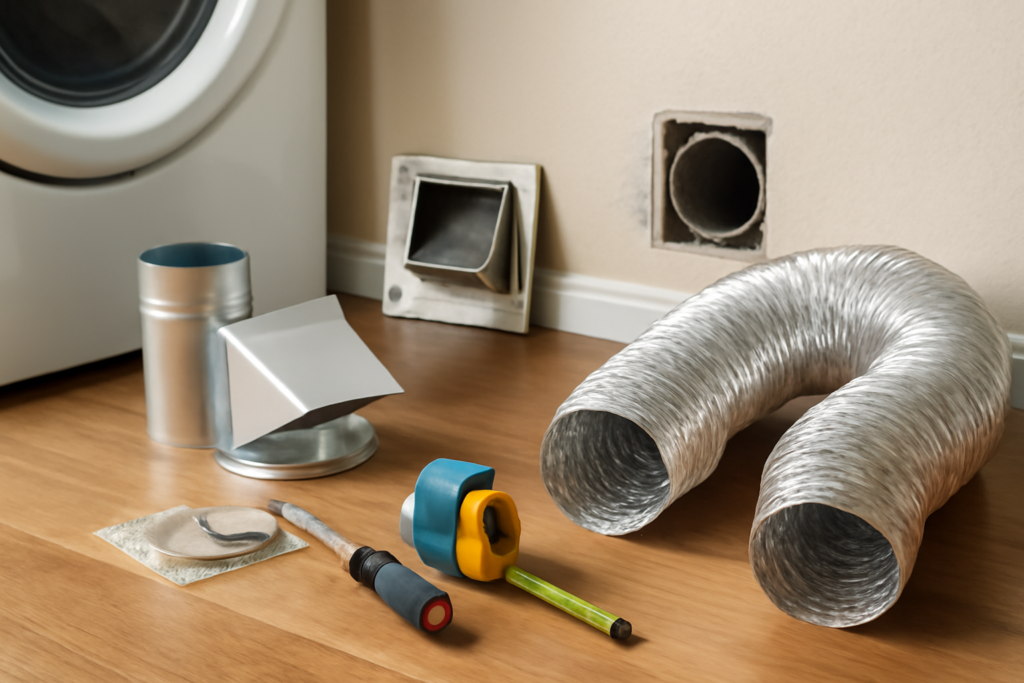
A dryer vent kit is the bundle of parts that carries hot, moist air and lint from the back of your dryer out through your wall. Buy the wrong dryer vent kit and you get slow drying, a musty laundry room, and a genuine fire hazard. Get it right and your clothes dry in one cycle while the vent stays clean for years.
The U.S. Fire Administration ties roughly 2,900 home dryer fires a year to lint buildup, and failure to clean the vent is the leading cause. The venting hardware you choose is the difference between a system that self-clears and one that traps lint at every turn. Here is exactly what belongs in a kit and how to put it together.
- What a Dryer Vent Kit Actually Includes
- Metal vs. Foil vs. Plastic: This Choice Matters Most
- No Interior Screws — Ever
- Sizing the Run and Counting Elbows
- Choosing the Right Exterior Vent Hood
- Step-by-Step Installation
- What a Good Kit Costs
- Common Mistakes That Ruin a Good Kit
- Gas vs. Electric: A Note on Clearance
- Maintenance After Install
- The Bottom Line
What a Dryer Vent Kit Actually Includes
Kits vary, but a complete one covers three jobs: the flexible transition piece behind the dryer, the rigid duct through the wall, and the exterior hood. A typical box contains:
- Transition duct — usually 4 to 8 feet of semi-rigid aluminum, the piece connecting the dryer to the wall stub.
- Wall or exterior vent hood — the outdoor cap, either a louvered-flap style or a floating-disc style.
- Clamps — two to four worm-gear or spring clamps, 4-inch diameter.
- Elbows — one or two 90-degree adjustable elbows, sometimes an offset “periscope” for tight clearances.
- Foil tape — UL-181 rated aluminum tape for sealing joints. Cheap kits skip this; buy a roll separately for about $8.
Standard residential dryers use a 4-inch duct. Do not step down to a smaller diameter or you choke airflow and stall the moisture sensor.
Metal vs. Foil vs. Plastic: This Choice Matters Most
Skip anything plastic or thin white vinyl. That flexible foil-and-wire “slinky” duct sold in bargain kits is the single worst offender for lint fires. Its ridges grab lint, it sags into low spots that collect condensation, and it can melt or ignite under the heat of a gas dryer.
Use one of these instead:
- Rigid metal duct (galvanized steel or aluminum, 26- or 30-gauge) — the gold standard for the run inside walls, floors, or ceilings. Smooth interior, nothing to snag lint.
- Semi-rigid aluminum — corrugated but crush-resistant, allowed for the short transition behind the dryer where you need a little flex to slide the unit into place.
Building codes (IRC M1502) require the transition duct to be metal and limit it to 8 feet. Foil flex is banned in many jurisdictions for exactly this reason. Pay the extra $15 for metal; it is the cheapest fire insurance in the house.
No Interior Screws — Ever
When you join duct sections, never use sheet-metal screws that poke into the airflow path. Screw tips act like lint hooks; within months you get a clog dam right at each joint. Secure connections with UL-181 foil tape and external clamps only. If a manufacturer’s elbow demands screws, keep them at the outer collar so nothing protrudes inside the pipe.
Sizing the Run and Counting Elbows
Your total allowed duct length shrinks with every turn. The IRC baseline is a maximum developed length of 35 feet for a 4-inch duct, and each fitting eats into that budget:
- Each 90-degree elbow subtracts about 5 feet.
- Each 45-degree elbow subtracts about 2.5 feet.
So a run with two 90-degree turns starts you at 25 feet of usable straight length. Some newer dryers list their own maximum equivalent length on a sticker inside the door or in the manual — a booster-fan-free limit that can be higher or lower than code. Measure your route, add up the penalties, and if you exceed the limit, reroute for fewer bends or add an inline booster fan rated for dryer exhaust.
Choosing the Right Exterior Vent Hood
The outdoor cap is where most cheap kits fall down. Two designs dominate:
- Louvered flap hood — a hinged plastic or metal flap that opens with airflow. Simple and cheap ($8-$15), but the flap can freeze shut in winter or jam with lint.
- Floating-shuttle hood (brands like the DundasJafine ProVent or Heartland) — a lightweight disc that lifts on airflow and drops to seal. Better at blocking pests and drafts, roughly $18-$30.
Never install a screen or wire mesh over a dryer hood. Screens catch lint fast and turn into a total blockage. Choose a hood with a wide, unobstructed opening and, in cold climates, one that seals tight to stop backdrafts of freezing air.
Step-by-Step Installation
Budget about 90 minutes. You need a drill, 4-inch clamps, a screwdriver, foil tape, and a helper to move the dryer. Turn off the dryer at the breaker if it is electric, or shut the gas valve if it is gas.
- Pull the dryer out far enough to reach the exhaust collar on the back. Vacuum any lint already piled at the wall stub.
- Attach the wall elbow. If clearance is tight, use a periscope or offset elbow so the dryer can sit close to the wall without crushing the duct.
- Connect the transition duct from the dryer’s 4-inch collar to the wall stub. Slip a clamp over each end, tighten to snug, then seal the seam with foil tape.
- Run the rigid duct through the wall or floor cavity if you are replacing the whole path. Keep joints pointing so the male end faces downstream (toward the exit) — that way lint slides past instead of catching on a lip.
- Mount the exterior hood to the wall stub outside. Bead the flange with exterior caulk, screw it to the siding, and confirm the flap or shuttle moves freely.
- Seal every joint with foil tape, push the dryer back leaving a gentle curve in the transition duct (no sharp kinks), and restore power or gas.
Run a 10-minute cycle and step outside. You should feel a strong warm gust at the hood and see the flap standing open. Weak airflow means a kink, a clog, or too many elbows.
What a Good Kit Costs
Prices as of 2026 run about like this:
- Basic transition kit (semi-rigid duct, two clamps, hood): $20-$35.
- Complete kit with rigid elbows, periscope, and floating hood: $40-$70.
- Add-ons: UL-181 foil tape $8, inline booster fan $80-$150 for long runs.
Compare that to a professional install at $150-$300 plus parts. The DIY route is straightforward for a wall-adjacent dryer; hire a pro when the run threads through a finished ceiling or a multi-story chase.
Common Mistakes That Ruin a Good Kit
Even a top-quality kit fails if installed carelessly. The errors technicians see most often:
- Leaving the plastic slinky in place and only swapping the hood. The weakest link decides the whole system’s safety, and foil flex is the weakest link.
- Crushing the transition duct by shoving the dryer flat against the wall. Leave 4 to 6 inches of clearance or use a periscope elbow designed for tight spaces.
- Taping over a leaky joint with duct tape. Cloth “duct tape” dries out and peels within a year in the heat. Only UL-181 foil tape holds.
- Running the duct uphill into a low spot. Sags collect condensation and lint. Keep the run level or gently sloped toward the exit.
- Skipping the airflow test. Always confirm a strong gust at the hood before you call the job done.
Each of these turns a $50 kit into a slow, lint-choked hazard. Spending ten extra minutes to do the connections right pays off for the life of the dryer.
Gas vs. Electric: A Note on Clearance
The kit itself is the same 4-inch metal hardware for both fuel types, but a gas dryer produces combustion byproducts along with moisture, so airflow matters even more. A restricted vent on a gas unit can push carbon monoxide back into the room and cause the burner to short-cycle. Never vent any dryer into an attic, crawlspace, or garage — it must terminate outdoors. Keep the exhaust away from soffit intakes and windows so humid, linty air does not get drawn back inside.
Maintenance After Install
Even the best hardware needs upkeep. Clean the full duct path once a year with a dryer-vent brush kit — a flexible rod that reaches the whole run. Watch for warning signs between cleanings: clothes taking two cycles to dry, a hot laundry room, or a burning smell. Any of those means lint is choking the line.
Wipe the lint screen after every load, and once a month wash it with warm soapy water to strip off fabric-softener residue that blocks airflow through the mesh. A clean screen plus smooth metal duct is what keeps the whole system working the way the kit intends.
The Bottom Line
A quality dryer vent kit is metal from end to end, sized for your run’s length and turns, sealed with foil tape, and capped with a screen-free hood that opens under airflow. Spend the extra $20 on rigid or semi-rigid metal and skip the foil slinky entirely. Your clothes dry faster, your energy bill drops, and you close the door on the most common cause of laundry-room fires.