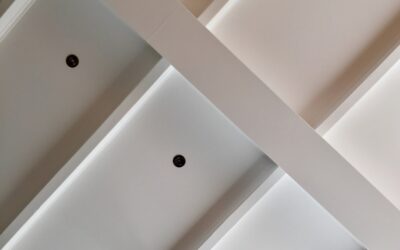
A bad ceiling layout will haunt you every time you walk into the room, with visible seams catching every ray of afternoon sun. Getting the drywall ceiling layout right before you lift a single sheet is the difference between a flat, professional-looking ceiling and one that telegraphs every joint within a month. I have hung ceilings in homes from Charleston to Seattle, and the layout decisions made in the first 15 minutes shape the next 20 years of how that ceiling looks.
Part of our Paint & Walls guide — explore the full guide →
This guide walks through the planning, the math, and the pro tricks that keep ceiling drywall flat, crack-free, and easy to finish.
Run Sheets Perpendicular to Joists
Always run drywall sheets across the ceiling joists, not parallel to them. A 4-foot wide sheet running perpendicular crosses at least four 16-inch on-center joists, which spreads load and locks the panel in place. Running parallel puts the entire 8-foot length of the sheet on just one or two joists, and gravity will sag it within a heating season.
This rule holds for 5/8-inch and 1/2-inch board alike. The only exception is when joists are 24 inches on center, which is common in trusses. In that case, you must use 5/8-inch board to prevent sag, and perpendicular orientation is even more critical.
Start From the Longest Unbroken Wall
Pick the longest straight wall in the room as your starting edge. Measure off it at 48 inches and snap a chalk line across the joists. That line marks where the long edge of your first row of sheets will land. Starting from this reference instead of eyeballing the corner keeps your seams parallel across the whole ceiling, even if the room is out of square by half an inch or more.
In a 12-by-14 bedroom, your first sheet should be a full 4-by-8 panel set tight to the starting wall. The opposite edge falls right on a joist for proper support. If the room is wider than a multiple of four feet, the last row will need to be ripped narrower, but it ends up against a less visible wall.
Stagger End Joints Like Brick
End joints, the short 4-foot seams where two sheets meet butt-to-butt, are the weakest part of any drywall ceiling. They are not tapered, so the finished joint sits slightly proud no matter how good your mud work is. Stagger them like running-bond brick so no two end joints in adjacent rows line up.
The simplest method is to start your second row with a half sheet of 4 feet long, then continue with full 8-foot sheets. This pushes the end joints in row two exactly 4 feet off from row one. In row three, return to a full sheet at the start. Repeat this offset pattern across the room and the joints disperse instead of forming a visible vertical line.
Plan Around Lights and Vents Before Cutting
Mark every can light, ceiling fan box, HVAC register, and smoke detector on your chalk-line grid before you carry the first sheet up the lift. The goal is to keep these obstructions in the middle of a panel rather than crossing a seam. A penetration that lands within 4 to 6 inches of a seam is almost impossible to finish cleanly, because the joint compound and the trim ring of the fixture compete for the same surface.
If a recessed light unavoidably falls on a seam line, shift the entire row by a foot or two so the cutout sits well inside a single sheet. The trade-off, a narrower rip at the end of the row, is always worth a clean cutout.
Match Sheet Sizes to the Room
Standard drywall sheets come in 4-by-8, 4-by-10, and 4-by-12 sizes. For ceilings, longer sheets reduce the number of end joints, which is the single best thing you can do for appearance and durability. A 12-by-14 bedroom that takes six 4-by-8 sheets only needs four 4-by-12 sheets, cutting end joints by two-thirds.
- 4-by-8 sheets: easy to handle alone, but maximum end joints. Best for small bathrooms and closets.
- 4-by-10 sheets: solid compromise for bedrooms and offices. Two people can lift them with a basic panel lift.
- 4-by-12 sheets: ideal for living rooms and great rooms. Always rent a panel lift; they weigh about 80 pounds and are too long to safely muscle into place.
Use a Panel Lift for Anything Over 4 by 8
A drywall panel lift rents for $40 to $55 per day at Home Depot or Sunbelt. It is not optional for ceiling work above 4 by 8 sheets, and honestly, it saves your back and your finish even on small sheets. The lift holds the panel exactly tight against the joists at any height, freeing both your hands to drive screws.
Set the lift on a flat patch of subfloor, load the sheet on the cradle, then crank it within an inch of the joists. Final adjustments tap the sheet into position. Drive at least 12 screws per 4-by-8 panel, more for larger sheets, spaced 12 inches on center along every joist.
Leave a 1/8-Inch Gap at Walls
Do not push ceiling drywall hard into the wall framing. Leave roughly a 1/8-inch gap on all sides. The wall drywall, installed afterward, will cover the gap completely and the joint compound bridges it during taping. This gap gives the ceiling panel room to expand and contract with humidity swings without buckling at the edges, which is the most common cause of corner cracks.
The same principle applies around can lights and vents. Cut openings 1/16 to 1/8 inch larger than the fixture so the panel can move without binding.
Mark Joists After Sheets Go Up
Before lifting each sheet, transfer the joist locations to the sheet surface with a pencil mark on the long edges. Once the sheet is pressed to the ceiling, snap a chalk line between marks and you have a perfect screw guide. Without these marks, half the screws miss the joist and tear through the paper, which is a frustrating waste of time and material.
A solid drywall ceiling layout is mostly planning, not muscle. Sketch it on graph paper, account for fixtures, and order the longest sheets you can handle. Do that and the actual hanging goes fast, the finishing is clean, and the ceiling stays flat for the life of the home.