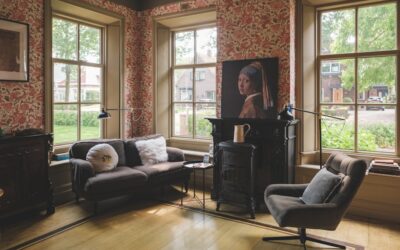
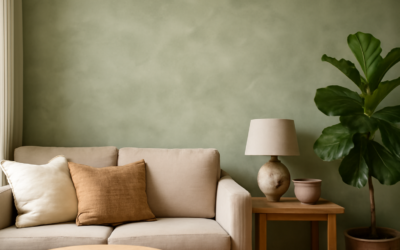
True limewash only bonds to porous, mineral surfaces like brick, plaster and raw stone, which leaves most drywall, painted walls and laminate furniture out of luck. Faux limewash paint solves that problem: you thin ordinary latex with glaze and water, then brush it on in loose, overlapping strokes to build the same soft, cloudy movement. It sticks to anything regular paint sticks to, costs less and is far easier to touch up.
Part of our Paint & Walls guide — explore the full guide →
The basic recipe is a base coat in a lighter shade, then a glaze mix of roughly one part paint to one or two parts glaze plus a splash of water, applied in random crisscross strokes with a wide block brush. You work small sections, soften the edges while wet and add a second pass where you want more depth. Success with faux limewash paint comes down to three things: the ratio, the brush and the timing.
Faux Limewash Paint vs True Limewash
Real limewash is made from slaked lime and pigment. It soaks into porous masonry, cures by reacting with carbon dioxide and leaves a chalky, breathable finish. On primed drywall or old latex paint it has nothing to grip, so it can dust off or fail. Some people search for natural limewash paint hoping it will work on any wall, but the mineral product really belongs on brick, stone and lime plaster.
| Feature | Faux limewash | True limewash |
|---|---|---|
| Main ingredient | Latex paint plus glaze | Slaked lime plus pigment |
| Best surfaces | Drywall, painted walls, primed wood, furniture | Brick, stone, lime plaster, raw masonry |
| Finish feel | Soft, slightly smooth | Chalky, matte, mineral |
| Washability | Good once cured | Low; rubs off when scrubbed |
| Touch-ups | Easy | Variable |
If you have bare interior brick or plaster and want the authentic chalky texture, use mineral limewash. For everything else, the faux method gives you most of the look with more durability.
Tools and Materials
- Latex paint in two related shades: a lighter base and a slightly darker or more saturated top color. Flat or matte sheen looks the most like lime.
- Clear latex glazing liquid, which extends drying time and adds translucency
- Water for thinning
- A large block brush or wide natural-bristle masonry brush, 4 to 6 inches across
- A 2 inch angled brush for edges and corners
- Roller and tray for the base coat
- Bucket and stir sticks, measuring cup
- Painter’s tape, drop cloths
- Damp lint-free rag or sea sponge for softening
- Primer if the wall is glossy, patched or stained
The brush matters most. A block brush with long, slightly floppy bristles drags the glaze into soft, irregular streaks. A stiff, short synthetic brush leaves harder lines that look more like ordinary brushed paint.
Prep the Wall
- Clean the surface with mild soap and water to remove grease and dust. Rinse and let it dry.
- Patch holes and cracks with spackle, sand smooth and spot-prime the patches.
- Scuff glossy paint with fine sandpaper (around 180 to 220 grit), or use a bonding primer on slick surfaces like laminate, tile or high-gloss trim.
- Tape off ceilings, trim, outlets and switch plates. Remove cover plates first.
- Roll the base coat in the lighter shade and let it dry fully, usually 4 hours or per the label. Two coats give a more even foundation.
Choose a base that sits two or three steps lighter than your top color on a paint strip. A warm white base with a greige or soft taupe top coat is the classic look. Sage over cream, terracotta over blush and dusty blue over pale gray are all popular variations.
Mix the Glaze
Start with this ratio and adjust after a test board:
- 1 part latex paint (top color)
- 1 to 2 parts glazing liquid
- About 1/2 part water
More glaze gives you longer working time and more translucency. More water makes the mix runnier and the finish more watercolor-like, but too much can cause drips. For a very subtle wash, go as high as 1 part paint to 3 parts glaze. Mix enough for the whole wall in one batch so the color stays consistent; a typical accent wall needs a quart to a half gallon of mix.
Always test first. Brush the mix on a primed piece of scrap drywall or poster board painted with your base color. Let it dry, then check it in the room’s light. Glaze often dries a little darker and more opaque than it looks wet.
Step-by-Step Brushing Technique
- Load the brush lightly. Dip only the tips and tap off the excess. A heavy load causes drips and flat, solid patches.
- Work in sections of about 3 by 3 feet, starting in an upper corner.
- Brush in random X or crisscross strokes, varying the angle and length. Avoid straight vertical or horizontal lines, which look striped.
- Leave some base showing so the wall has light and dark areas. The contrast is what creates the cloudy limewash movement.
- Keep a wet edge. Move to the next section while the edge of the last one is still damp, blending the two with a few feathered strokes.
- Soften as you go. If a stroke looks harsh, lightly pounce or drag a damp rag or a dry brush across it to blur the edge.
- Cut in corners with the angled brush, using short crisscross strokes so they match the field.
- Let it dry at least 4 hours, then step back and assess.
- Add a second pass in spots that look thin or flat. Apply it more sparingly than the first, focusing on building depth rather than covering.
Work with good, even light and step back every few minutes. It is easy to over-brush when you are close to the wall. Two people help on large walls: one applies, the other softens.
Sealing and Durability
Most faux limewash finishes on walls do not need a topcoat, since cured latex is reasonably washable. In kitchens, bathrooms, mudrooms and kids rooms, a clear, water-based matte polyurethane or acrylic topcoat adds scrub resistance without adding shine. Test the sealer on your sample board, because some topcoats can add a faint amber tone over pale colors. On furniture, always seal; tabletops and drawer fronts see too much handling to go bare. Give the finish about two weeks to fully cure before scrubbing it, even though it feels dry within hours. A properly cured faux limewash paint finish can be wiped with a soft sponge and mild soapy water, which is a real advantage over mineral limewash in busy family rooms.
Troubleshooting Common Problems
Visible lap lines. The edge dried before you blended into it. Add more glaze to the mix for longer open time, work smaller sections and avoid painting in direct sun or with a fan blowing on the wall.
The wall looks striped. Strokes were too regular. Go back over the wall with a second pass in true random directions.
Too dark or too uniform. The mix has too much paint. Thin with more glaze, or brush a diluted base color over the heavy areas to lift them back.
Drips and runs. The brush was overloaded or the mix was too watery. Catch drips with a dry brush while wet; sand dried runs lightly and feather them in.
Patches look different from the rest. Unprimed spackle absorbs glaze differently. Prime all patches before the base coat, every time.
General Cost Ranges
For a single 12 by 8 foot accent wall, plan on roughly the cost of two quarts to a gallon of paint, a quart of glazing liquid and a good block brush, which usually lands under one hundred dollars total for DIY. Painters who offer decorative finishes typically charge noticeably more per square foot than for a plain coat, because the technique takes more time and skill. Whole rooms or stairwells with high walls cost more due to labor and access.
When to Call a Pro
Hire a decorative painter for two-story foyers, stairwells and vaulted walls where ladder work and keeping a wet edge get difficult, or when you want the finish to flow across several rooms with perfect consistency. A pro is also smart for exterior masonry, where true mineral limewash usually performs better than any faux approach and surface prep matters a great deal. If the home was built before 1978 and you need to sand old paint before starting, test for lead first and follow lead-safe practices or bring in a certified contractor.
Frequently Asked Questions
Can I fake limewash with regular paint?
Yes. Mix latex paint with clear glazing liquid and a little water, then apply it over a lighter base with a block brush in random crisscross strokes. The glaze adds translucency and working time, which creates the cloudy limewash look.
What ratio of paint to glaze should I use?
Start with 1 part paint, 1 to 2 parts glaze and about half a part water. Use more glaze for a softer, more transparent finish and test on a sample board before committing to the wall.
Does faux limewash work on drywall?
It works very well on primed or painted drywall. That is the main advantage over true limewash, which needs porous mineral surfaces like brick or plaster to bond properly.
Do I need to seal faux limewash?
On most walls, no. In high-moisture or high-touch areas, or on furniture, a clear water-based matte topcoat adds protection. Test it first so it does not change the color.
What brush works best for a limewash effect?
A wide block brush or natural-bristle masonry brush, 4 to 6 inches across, gives the softest and most natural strokes. Short, stiff brushes leave lines that look more like ordinary brushwork.