The galley is the original efficient kitchen, born on ships where every inch counted. A smart floor plan galley kitchen layout puts two parallel runs of cabinets and counters facing each other with a single walkway between, and when the dimensions are right it can out-cook kitchens twice its size. Get the aisle width or the work zones wrong, though, and it turns into a cramped bottleneck. Here are the numbers and principles that make a galley sing.
Part of our Kitchen Remodeling guide — explore the full guide →
The Basic Anatomy of a Galley
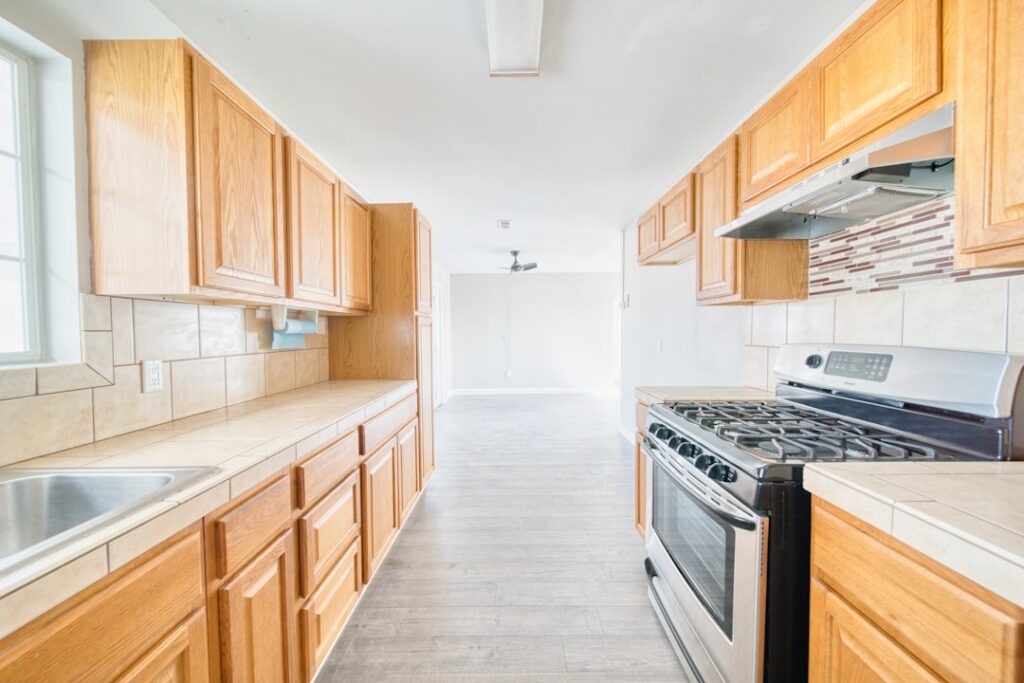
A true galley has two opposing walls of base cabinets and counters with an aisle running down the center. Everything, from the sink to the range to the fridge, lines up along those two runs. There are no corners to design around, which is exactly why the layout is so space-efficient and popular in apartments, narrow additions, and older homes.
Some galleys are open on one or both ends, letting the space act as a pass-through; others are closed at one end. That single choice affects traffic flow more than almost anything else in the design.
Walkway Width: The Number That Matters Most
The aisle between the two counter runs is the make-or-break dimension. Design guidelines converge on these targets:
- 36 inches minimum — the absolute floor for a one-cook kitchen; anything less feels tight and fails accessibility.
- 42 inches — the recommended width when two people share the kitchen or appliance doors open into the aisle.
- 48 inches — generous room for two cooks to pass and for a dishwasher and oven to open without blocking the path.
Remember that appliance doors eat into the aisle. An open oven or dishwasher can swallow 24 inches of your walkway, so the 42-inch target isn’t luxury, it’s what keeps the kitchen usable when things are actually cooking.
The Work Triangle in a Straight Line
The classic kitchen work triangle connects the sink, the cooktop, and the refrigerator. In a galley it flattens across two walls instead of forming a true triangle, but the spacing principles still apply. Keep each leg between roughly 4 and 9 feet, and aim for a total of the three legs somewhere in the 13-to-26-foot range. Too short and you’re cramped; too long and you’re logging miles.
A proven arrangement puts the sink and cooktop on one run and the refrigerator on the opposite wall, so the cook pivots rather than walks. Keep the range and sink from sitting directly across from each other if two people will use the space at once, to avoid collisions.
Clearances and Landing Space
Beyond the aisle, the details around each appliance keep the kitchen functional:
- Beside the range — leave at least 12 to 15 inches of counter on one side for setting down hot pans.
- Beside the sink — 18 to 24 inches of landing area for prep and drying.
- By the refrigerator — 15 inches of counter next to the handle side for unloading groceries.
- Cabinet-to-cabinet — confirm opposing drawers and appliance doors can’t collide when both are open.
Pros and Cons, Honestly
The galley earns its reputation, but it isn’t for everyone. On the plus side, it’s the most efficient layout per square foot, keeps everything within arm’s reach, wastes no corner cabinets, and costs less to build because the runs are simple and straight. It’s also easy to make ergonomic since the cook rarely takes more than a step or two.
The downsides are real too. Storage and counter space are limited by the two runs, only one cook fits comfortably in tighter versions, and an open-ended galley can turn into a hallway with people passing through your cooking zone. There’s also nowhere to add an island, so seating usually lives outside the kitchen itself.
Small-Space Tips That Add Up
Because floor area is fixed, a galley rewards vertical and clever thinking. Run cabinets to the ceiling for extra storage, and use the wall between counter and uppers for rails, hooks, and magnetic strips instead of cluttering the counter. Light colors and a continuous countertop make a narrow galley feel wider, while under-cabinet lighting kills the shadows that make tight kitchens feel closed in.
Choose a durable, seamless floor that reads as one plane; large-format tile or wide plank running the length of the aisle visually stretches the space. Pocket or barn doors at the ends preserve every inch the swing of a standard door would steal.
Single-Wall vs. Two-Wall Galleys
Not every galley uses both walls the same way, and the split changes how the kitchen functions. A true two-wall galley puts working counters and appliances on both sides, maximizing storage and prep space but requiring the full recommended aisle so opposing doors and drawers don’t collide. This is the most productive version for serious cooking, since everything is a half-turn away.
Some homeowners convert one run into a service or pantry wall, keeping the sink, range, and prep on a single side while the opposite wall holds tall cabinets, a fridge, or open shelving. This eases traffic conflicts and works well when the galley is open to a dining area on the far side. Decide early which model fits your cooking style, because it drives where the plumbing and gas lines need to go.
Appliance and Cabinet Placement Tips
Within the two runs, thoughtful placement makes a small galley feel effortless. A few guidelines pay off:
- Keep the sink and dishwasher adjacent — so you can rinse and load without dripping across the aisle.
- Don’t corner the fridge — placing it at the open end of a run lets the door swing freely and keeps it accessible from outside the work zone.
- Avoid range-across-from-fridge — a hot cooktop directly facing an open fridge door wastes energy and crowds the aisle.
- Reserve one solid prep zone — a clear stretch of counter between sink and range is the kitchen’s most-used real estate.
Because a galley offers limited counter, protect prep space by relocating the microwave to a wall shelf or a lower cabinet and keeping small appliances stored rather than parked out. Every clear foot of counter counts more here than in a big kitchen.
Making the Layout Yours
A galley kitchen doesn’t have to feel like a corridor. Nail the walkway width first, keep the work triangle tight and logical, and protect landing space beside every appliance. Do that and this floor plan galley kitchen layout delivers the kind of cooking efficiency that big, open kitchens spend a fortune trying to imitate.
Before you finalize a design, tape out the layout on your actual floor. Use painter’s tape to mark the two counter runs and the aisle between them, then walk through your normal cooking routine. Open imaginary appliance doors, pretend to carry a hot pot from range to sink, and have a second person try to pass behind you. This five-minute exercise reveals traffic pinch points and cramped clearances no floor plan on paper ever will, and it’s far cheaper to discover them now than after the cabinets are installed. A galley that measures fine but feels tight in this dry run tells you to widen the aisle or rethink where the appliances land.
Prefer to explore on your own?
See how new flooring looks in your actual room in seconds — free, no signup.
Try the free Floor Studio →