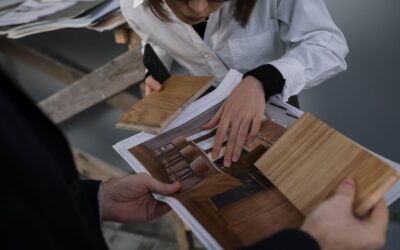
Choosing new flooring based on a tiny thumbnail image online is a recipe for regret. Colors look different on screens, textures are impossible to judge, and that “warm oak” you loved in photos could arrive looking orange in your living room light. That is exactly why flooring samples exist, and why every flooring professional will tell you to order them before committing to a purchase.
In this guide, we walk you through everything you need to know about flooring samples: where to get them, how much they cost, what to look for when evaluating them, and how to test samples at home so you make a confident decision.
- Why Flooring Samples Matter More Than You Think
- Free vs Paid Flooring Samples
- Where to Get Flooring Samples by Type
- How Many Samples Should You Order?
- How to Test Flooring Samples at Home
- What to Look for When Evaluating Samples
- Common Mistakes When Using Flooring Samples
- Tips for Getting the Most Out of Your Samples
- Final Thoughts
Why Flooring Samples Matter More Than You Think
A flooring sample is a small piece of the actual product you are considering for your home. It is not a photograph, a rendering, or a close approximation. It is the real material, and holding it in your hands tells you things a product listing never can.
Here is what samples reveal that photos cannot:
- True color and undertones: Monitor calibration, lighting in product photography studios, and your screen brightness all distort color. A sample shows you the actual shade under your own lighting.
- Texture and finish: Whether a floor is smooth, hand-scraped, wire-brushed, or embossed-in-register matters enormously for feel and appearance. You need to touch it.
- Thickness and quality: Picking up a sample immediately tells you whether a product feels solid or flimsy. You can inspect the wear layer, core, and backing.
- How it looks with your decor: Placing a sample next to your cabinets, wall paint, and furniture is the only reliable way to check coordination.
Skipping this step is one of the most common mistakes homeowners make. Returning hundreds of square feet of flooring because the color was not what you expected is expensive, time-consuming, and entirely avoidable.
Free vs Paid Flooring Samples
Most flooring retailers offer samples, but the terms vary. Understanding the difference between free and paid options helps you budget and plan your selection process.
Free Flooring Samples
Many online flooring retailers offer free samples as a marketing tool. They want you to see and feel the product so you are more likely to buy. Typically, you can order between three and five free samples per order. Some retailers are generous and allow more.
Common sources for free samples include:
- Manufacturer websites: Companies like Shaw, Mohawk, and COREtec often ship free samples directly.
- Online flooring stores: Retailers like BuildDirect, FlooringInc, and Lumber Liquidators (now LL Flooring) frequently offer free sample programs.
- Home Depot and Lowe’s: Both offer free samples in-store for many product lines. Online ordering varies.
The catch with free samples is that they are sometimes smaller than paid ones, and shipping can take five to ten business days. If you are on a tight timeline, factor that in.
Paid Flooring Samples
Paid samples typically cost between one and five dollars each. They tend to be larger, often a full plank or tile piece, which gives you a much better sense of the product. Some retailers refund the sample cost when you place your flooring order, effectively making them free if you buy.
Paid samples are worth the investment when you have narrowed your choices to two or three finalists. The larger size makes it easier to evaluate pattern variation, especially in products like hardwood flooring and natural stone flooring where no two pieces look alike.
Where to Get Flooring Samples by Type
Different flooring materials have different sample availability. Here is a breakdown of where to find samples for each major flooring type.
Hardwood Flooring Samples
Hardwood samples are widely available from both local dealers and online retailers. Because wood grain varies naturally, try to get at least two samples of the same product to see the range of color and grain pattern. Local flooring showrooms often have the best selection, with full-size planks mounted on display boards.
Vinyl and LVP Samples
Luxury vinyl plank samples are some of the easiest to obtain for free. Most major LVP flooring brands ship samples at no cost because the material is lightweight and inexpensive to produce. Pay attention to the embossing on vinyl samples, as this is what creates the realistic wood or stone texture.
Laminate Flooring Samples
Laminate samples are typically free or very low cost. Since laminate flooring uses a photographic layer over an HDF core, the sample gives you an accurate representation of what every plank will look like. Check the click-lock mechanism on the sample to get a feel for installation ease.
Tile Flooring Samples
Tile samples can be heavier to ship, so free options are less common for large-format tiles. Many tile showrooms let you borrow samples or check them out temporarily. For porcelain and ceramic tiles, always request an actual tile rather than a chip, as the edge finish and size proportions matter.
Carpet Flooring Samples
Carpet samples are usually available for free from retailers and big-box stores. They come as small swatches or squares. When evaluating carpet, rub the sample vigorously with your hand to test fiber resilience and check how it feels underfoot by placing it on the floor and stepping on it.
How Many Samples Should You Order?
There is a sweet spot. Order too few, and you might miss a better option. Order too many, and the decision becomes overwhelming.
Here is a practical approach:
- Start with five to eight samples in your preferred color range and material type. This gives you enough variety to compare without creating decision paralysis.
- Narrow to three finalists after your initial evaluation. Eliminate any samples that look wrong under your home lighting or clash with your decor.
- Live with the finalists for a few days. Place them in the room where the flooring will be installed. Look at them in morning light, afternoon light, and under artificial lighting at night.
If you are ordering from multiple manufacturers or retailers, keep a spreadsheet or note with the product name, SKU, price per square foot, and your impressions. This prevents confusion when samples start arriving on different days.
How to Test Flooring Samples at Home
Getting samples shipped to your door is only the first step. How you evaluate them determines whether you make a good choice. Here is a systematic approach to testing flooring samples.
The Lighting Test
Place the sample on the floor in the room where it will be installed. Check it at different times of day. North-facing rooms get cool, indirect light that can make warm-toned floors look muted. South-facing rooms get warm, direct light that can intensify yellow or orange undertones. A floor that looks perfect at noon might look completely different at 7 PM under LED bulbs.
The Decor Coordination Test
Set the sample next to your existing elements: cabinets, countertops, wall paint, furniture upholstery, and trim. Look for clashing undertones. A floor with pink undertones will fight green-toned cabinets. A floor with yellow undertones may not work with cool gray walls. This is the single most valuable test you can perform.
The Scratch and Durability Test
For hard-surface flooring, try scratching the sample with a coin or key. This is especially useful for comparing the wear layers on vinyl and laminate products. A quality SPC flooring sample should resist light scratching without visible damage.
The Water Test
If you are considering flooring for kitchens, bathrooms, or basements, place a few drops of water on the sample and leave them for 30 minutes. Check for absorption, swelling, or discoloration. Products marketed as waterproof should show zero reaction. This is a quick way to verify claims.
The Feel Test
Walk on the sample barefoot if possible. Place it on a hard surface and step on it. Does it feel cold? Warm? Hard? Cushioned? If you are comparing carpet samples, press your thumb into the pile and see how quickly it springs back. Resilience indicates long-term performance.
What to Look for When Evaluating Samples
Beyond the subjective tests above, there are objective quality indicators to check on every sample.
Wear Layer Thickness
For vinyl and laminate, look at the side of the sample. The wear layer is the clear protective coating on top. Thicker is better. For residential vinyl, look for at least 12 mil. For commercial-grade or high-traffic areas, 20 mil or more is ideal. For laminate, check the AC rating, which should be printed on the sample or packaging.
Core Material
The core determines stability, dent resistance, and feel underfoot. SPC (stone polymer composite) cores are rigid and dent-resistant. WPC (wood polymer composite) cores are softer and more comfortable but slightly less dent-resistant. HDF cores in laminate should feel dense and heavy for their size.
Locking Mechanism
If you have two samples of the same type, try clicking them together. The locking mechanism should engage with a satisfying snap and hold firmly without gaps. Poor locking systems are a leading cause of installation problems and long-term floor failure.
Edge and End Quality
Examine the edges closely. Are they clean and uniform, or do you see roughness, chipping, or inconsistency? Edge quality affects how tight the seams will be when the floor is installed.
Common Mistakes When Using Flooring Samples
Even with samples in hand, homeowners make predictable errors. Avoid these:
- Judging color in the store or under packaging: Retail lighting is nothing like your home lighting. Always evaluate at home.
- Only looking at one sample of natural materials: Wood and stone have natural variation. One sample does not represent the full range. Ask for multiple pieces or visit a showroom with a large display.
- Ignoring the room’s purpose: A beautiful light-colored floor might be impractical for a mudroom. Think about maintenance and wear, not just aesthetics.
- Forgetting about transitions: If you are using different flooring in adjacent rooms, place those samples next to each other. Transitions between rooms matter for visual flow.
- Making a final decision in under 24 hours: Live with your samples for at least two to three days. First impressions can be misleading.
Tips for Getting the Most Out of Your Samples
A few practical tips to make the sampling process more efficient:
- Photograph samples in place: Take photos of each sample in the room with your phone. This creates a record you can compare later and share with family members or designers for input.
- Label everything: Write the product name, brand, and price on a piece of tape on the back of each sample. When you have eight samples on the floor, they all start to blur together.
- Request samples from the same production batch: When you order your full flooring, ask the retailer to confirm the batch. Colors can vary slightly between production runs.
- Check return policies before ordering: Some retailers ask you to return samples. Others let you keep them. Know the terms upfront.
- Order samples before sales end: If you spot a flooring deal, order samples immediately. By the time samples arrive and you make a decision, the sale might be over. Plan ahead.
Final Thoughts
Flooring samples are the single most effective tool for avoiding expensive mistakes. They are free or nearly free, they ship directly to your home, and they let you make a decision based on reality rather than guesswork. Whether you are choosing hardwood, vinyl, laminate, tile, or carpet, the process is the same: order broadly, narrow carefully, test thoroughly, and live with your finalists before committing.
Take the extra few days to do this right. Your floors are something you will walk on, look at, and live with every day for years or even decades. A small investment of time now saves you from the frustration and cost of choosing wrong.
Prefer to explore on your own?
See how new flooring looks in your actual room in seconds — free, no signup.
Try the free Floor Studio →