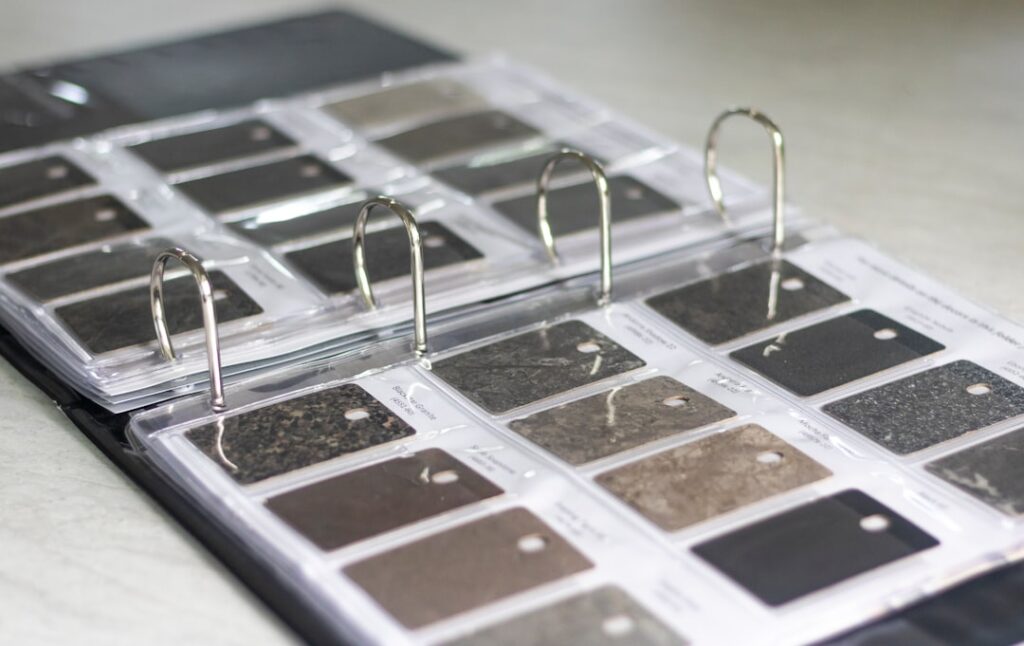
The color of your grout changes a tiled surface more than almost any other single choice you make, yet most people pick it from a tiny printed chart at the store and regret it later. Ordering grout samples before you commit to a full bag is one of the cheapest insurance policies in any tile project. A handful of cured chips on your countertop will tell you more than ten minutes squinting at a fan deck under fluorescent lighting. I have seen homeowners spend thousands on premium porcelain only to frame it with a grout shade that fights the tile. Test first, then buy.
Why Grout Color Matters So Much
Grout occupies the gaps, but those gaps add up. On a 12-by-12-inch tile with a standard 1/8-inch joint, grout is a small fraction of the surface. Shrink to a 2-by-2-inch mosaic and grout can cover 25 percent or more of what your eye sees. The narrower and busier the tile, the more the joint color drives the overall look.
Matching grout to the tile makes a surface read as one continuous plane, hiding the grid. Contrasting grout, like charcoal against white subway tile, turns each tile into a graphic element and emphasizes the pattern. Neither is wrong. But you cannot judge that effect from a half-inch swatch on paper, which is exactly why physical grout samples exist.
How to Get Grout Samples
You have several routes, and the right one depends on how precise you need to be.
- Manufacturer color cards: Brands like Mapei, Custom Building Products, Laticrete, and TEC publish fan decks with small painted or molded chips. Free at most tile shops. Good for narrowing the field, not for a final call.
- Cured sample sticks: Many tile retailers stock or will order actual cured grout sticks, which show the real texture and tone after drying. These beat printed cards because pigment shifts as grout cures.
- DIY test batches: Buy small trial bags or a sample kit, mix a tablespoon or two, and trowel it between leftover tiles. This is the gold standard.
Expect to pay nothing for color cards and a few dollars up to around fifteen dollars for ordered sample sticks or trial bags. That is trivial against the cost of regrouting a whole bathroom.
Test Grout Samples the Right Way
Wet grout always looks darker than cured grout. A color that seems perfect straight out of the bucket can dry two or three shades lighter, and sanded grout dries lighter than unsanded. Always let a sample cure fully, which means waiting 24 to 72 hours depending on humidity and how thick you spread it.
Set your cured grout samples against the actual tile you bought, not a similar one. Then view them in three lighting conditions: bright daylight near a window, warm evening lamplight, and the fixture that will actually light the finished room. Grout that reads as soft gray at noon can look distinctly blue or green under LED bulbs with a high color temperature.
Sanded vs. Unsanded and Why It Affects Color
Grout type is not just a strength decision; it changes appearance. Sanded grout, used for joints 1/8 inch and wider, has a coarser texture that scatters light and reads slightly grainier. Unsanded grout, for joints under 1/8 inch, dries to a smoother, sometimes glossier finish that can appear a touch deeper in tone.
If you request grout samples, ask for them in the same type you will install. A smooth unsanded sample will mislead you if your real joints get sanded grout. Epoxy grouts, a third category, hold color more consistently and resist staining, but they cost more and set fast, so sample those separately if you are considering them.
Matching Grout to Common Tile Choices
A few field-tested pairings to start your testing from:
- White subway tile: Bright white grout for a seamless classic look, or charcoal for high contrast farmhouse style. A warm gray hides dirt better than pure white in kitchens.
- Wood-look plank tile: Choose a grout that matches the mid-tone of the plank so the joints disappear and the floor reads like real wood.
- Marble or marble-look: A soft warm gray or greige usually beats stark white, which can make natural veining look dingy by comparison.
- Bold patterned cement tile: A neutral mid-gray lets the pattern do the talking without adding a competing line.
Practical Tips Before You Order a Full Bag
Buy slightly more grout than the coverage chart suggests, and buy it all in one lot. Dye lots vary, and matching a partial bag months later for a repair is frustrating. Note the exact color name and manufacturer somewhere you will find it again, like inside a cabinet door.
One more thing experienced installers know: lighter grout shows less lippage and small tile imperfections, while dark grout flatters precise work but punishes sloppy joints. If your tile is slightly uneven, a mid-tone grout is forgiving. Spend an evening with cured grout samples and the right tile, and you will walk into the store knowing exactly which bag to grab.
How Many Samples Should You Test?
Resist the urge to test a single color you think is the winner. Always pull at least three: your top pick, one shade lighter, and one shade darker. The lighter and darker neighbors are insurance, because grout reads differently next to your specific tile than it does on a fan deck. People who test only one color almost always wish they had a comparison sitting right beside it.
If you are torn between a matching and a contrasting look, test both extremes. Lay one cured chip that matches the tile and one that contrasts hard, then step back ten feet and look at the whole effect, not just the joint up close. The from-across-the-room view is what you actually live with every day, and it often flips a decision made nose-to-the-tile.
The Bottom Line
Grout is permanent enough that getting the color wrong means living with it for years or paying to redo it. The fix costs a few dollars and a couple of days of patience. Order grout samples, cure them properly, view them in real light, and match the grout type to your joints. Test a few shades side by side rather than betting on one, judge them from across the room, and the finished surface will look exactly the way you pictured it.