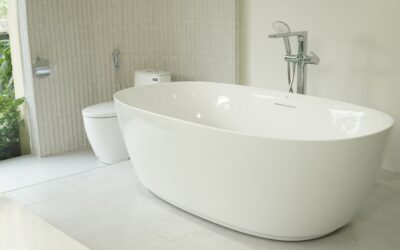
A freestanding tub faucet is the tall, floor-mounted filler that rises beside a standalone soaking tub — the fixture that makes a spa bathroom look finished. It’s also the fixture most likely to go wrong, because its plumbing is buried in the floor and roughed in before the tile ever goes down. Get the rough-in right and it’s stunning; get it wrong and you’re opening the floor again. Faucets run $300 to $1,500, plus install.
What Makes It “Freestanding”
Unlike a wall-mounted or deck-mounted filler, a freestanding tub faucet stands on its own floor pillar, connecting to water lines that come up through the floor. The pipe riser is tall — usually 40 to 45 inches — so it clears the rim of a deep soaking tub and arcs the spout over the edge. Many models include a handheld shower on the pillar. Because everything mounts to the floor, the supply valves and the mounting anchor must be positioned precisely during rough-in.
Floor-Mount vs. Deck-Mount
Two mounting approaches exist, and they’re not interchangeable:
- Floor-mount (freestanding): The faucet stands on the floor next to the tub, fed by lines in the subfloor. The classic look for a standalone tub with no deck. Requires floor rough-in.
- Deck-mount: The faucet mounts on a tub’s flat rim or a surrounding platform. Used on drop-in and some freestanding tubs with a wide edge. Plumbing runs under the deck, not the floor.
Confirm which your tub supports before buying. A true freestanding soaking tub with no rim needs a floor-mount filler.
The Rough-In Is Everything
This is the single most important part of the job. The supply lines, shutoffs, and the faucet’s floor anchor are set inside the subfloor before the finish flooring and tub go in. That means you must know the exact faucet model — and its rough-in dimensions — before your plumber closes the floor. Key measurements to nail:
- Water line spacing: the center-to-center distance between hot and cold supplies, specific to the model.
- Distance from the tub: the pillar sits a few inches off the tub so the spout clears the rim without splashing outside.
- Anchor location: most freestanding fillers bolt to a mounting plate or bracket secured to the subfloor or a blocked-in support.
Order the faucet first, hand the rough-in template to your plumber, and only then frame and close the floor. Reversing that order is the number-one cause of costly do-overs.
Sequencing With the Finish Flooring
Coordination between the plumber and the flooring installer matters. The valve and supply rough-in happens before the finish floor goes down, but the faucet body itself is set after the tile or wood so the escutcheon sits cleanly on the finished surface. Plan the sequence: rough-in the supplies and anchor, dry-fit and confirm the tub position, lay the finish flooring with the supply stubs protruding, then mount the tub and the faucet. If flooring goes in without accurate stub locations, you’ll be drilling finished tile — risky and ugly.
Choosing a Style
Freestanding fillers come in silhouettes to match any bath:
- Gooseneck / cannonball: A tall, curving spout — the traditional, elegant standard.
- Straight / architectural: Squared or cylindrical risers for modern and minimalist rooms.
- Cross-handle vs. lever: Cross handles read classic; single levers read contemporary.
- With or without handshower: A handheld sprayer on the pillar makes rinsing and cleaning the tub far easier.
Match the finish — chrome, brushed nickel, matte black, brushed gold — to your other bath fixtures for a coordinated look.
Flow Rate and Fill Time
A soaking tub holds a lot of water, so flow rate matters here more than on a sink. Freestanding fillers commonly flow 4 to 7 GPM (they’re exempt from the 2.5 GPM faucet cap in many jurisdictions because they fill rather than run continuously), letting a deep tub fill in a reasonable time. A low-flow filler on an 80-gallon soaker means a frustrating 15-plus-minute wait. Check the GPM and pair it with adequately sized ¾” supply lines if your tub is large; ½” lines choke the fill on big tubs.
Installation Steps
- Buy the exact faucet and read its rough-in specs.
- Rough-in hot and cold supplies and the floor anchor to the template, before flooring.
- Install finish flooring around the supply stubs.
- Set the tub in final position.
- Mount the faucet pillar to the anchor, connect the flexible supply hoses inside the pillar, and seal the base.
- Pressure-test for leaks before caulking everything down.
This is a job where hiring a licensed plumber pays off — the rough-in tolerances are unforgiving and buried leaks are expensive.
Cost Breakdown
- Freestanding tub faucet: $300 to $1,500 depending on brand and finish
- Rough-in plumbing and floor anchor: $300 to $800 in labor
- Final set and connection: $150 to $400
- Total, faucet plus install: roughly $800 to $2,500
Matching the Faucet to Your Tub
Not every freestanding filler suits every tub, so match them thoughtfully. Check the tub’s height first — a deep 23″+ soaker needs a tall filler with enough spout reach to arc over the rim, while a shorter tub pairs with a more compact riser. Measure the distance the spout projects and confirm it clears the tub edge and lands water inside, not down the outside. Style should coordinate too: a sleek architectural tub calls for a straight, modern filler, while a classic slipper or clawfoot tub wants a gooseneck with cross handles. Finally, match the finish to the tub’s drain and overflow trim and to the rest of the bathroom’s fixtures. Buying the tub and filler as a coordinated pair, or at least confirming compatibility before ordering, saves you from a beautiful faucet that looks wrong on the tub.
Common Rough-In Mistakes
Because the plumbing hides in the floor, mistakes here are costly and worth calling out. The biggest is ordering the tub and finish flooring before choosing the exact faucet, then discovering the supply lines don’t match the model’s rough-in template. Another is placing the pillar too close to or too far from the tub, so the spout either splashes outside the tub or can’t reach the water. Skipping solid blocking or a proper mounting anchor in the subfloor leaves the tall faucet wobbly once it’s under water pressure. And using undersized ½” supply lines on a large soaker leads to a maddeningly slow fill. Every one of these is prevented by the same discipline: pick the faucet first, follow its rough-in spec exactly, and have a licensed plumber set the supplies and anchor before the floor closes.
Water Pressure and Supply Sizing
A soaking tub is a big vessel, so supply sizing deserves attention most people skip. A standard freestanding filler works off ½” supply lines, but a large soaker fills painfully slowly through them — sometimes 12 to 15 minutes for an 80-gallon tub. Upsizing to ¾” supply lines and choosing a high-flow filler rated at 5 to 7 GPM can cut that fill time dramatically. Check your home’s water pressure too: a filler needs adequate pressure to reach its rated flow, and a home with weak pressure may want a pressure-boosting approach or a filler engineered for lower pressure. Discuss expected fill time with your plumber during the rough-in planning stage, because the supply-line size is set in the floor and can’t be changed later without opening it up. Matching the supply size and faucet flow rate to your tub’s volume is the difference between a relaxing quick fill and a tedious wait.
The Bottom Line
A freestanding tub faucet is a showpiece, but its beauty depends entirely on planning. Choose the exact model first, get the supply lines and floor anchor roughed in to spec before the finish flooring goes down, and coordinate the tub and faucet set for last. Nail the sequence and you get a spa-worthy soaking station; skip it and you’ll be tearing up new tile. When in doubt, let a licensed plumber own the rough-in.