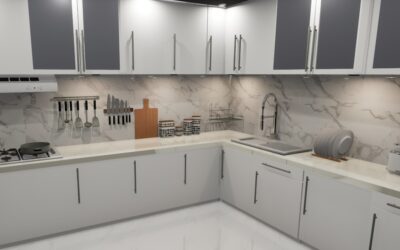
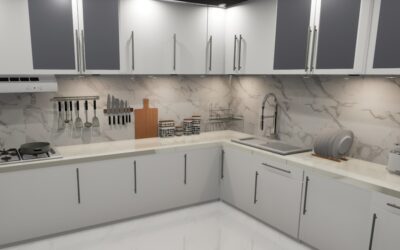
White subway tile is safe to the point of invisibility; colored tile is a commitment plenty of homeowners regret. The grey subway tile backsplash lives precisely in the gap between those two — enough presence to register as a design choice, enough neutrality to survive every future repaint and hardware swap. It’s become one of the most-installed backsplashes in American kitchens for that exact reason, and also one of the most blandly executed, because “grey subway tile” covers everything from icy gloss to smoky handmade zellige. The difference between a flat, rental-grade result and a backsplash with real depth comes down to four decisions: which grey, which finish, which grout, and which layout. Here’s how I walk clients through each.
Part of our Kitchen Remodeling guide — explore the full guide →
Which Grey: Undertones Decide Everything
Grey is never just grey. Every grey tile leans somewhere, and the lean has to agree with your counters and cabinets:
- Cool blue-greys — crisp and slightly icy. They flatter white quartz, stainless appliances, and chrome or nickel hardware. Against warm wood cabinets or beige-gold granite they turn dingy.
- Warm greige — grey with beige underneath, the workhorse of current design. Plays with warm whites, oak cabinets, brass, and nearly every current counter trend. If you’re unsure, greige is the modern safe answer.
- Green-greys (sage-adjacent, the “silver mist” family) — subtle, organic, and quietly on-trend; lovely with cream cabinets and butcher block.
- Charcoal and slate — deep greys that function as a dark accent rather than a neutral field. Striking with white cabinets and pale counters; in small dim kitchens they eat light.
Test the undertone the same way you’d test paint: tape three sample tiles to the wall behind the range and look at them at morning, noon, and under evening bulbs. Kitchen lighting swings warm to cool through the day, and grey shifts with it more than any other neutral.
Finish and Body: Where the Depth Comes From
The single biggest upgrade from builder-basic isn’t color — it’s surface quality.
- Glossy machine-made ceramic ($2–$6/sq ft): flat, uniform, reflective. Clean and budget-friendly; also the version that reads most generic. Fine when the kitchen’s interest lives elsewhere.
- Handmade and handmade-look tile ($8–$20/sq ft): irregular edges, rippled glossy faces that catch light unevenly, shade variation tile to tile. This is where grey subway comes alive — a wall of it reads as texture, not just color. The handmade-look category (machine-made with deliberate irregularity) delivers most of the effect at 60 percent of the price.
- Zellige ($15–$50/sq ft): the maximal version — hand-cut Moroccan clay with dramatic variation, pooled glaze, and chips that are part of the aesthetic. Smoke-grey zellige behind a range is a legitimate showstopper. Demands an installer who has set it before and a homeowner who has seen a full installed wall, not just a Pinterest crop.
- Matte porcelain ($4–$10/sq ft): velvety, modern, fingerprint-friendly. Matte grey with matching grout is the quiet-luxury take; it reads architectural rather than decorative.
Grout: The Decision People Get Wrong
Grout is roughly 10 percent of the surface area and 50 percent of the visual outcome. With grey tile you have three coherent strategies, and the failure mode is not choosing one deliberately.
| Grout Strategy | Effect | Best For |
|---|---|---|
| Matching grey grout | Seamless, calm, tile reads as one surface | Matte tile, modern kitchens, busy counters |
| White or pale grout | Every tile outlined; crisp grid energy | Glossy tile, classic and farmhouse kitchens |
| Charcoal/darker grout | Graphic, utilitarian, hides cooking grime | Light grey tile, industrial looks, behind ranges |
Two practical notes from the field. First, whatever the color, spend up for a stain-resistant high-performance cement grout or single-component premixed grout ($30–$60 more for a whole backsplash) — backsplash grout takes grease aerosol daily and bargain grout yellows and blotches. Second, grey grout with grey tile must be checked against the actual fired tile, not the box swatch; a grout half a step warmer or cooler than the tile looks like a mistake rather than a choice. Buy two grout samples and do a one-square-foot mockup. Thirty dollars of testing prevents the single most common backsplash regret I hear.
Layout: Same Tile, Five Different Rooms
A 3×6 grey subway tile can produce wildly different characters depending on pattern:
- Classic 50-percent offset (running bond): the default, and with grey tile it’s the safest — timeless, forgiving of wall irregularities.
- Vertical stack: columns of tile, crisp and contemporary; makes low ceilings feel taller. The strongest current alternative to running bond.
- Horizontal stack: a calm modern grid that suits matte tile and minimal kitchens beautifully.
- Herringbone: maximum pattern energy from a plain tile — best used on one focal zone (behind the range) rather than the whole run, and expect 15–20 percent more labor cost and tile waste.
- Third-offset: the pro move for handmade tile, stepping each row by a third; it avoids the lippage-highlighting long stagger lines and looks subtly custom.
The scale trend worth knowing: longer formats — 2×8, 3×12, even 4×16 — are displacing the classic 3×6 in current design. Grey in a long thin format reads sleek and current; grey 3×6 gloss with white grout reads traditional. Neither is wrong; they’re different rooms.
How Far Up, How Far Across
Grey tolerates volume better than bolder colors, which opens layout options. Standard counter-to-cabinet coverage (roughly 30–45 sq ft in most kitchens) is the default. Running the grey to the ceiling on open-shelf or window walls has become the signature contemporary move — grey’s neutrality keeps a full wall from overwhelming, where a colored tile might. Behind the range, take it to the hood, always; stopping tile at 18 inches behind a cooktop is both a cleaning problem and a visual one. For a typical kitchen, materials plus professional installation lands at $800–$2,500 for machine-made ceramic and $1,500–$4,500 for handmade or zellige territory, with DIY saving roughly half — subway formats remain one of the most DIY-attainable tile projects going.
Installation Notes for the DIY-Inclined
Grey subway is a friendly first tile project with a few grey-specific wrinkles. Use bright white thinset under light greys and translucent-glazed tile — grey mortar can shadow through pale glazes and shift the color you so carefully chose. Snap a level line and work off a ledger board rather than trusting the countertop, which is never as level as it looks. With handmade and zellige-style tile, dry-lay a few square feet first and shuffle tiles from multiple boxes so shade variation distributes evenly instead of clustering; installers call this blending, and skipping it is how you get a visibly darker patch behind the faucet. Spacer choice follows tile type — 1/16 inch for crisp machine-made looks, tight and irregular for zellige (often set nearly jointless). Seal any cementitious grout after cure, run a neat silicone bead where tile meets counter (grout cracks at that joint; silicone flexes), and give yourself a full weekend: prep and setting on Saturday, grouting on Sunday, admiring for years after.
Pairings: Making Grey Sing Instead of Sag
Grey’s risk isn’t ugliness — it’s flatness. An all-cool kitchen (grey tile, grey quartz, white cabinets, stainless everything) can land clinical. The fixes are reliable: introduce one warm element with real surface area — wood open shelving against the tile, oak floors, walnut stools, brass hardware and faucet — and vary your sheens, glossy tile against honed counters or matte tile against polished stone. With white cabinets, virtually any grey works; with wood-tone cabinets, stay greige or green-grey; with dark blue or green cabinets — the strongest current pairing — a pale warm grey splash bridges cabinet color and white counters better than white tile does, softening the contrast by one welcome step.
That’s the whole playbook. Grey subway tile earns its “neutral classic” title honestly — it’s the rare backsplash that can skew traditional or modern, quiet or graphic, with the same rectangle of fired clay. Just refuse the default path of grabbing the first glossy grey box at the big-box store with whatever grout the installer has on the truck. Choose the undertone against your real counters, buy the most textured tile version your budget allows, commit to a deliberate grout strategy, and pick the layout that matches the kitchen’s era. Four decisions, maybe an extra hour of thought, and the most common backsplash in America becomes specifically, recognizably yours.
Prefer to explore on your own?
See how new flooring looks in your actual room in seconds — free, no signup.
Try the free Floor Studio →