If you have ever spent a DIY flooring weekend coughing through clouds of sawdust and running back and forth to a saw set up in the garage, you understand why a hardwood floor cutter exists. Often called a flooring guillotine or plank shear, this hand tool slices through laminate, engineered, and many solid planks in one quiet, dust-free stroke, no power, no noise, no mess. For the right kind of job it can cut your installation time dramatically, and this guide explains exactly how it works, where it excels, and when you still need a saw.
What a Hardwood Floor Cutter Is
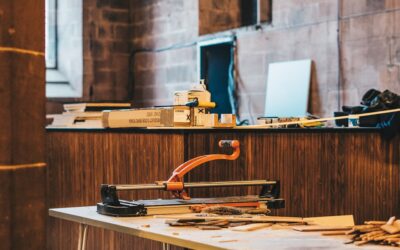
A flooring cutter is a manual shearing tool built like an oversized paper cutter. You slide a plank onto the flat base against an adjustable fence, line up your mark, then pull down the long handle, which drives a heavy blade straight through the board. The cut happens in a fraction of a second with a clean shearing action rather than abrasive grinding.
Because it shears instead of sawing, it produces no airborne dust and almost no noise, which makes it ideal for working indoors, in apartments, or in occupied homes where sawdust and screaming circular saws are a problem.
How It Works in Practice
The workflow is simple, which is much of the appeal. Measure the cut you need, mark the plank, set the adjustable fence so it stops at the right length, slide the board in, and pull the handle. Many cutters include angle guides so you can shear miter cuts for transitions and diagonal layouts as well as straight crosscuts.
- Crosscuts: The primary job, trimming planks to length at the ends of rows.
- Angle cuts: Most models tilt the fence for 45-degree and other angled cuts.
- Quick repeat cuts: Set the fence once and shear a stack of identically sized boards fast.
The Big Advantages
For installers and homeowners alike, the floor cutter solves several real headaches:
- Zero dust: No sawdust means you can cut right in the room you are installing, saving constant trips outside.
- Quiet operation: No motor, so you can work early or late without disturbing neighbors.
- Speed: A single pull is faster than positioning and running a saw, especially across many cuts.
- Safety: No spinning blade and no kickback risk like a circular saw or table saw.
- Portability: Lightweight and cordless by nature; no extension cords or batteries.
The Limitations You Should Know
A floor cutter is excellent at what it does, but it does not replace every saw. It handles straight and angled crosscuts beautifully, but it cannot make a lengthwise rip cut to narrow a plank for your final row against a wall. It also struggles with very thick or extremely dense solid hardwood; the shearing force needed climbs with thickness, and dense exotic species can be tough on a manual cutter.
Curved cuts, notches around door jambs, and cutouts for vents and pipes are also beyond it; those still call for a jigsaw or oscillating multi-tool. Cut quality on the underside can occasionally chip on cheaper laminates, though since cut ends usually sit hidden under baseboard or transitions, this rarely matters.
Floor Cutter vs. Saws
Understanding where each tool wins helps you build the right kit:
- Floor cutter: Best for fast, clean, dust-free straight and angled crosscuts on laminate, vinyl plank, and engineered boards.
- Miter or circular saw: Better for thick solid hardwood and when you need finely controlled, splinter-free finished edges.
- Table saw: The tool for rip cuts down the length of a plank, which a floor cutter cannot do.
- Jigsaw or multi-tool: Required for curves, notches, and cutouts around obstacles.
Most pros carry a floor cutter for the bulk of crosscuts and a small saw for the rips and detail work, getting the best of both.
Choosing the Right Cutter
When shopping, match the tool to your material. Check the maximum cutting width and thickness against your planks; wide-plank flooring needs a cutter rated for that width. Look for a sturdy steel blade and a solid base that will not flex, an adjustable fence with clear angle markings, and a handle long enough to give you good leverage. Heavier, well-built models cut denser boards with less effort and stay accurate longer.
If you are doing a single small room, a basic model is plenty. For a whole house or repeated projects, invest in a heavier-duty cutter that will stay sharp and square.
What Materials a Floor Cutter Handles Best
Matching the tool to your flooring keeps results clean and effort low. Manual flooring cutters are at their best with the materials most homeowners install today:
- Laminate: The ideal candidate. Laminate shears cleanly and quickly, and since cut ends hide under trim, the occasional small chip on the bottom edge does not matter.
- Luxury vinyl plank and tile: Cut easily and quietly; many installers prefer a cutter over a saw for the dust-free, low-noise speed.
- Engineered wood: Generally fine for thinner products, though denser or thicker boards take more force.
- Thin solid hardwood: Possible with a heavy-duty cutter, but thick or very dense species are better cut with a miter saw.
If your project is mostly laminate or vinyl plank, a cutter will handle the overwhelming majority of your cuts and save hours over a saw.
Caring for Your Cutter So It Lasts
A flooring cutter is a simple tool, but a little maintenance keeps it shearing cleanly for years. Wipe the blade after use to remove residue, and apply a light machine oil to the blade and pivot so the action stays smooth. Store it somewhere dry to prevent rust on the blade and base. If cuts start to feel ragged or require excessive force, the blade has dulled; many models accept replacement blades, which is far cheaper than buying a new cutter. Keeping the base clean and free of grit also protects your planks from getting scratched as you slide them in for each cut.
Tips for Clean, Accurate Cuts
Get the most from your cutter with a few habits: keep the blade clean and lightly oiled so it shears rather than crushes, always seat the plank firmly against the fence before pulling, and make your cut in one decisive stroke rather than a hesitant push. Place the finished, visible face up if your model cuts cleanest on the top side, and verify your fence setting with a test cut before running a batch. With those basics, a hardwood floor cutter turns one of the most tedious parts of a flooring install into the fastest, cleanest step of the whole job.
Prefer to explore on your own?
See how new flooring looks in your actual room in seconds — free, no signup.
Try the free Floor Studio →