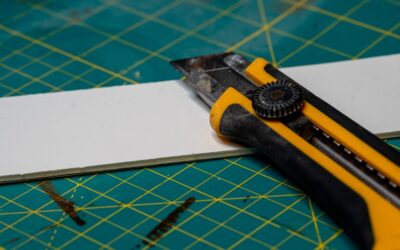
Cutting laminate cleanly is the step that separates a floor that looks professionally installed from one that looks rushed. A good laminate tile cutter lets you slice planks and tiles to size quickly, quietly, and without the choking dust a power saw throws into the air. This guide explains the main tool types, what to look for before you buy, and how to get factory-crisp edges on every cut, whether you are trimming a single doorway board or fitting out a whole room.
Part of our Tile & Grout guide — explore the full guide →
- Why Use a Laminate Tile Cutter at All
- The Main Types of Laminate Cutters
- Top Picks by Use Case
- What to Look For Before You Buy
- How to Get Clean Cuts Every Time
- Price Ranges and What You Get
- Maintaining Your Cutter
- Laminate Cutter Versus Power Saws
- Common Mistakes That Ruin Cuts
- Final Thoughts on Choosing a Laminate Tile Cutter
Why Use a Laminate Tile Cutter at All
You can cut laminate with a jigsaw or a circular saw, but those tools tear the decorative top layer, spray fine particles everywhere, and are loud enough to annoy the whole household. A dedicated laminate cutter works by shearing or scoring the board with a blade pressed through it by a lever. The result is a clean edge, no dust cloud, and near-silent operation, which makes it ideal for indoor work and for anyone laying floor in an occupied home.
- Virtually dust-free, so no mask or shop vacuum needed.
- Quiet enough to use in an apartment at any hour.
- Fast repeat cuts once the fence is set.
- No power cord or blade-change hassle for straight cuts.
The Main Types of Laminate Cutters
Understanding the categories helps you match the tool to your project. Each has a clear strength.
- Guillotine shear cutters. A hardened blade drops through the plank as you pull a lever. These handle full-width cross cuts in one clean action and are the workhorse for most laminate installs.
- Scoring and snap cutters. A carbide wheel scores the surface and you snap the board along the line. Cheaper and lighter, but best for thinner boards and less reliable on dense cores.
- Miter-capable shear cutters. Higher-end shears include an adjustable fence for angled cuts around door frames and diagonal layouts.
For anything more than a tiny repair, a lever-operated shear cutter is the tool most installers reach for first.
Top Picks by Use Case
Rather than name fragile model numbers that change every season, it is smarter to shop by category so you can choose whatever current model fits your budget.
- Best for full rooms: a heavy-duty guillotine shear with a wide bed and a stop block for repeat cuts. Look for a cutting width that clears your plank width in a single stroke.
- Best budget option: a compact shear cutter rated for boards up to around 12 mm. Fine for a small hallway or a closet.
- Best for angles: a shear model with a rotating fence marked in degrees, so miters around casings come out consistent.
- Best for curves and notches: pair any shear cutter with a fine-tooth jigsaw for the occasional pipe cutout, since no shear does curves.
What to Look For Before You Buy
A laminate tile cutter is a simple machine, but a few features make daily use far more pleasant. Weigh these points against how much cutting you actually plan to do.
- Cutting width and thickness. Confirm the tool clears your board width in one pass and is rated for your plank thickness, commonly 8 to 12 mm.
- Blade quality. A hardened steel or carbide blade keeps a clean edge far longer and can often be resharpened or replaced.
- A reliable fence and angle guide. Repeatable, square cuts depend on a fence that locks firmly and does not drift.
- Stability and weight. A heavier base stays put during the cut; rubber feet stop it walking across the floor.
- Leverage. A longer handle means less effort to push the blade through dense high-density-fiberboard cores.
How to Get Clean Cuts Every Time
Even the best tool needs good technique. These habits will lift the quality of your finished floor.
- Cut with the decorative face up on shear cutters so any minor chipping lands on the hidden underside.
- Mark your line clearly and line it up with the blade before committing.
- Push the lever in one smooth, firm stroke rather than sawing back and forth.
- Support long offcuts so they do not snap or twist as the blade exits.
- Keep the blade clean; a build-up of laminate resin drags and tears edges.
For pipe holes and irregular notches, mark the shape, drill starter holes, and finish with a jigsaw, then hide the edge under a cover plate or trim.
Price Ranges and What You Get
Laminate cutters span a wide price band. A basic scoring or light shear cutter can cost around 30 to 60 dollars and suits a one-off small job. A solid mid-range guillotine shear runs roughly 80 to 160 dollars and will comfortably handle a full room with repeatable, square cuts. Professional-grade cutters with wide beds, precision fences, and replaceable carbide blades climb to 200 dollars or more, which only makes sense if you install floors regularly. Renting is worth considering for a single project, since a day rate is often a fraction of the purchase price.
Maintaining Your Cutter
A little care keeps a laminate tile cutter working like new for years. Wipe the blade and bed after each session to clear resin and grit. Keep pivot points lightly oiled so the lever moves smoothly. Store the tool indoors and dry to prevent rust on the blade and base. When cuts start to tear rather than shear cleanly, it is a sign the blade needs sharpening or replacing, which is far cheaper than buying a whole new unit.
Laminate Cutter Versus Power Saws
It is worth understanding exactly why a dedicated cutter beats the power tools you may already own. A circular saw or miter saw cuts fast and handles thick material, but it throws a cloud of fine laminate dust, screams loud enough to need hearing protection, and tends to chip the decorative wear layer unless you fit a fine-tooth blade and cut face down. A jigsaw is essential for curves and notches but is slow and rough for long straight cuts. A shear-style laminate cutter, by contrast, produces no dust, runs almost silently, and shears a clean edge in a single stroke, which is exactly what you want for the dozens of repetitive cross cuts a floor install demands. The smart setup for most homeowners is a shear cutter for the bulk of straight cuts and a jigsaw kept nearby for the occasional pipe cutout or irregular shape. Together they cover every cut a laminate floor throws at you without ever filling the room with dust.
Common Mistakes That Ruin Cuts
Even a good tool cannot save a careless technique, so watch for these frequent errors. Rushing the lever in a jerky, half-hearted push causes the blade to tear rather than shear, leaving a ragged edge. Failing to support long offcuts lets them droop and snap unevenly as the blade exits. Measuring from the wrong reference point, or forgetting to account for the expansion gap laminate floors require around the perimeter, leads to boards that are cut too tight and buckle later. Letting laminate resin build up on the blade drags every subsequent cut. And cutting the decorative face in the wrong orientation puts any minor chipping on the visible side. Slow down, mark clearly, support the board, keep the blade clean, and each plank will come off the cutter ready to click into place.
Final Thoughts on Choosing a Laminate Tile Cutter
The right laminate tile cutter turns one of the messiest parts of flooring into a clean, quiet, satisfying task. For most homeowners a mid-range guillotine shear with a dependable fence hits the sweet spot: quick straight cuts, crisp edges, and no dust to clean up afterward. Match the cutting width and thickness rating to your boards, add a jigsaw for the occasional curve, and keep the blade sharp. Do that and every plank will meet the wall, the doorway, and its neighbors with the tight, tidy joints that make a laminate floor look like it was fitted by a pro.
Prefer to explore on your own?
See how new flooring looks in your actual room in seconds — free, no signup.
Try the free Floor Studio →