Metal panels are unforgiving. A clean cut disappears under the next panel’s overlap; a ragged, heat-burned cut rusts, telegraphs through the finish, and voids most paint warranties. Learning how to cut metal roofing correctly comes down to three things: choosing a cold-cutting tool instead of an abrasive disc, supporting the panel so it doesn’t chatter, and sealing any exposed edge that will see weather. This guide covers the right tool for every cut — long rips, crosscuts, curves, and penetrations — plus the technique details that separate a factory-looking edge from a mangled one.
Part of our Roofing guide — explore the full guide →
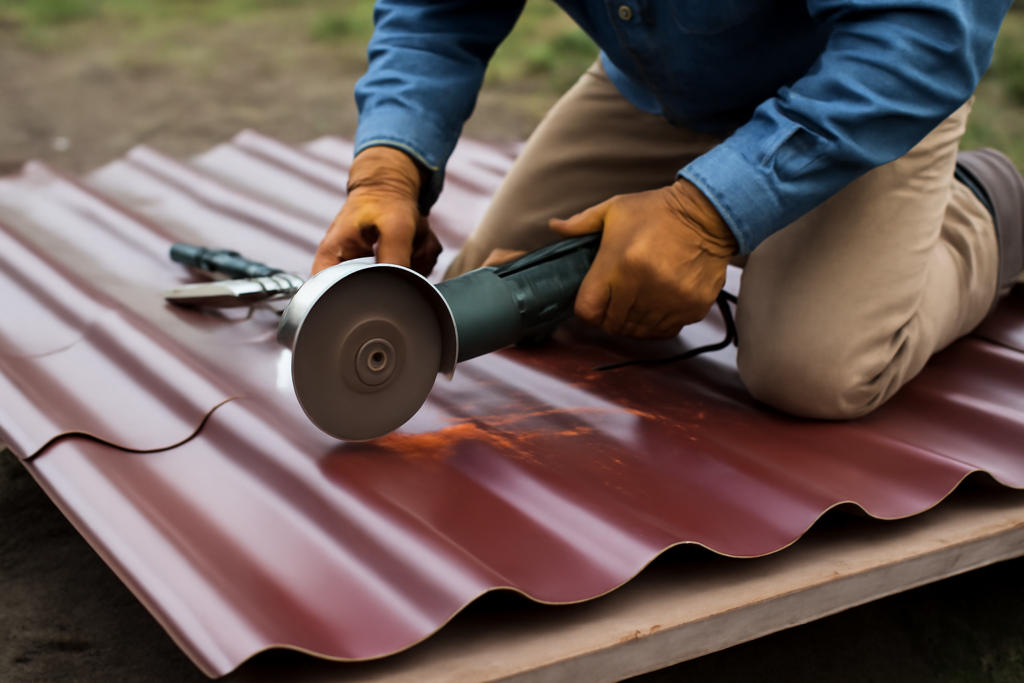
Why You Should Never Use an Abrasive Cut-Off Disc
The angle grinder with a thin cut-off wheel is the first tool most DIYers reach for, and it is the single worst choice for painted steel roofing. Here is what happens:
- Heat destroys the metallic coating. Galvanized and Galvalume panels rely on a sacrificial zinc or zinc-aluminum layer. An abrasive disc runs the cut edge past 700°F, burning off that coating for 1/4 inch or more on each side of the kerf. The bare steel underneath starts rusting within one wet season.
- Hot swarf embeds in the finish. The disc throws a rooster tail of molten steel filings. Those particles land on the panel face, weld themselves into the paint, and rust in place — hundreds of tiny orange freckles you cannot remove.
- Warranty loss. Nearly every major panel manufacturer (McElroy, Fabral, Central States, ABC) explicitly excludes abrasive-cut edges from their 30- to 40-year finish warranties.
Every tool recommended below is a cold-cutting tool: it shears or punches the metal without generating meaningful heat, so the zinc coating stays intact and continues protecting the cut edge galvanically. If you’re working with Galvalume specifically, the coating chemistry and edge-creep behavior are covered in more depth in our Galvalume metal roof guide.
The Right Tool for Each Cut
| Cut type | Best tool | Typical price | Notes |
|---|---|---|---|
| Short crosscuts, notching | Aviation snips (left/right/straight) | $15–$25 each | Buy all three colors; slow but precise |
| Long rips down the panel | Electric or drill-attachment shears | $60–$250 | Fast, clean, minimal distortion |
| Cuts through ribs/corrugations | Nibbler | $70–$300 | Handles profile changes snips can’t |
| Gang-cutting multiple flat panels | Circular saw + metal-cutting blade | $40–$70 (blade) | Carbide-tooth cold-cut blade only, never abrasive |
| Round penetrations (pipes, vents) | Step bit + nibbler or snips | $20–$40 | Drill a starter hole, then cut the circle |
Aviation Snips: The Foundation
Aviation snips come in three cutting directions, color-coded by industry convention: red cuts left curves, green cuts right curves, yellow cuts straight. On 29- and 26-gauge steel roofing you will use all three, because the offset handles keep your knuckles above the sheet and the waste curls away from the cut line. Technique matters: take long strokes using the full length of the jaws, never close the tips completely (that leaves a small tear at the end of each bite), and keep the flat panel side supported while the waste side curls downward. Snips are the tool for hemming details, valley notches, and trimming panels around dormers.
Electric Shears: For Long Rips
When you need to rip a panel lengthwise — the last course against a gable, for example — powered shears earn their price. Double-cut shears remove a thin 1/4-inch ribbon of waste and leave both sides of the cut flat and undistorted, which is exactly what you want on a visible edge. Single-cut shears cut faster and leave no waste strip but slightly curl one side. Drill-attachment shear heads ($60–$100) that chuck into an 18V drill are the budget sweet spot for a one-roof project; dedicated shears like the Makita JS1602 run $200+ and make sense for anyone doing more than one roof.
Nibblers: For Ribs and Profiles
Shears stall when they hit a 3/4-inch rib on a corrugated or ribbed panel. A nibbler punches out a series of tiny half-moon chips and doesn’t care about profile changes — it climbs right over ribs, follows tight curves, and cuts standing-seam legs. The downsides: it scatters sharp crescent-shaped chips everywhere (they rust-stain everything they land on, so sweep constantly and never let them sit on the panels), and the kerf edge is slightly serrated. For crosscutting installed corrugated panels in place, the nibbler is usually the only realistic option.
Circular Saw with a Cold-Cut Metal Blade
A 7-1/4-inch carbide-tooth metal-cutting blade (Diablo Steel Demon, ~$40) in a standard circular saw crosscuts a whole stack of flat panels at once — flip the top panel face-down, clamp the stack, snap a line, and cut. This is how crews gang-cut panels to length on site. The carbide cold-cut blade shears chips at low temperature rather than grinding, so the coating survives. Run the saw at a steady feed, wear a face shield (chips come off fast), and expect a slightly rougher edge than shears — fine for edges that hide under trim, not for exposed hems.
Step-by-Step: Cutting a Panel to Length
- Measure twice at both ribs. Panels rack out of square easily; measure your cut length along both edges and mark both.
- Mark with a marker on tape. Scratch awls score the paint. Run painter’s tape across the cut line and mark on the tape, or use a fine paint-safe marker.
- Support both sides of the cut. Lay the panel on 2×4 rails so the cut line spans a gap of no more than 4 inches. Unsupported metal chatters, and chatter means a wavy cut and oil-canning.
- Cut face-down for saws, face-up for snips and shears. Saw teeth exit on the up-stroke side, so face-down protects the finish. Snips and shears want the finished face up so you can see your line.
- Deburr. Knock the cut edge down with a file or a quick pass of a deburring tool. Burrs slice hands and hold water.
- Sweep the panel immediately. Any chips or filings left on the surface will rust within days. Brush them off with a soft broom — never drag them across the paint.
Cutting Around Pipes and Penetrations
For a round penetration, mark the circle 1/2 inch larger than the pipe diameter (the boot flange seals the gap). Drill a 1/2-inch starter hole with a step bit just inside the line, then cut to the line with a nibbler or the tips of straight snips working in a spiral. On ribbed panels, position penetrations in the flat pan between ribs whenever the layout allows — sealing a boot over a rib is a lifetime maintenance item. If you’re adding snow retention hardware later, note that most modern metal roof snow guards clamp to seams or screw through flats and need no cutting at all.
Sealing and Protecting Cut Edges
On galvanized and Galvalume steel, the metallic coating protects small cut edges galvanically — zinc sacrifices itself to protect exposed steel up to roughly 1–2 mm from the coating. That means factory-quality shear cuts on 29-gauge panels generally don’t need paint. But you should still:
- Hide cut edges under overlaps and trim. Plan your layout so field cuts land at eaves (covered by drip edge relief), gables (under rake trim), and end laps — not exposed at the ridge line.
- Hem exposed eave cuts. A 3/4-inch hem folded under with a hand seamer doubles the edge, hides raw steel, and stiffens the panel.
- Touch up only actual damage. Use the manufacturer’s touch-up pen sparingly on scratches that reach steel. Slathering brush paint on cut edges looks worse than the edge and often fails cosmetically.
- Never leave copper, treated lumber, or dissimilar-metal contact at cuts. CCA/ACQ-treated wood and copper runoff both eat zinc coatings fast.
Safety Essentials
Cut metal is functionally a razor. Wear cut-resistant gloves (ANSI A4 or better) any time you handle panels, safety glasses always, and a face shield when running a circular saw in metal. Long sleeves prevent the classic forearm slice from carrying panels. On the roof itself, chips underfoot act like ball bearings on a steep pitch — sweep as you go. And handle panels in pairs in any wind above 10 mph; a 3-foot by 16-foot panel is a sail that will take you off a ladder.
Common Mistakes to Avoid
- Grinding with an abrasive disc — covered above, but it remains mistake number one and it is irreversible.
- Cutting on top of other panels. Swarf lands on the stack and rust-freckles every panel below.
- Closing snips fully at the end of each stroke. Leaves a tear that starts cracks.
- Forcing shears through ribs. You’ll fold the rib and distort 6 inches of panel. Switch to the nibbler.
- Measuring from a racked edge. Square the panel reference edge first or your cut runs off line.
- Ignoring the deburring step. Burred edges cut installers and prevent trim from seating flat.
FAQ
Can I cut metal roofing with a jigsaw?
Yes, with a fine metal blade (21–24 TPI), but expect chatter and a rough edge on thin panels unless the sheet is clamped tightly between sacrificial boards. It’s a last-resort tool for curves when you don’t own a nibbler.
What gauge is residential metal roofing, and does it change the tools?
Most residential panels are 29-gauge (about 0.014 in) or 26-gauge (about 0.019 in). Everything in this guide handles both; 24-gauge standing seam is noticeably harder on hand snips, and powered shears become close to mandatory for long cuts.
Do cut edges rust on Galvalume?
Shear-cut edges on coated steel self-protect galvanically at panel thicknesses under about 0.5 mm exposed steel. Keep cut edges out of standing water and away from copper and treated lumber and they’ll match the panel’s lifespan. Full panel selection and profile guidance lives in our main metal roofing guide.
How do professionals cut panels so fast?
Gang-cutting with a cold-cut circular saw for lengths, powered double-cut shears for rips, and a shop slitter or the supplier’s factory cut-to-length service. Ordering panels cut to exact length from the supplier — most roll-formers cut to the inch for free — eliminates 90% of field cutting and is the single best “technique” available to a DIYer.