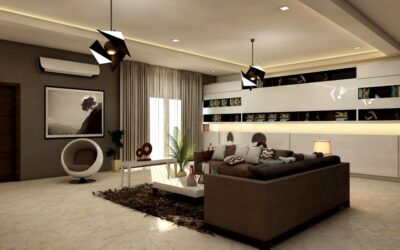
Open floor plans combine the kitchen, dining area, and living room into one large shared space. They let in more natural light, make homes feel bigger, and keep families connected. But without walls to define each area, the space can feel chaotic, echoey, or like one giant room with no purpose.
The key to decorating an open floor plan is creating distinct zones that still flow together visually. Here’s how to do it right, from furniture placement and rugs to lighting and color choices.
- Why Open Floor Plans Need Intentional Design
- Step 1: Map Out Your Zones
- Step 2: Use Furniture Placement to Define Spaces
- Step 3: Define Zones With Area Rugs
- Step 4: Layer Lighting for Each Zone
- Step 5: Create Color Flow
- Step 6: Add Vertical Separation
- Step 7: Control Acoustics
- Common Open Floor Plan Mistakes
- Budget-Friendly Zoning Ideas
Why Open Floor Plans Need Intentional Design
A 2,000-square-foot home with an open layout can feel smaller than its actual size if the furniture floats aimlessly or everything blends into one undefined blob. Without clear zones, the eye has nowhere to land and the space feels disorganized.
Good open-plan decorating accomplishes three things:
- Defines activity zones — cooking, eating, lounging, working — without physical barriers
- Creates visual cohesion so the space reads as one unified room, not three mismatched areas
- Controls scale so large furniture doesn’t overwhelm small zones and vice versa
Step 1: Map Out Your Zones
Before buying a single piece of furniture, walk your open space and decide what activities happen where. Most open floor plans have three to four zones:
- Kitchen zone: Counters, island, appliances, prep area
- Dining zone: Table and chairs, buffet or sideboard
- Living zone: Sofa, seating, TV or fireplace focal point
- Flex zone (optional): Reading nook, home office corner, kids’ play area
Sketch a rough floor plan or use a free tool like RoomSketcher or the IKEA planner. Mark traffic paths between zones — you need at least 36 inches of clearance for walkways, and 42 to 48 inches in high-traffic areas near the kitchen.
Anchor Each Zone to a Focal Point
Every zone needs something that visually anchors it. In the living area, that’s usually a fireplace, TV wall, or large piece of art. In the dining zone, it’s the table itself or a statement light fixture. The kitchen has the island or range hood. These anchors tell people “this is where this activity happens.”
Step 2: Use Furniture Placement to Define Spaces
Furniture arrangement is the most powerful zoning tool you have. The biggest mistake in open floor plans is pushing all furniture against the walls. This leaves a dead ocean of space in the middle and makes the room feel like a waiting room.
Float the Sofa
Pull the sofa away from the wall and use its back to create a visual boundary between the living and dining zones. A sofa positioned 12 to 18 inches from the wall (or more) instantly makes the living area feel intentional. The back of the sofa acts as a low wall that separates spaces without blocking sightlines.
Use Console Tables and Low Shelving as Dividers
A console table behind a floated sofa serves double duty: it defines the boundary and gives you a surface for lamps or decor. Low bookshelves (around 30 to 36 inches tall) can separate a reading nook or home office from the living area without cutting off light or making the space feel closed in.
Create Conversation Groupings
In the living zone, arrange seating in a U-shape or H-shape around the focal point. Two chairs facing a sofa with a coffee table between them creates a contained, purposeful grouping. Avoid the common mistake of one long sofa facing a TV with nothing else — it looks like a dorm room.
Dining Table Placement
Place the dining table where it naturally bridges the kitchen and living areas. If you have a kitchen island, the dining table often works best perpendicular to it or parallel with a walkway between. Leave 36 inches between the table edge and the nearest wall or piece of furniture so chairs can be pulled out comfortably.
Step 3: Define Zones With Area Rugs
Area rugs are the single most effective way to visually separate zones in an open floor plan. Each rug acts as a “floor” for its zone.
Sizing Rules
- Living area: The rug should be large enough for all front legs of the sofa and chairs to sit on it, or for all furniture to fit entirely on the rug. Common sizes are 8×10 or 9×12 feet. An undersized rug (like a 5×7 under a full seating arrangement) makes the space look disjointed.
- Dining area: The rug needs to extend at least 24 inches beyond the table on all sides so chairs stay on the rug when pulled out. For a 72-inch table, you need at least a 9×12 rug.
- Entryway or flex zone: A 3×5 or 4×6 runner or small rug can mark a transition point.
Coordinating Rugs Across Zones
The rugs don’t need to match, but they should feel related. Pick rugs that share at least one common color or have a similar visual weight. A bold patterned rug in the living area pairs well with a solid or subtly textured rug in the dining area, as long as the tones complement each other.
Leave 12 to 18 inches of bare floor between rugs. This “breathing room” reinforces the zone separation.
Step 4: Layer Lighting for Each Zone
A single overhead light in an open floor plan is a design killer. It flattens everything and provides no sense of zone identity. Instead, layer multiple light sources at different heights across the space.
Lighting by Zone
- Kitchen: Recessed cans for general light, pendant lights over the island (typically 2 to 3 pendants spaced 24 to 30 inches apart), under-cabinet task lighting
- Dining area: A chandelier or large pendant centered over the table, hung 30 to 36 inches above the table surface. This is one of the most impactful fixtures in the whole space.
- Living area: Floor lamps beside the sofa, table lamps on end tables, recessed lighting or a semi-flush mount for ambient light. A pair of matching lamps on either side of the sofa creates symmetry and warmth.
- Flex zone: A desk lamp, reading lamp, or arc floor lamp marks the area and provides task lighting.
Use Dimmers Everywhere
Dimmers let you adjust the mood of each zone independently. You might want bright light in the kitchen while the living area stays dim for movie night. Budget $15 to $30 per dimmer switch, and they’re straightforward to install if you have standard wiring.
Step 5: Create Color Flow
An open floor plan demands a cohesive color palette. This doesn’t mean everything is the same color — it means the colors across all zones feel intentional and connected.
The 60-30-10 Approach
- 60% dominant color: Walls, large furniture pieces, and big rugs. This is usually a neutral — white, greige, warm gray, or soft beige.
- 30% secondary color: Accent chairs, curtains, throw pillows, smaller rugs. This adds depth. Think navy, olive, rust, or slate blue.
- 10% accent color: Art, decorative objects, a single bold piece of furniture. This is where you get playful — mustard, emerald, coral.
Carry Color Through the Space
The thread that ties zones together is repeating your secondary and accent colors across the space. If the living room has navy throw pillows, the dining area might have navy cloth napkins or a navy-toned art print. The repetition doesn’t need to be exact — close is enough for the eye to make the connection.
Avoid Painting Walls Different Colors by Zone
Without walls to create natural stopping points, painting one section of a continuous wall a different color looks awkward. Stick to one wall color throughout the open area. You can add color variation through an accent wall on a naturally separated surface, like a fireplace surround or the wall behind a built-in bookcase.
Step 6: Add Vertical Separation
Zoning doesn’t just happen on the floor. Vertical elements add another layer of separation and make the space feel more architecturally interesting.
- Ceiling beams: Exposed beams or faux beams can visually divide the ceiling above different zones. Faux beams cost $10 to $30 per linear foot installed.
- Hanging planters or pendant clusters: A row of hanging plants between the dining and living area creates a soft, natural divider.
- Open shelving units: Floor-to-ceiling open shelving (like IKEA Kallax turned vertically or custom built-ins) provides separation while maintaining sightlines and light flow.
- Curtain dividers: Ceiling-mounted curtain tracks with sheer or linen panels can close off a flex space or home office when needed.
Step 7: Control Acoustics
Open floor plans are noisy. Hard surfaces like hardwood floors, large windows, and high ceilings bounce sound around, making conversations compete with kitchen clatter and TV audio.
Soft materials absorb sound:
- Large area rugs with thick pads (felt or rubber pads work best for noise absorption)
- Upholstered furniture over hard leather or wood
- Floor-to-ceiling curtains on windows, even if decorative
- Acoustic panels disguised as art (brands like Artnovion and GIK Acoustics make options that look like framed prints, starting around $80 per panel)
Common Open Floor Plan Mistakes
Pushing Everything Against the Walls
This creates a bowling alley effect and wastes the center of the room. Float at least some furniture toward the middle of the space.
Using Too-Small Rugs
A small rug in a large open space looks like a postage stamp. Size up. If budget is a concern, a larger solid rug is better than a smaller patterned one.
Matching Everything Too Closely
Buying a complete furniture set for the living area and another complete set for the dining area makes each zone look like a showroom display. Mix materials and styles within a cohesive palette for a more lived-in, layered look.
Ignoring Scale
A tiny loveseat in a 400-square-foot open living zone disappears. A massive sectional in a compact open plan eats the entire space. Measure everything and use painter’s tape on the floor to mock up furniture dimensions before you buy.
Forgetting Traffic Flow
People need to walk from the front door to the kitchen, from the kitchen to the dining table, and from the sofa to the bathroom without doing an obstacle course. Map your traffic paths first, then arrange furniture around them.
One Light Source for the Entire Space
A single overhead fixture makes the whole open plan feel flat and institutional. Layer lights at different heights and intensities across each zone.
Budget-Friendly Zoning Ideas
You don’t need to spend thousands to define zones in an open floor plan. Here are cost-effective strategies:
- Rearrange what you have: Floating existing furniture costs nothing and makes the biggest immediate difference.
- Add one large rug: A quality 8×10 rug starts around $150 to $400 at retailers like Rugs USA or Boutique Rugs.
- Swap light fixtures: A statement pendant over the dining table ($50 to $200) instantly creates zone identity.
- Use plants as dividers: A row of tall potted plants ($20 to $50 each) on a plant stand creates a natural screen.
- Paint one accent wall: A gallon of paint ($30 to $50) on a fireplace wall or kitchen accent wall adds visual weight to one zone.
The most impactful change is always furniture placement. Start there, then add rugs, lighting, and color as your budget allows. A well-arranged open floor plan with minimal decor will always look better than a cluttered one with expensive accessories in the wrong places.
Prefer to explore on your own?
See how new flooring looks in your actual room in seconds — free, no signup.
Try the free Floor Studio →