Epoxy flooring is one of the most durable, versatile, and visually striking floor coating systems available today. Made by combining an epoxy resin with a chemical hardener, this thermosetting polymer bonds directly to concrete to create a surface that resists chemicals, impact, abrasion, and staining for 10 to 20 years or longer. Whether you are transforming a garage, finishing a basement, or upgrading a commercial facility, an epoxy floor delivers performance and aesthetics that few other flooring options can match.
In this comprehensive guide, we cover everything you need to know about epoxy flooring—from the chemistry behind it and the different types available to installation steps, cost considerations, maintenance, design options, and the best applications for residential and commercial spaces. If you are comparing concrete flooring finishes or exploring options for your garage floor, you will find every answer here.
- What Is Epoxy Flooring?
- Types of Epoxy Flooring
- Epoxy Types Compared
- Residential vs. Commercial Epoxy Flooring
- Epoxy Garage Floors
- Epoxy Basement Floors
- Epoxy Flooring Cost Overview
- DIY vs. Professional Epoxy Flooring
- The Epoxy Flooring Installation Process
- Pros and Cons of Epoxy Flooring
- Durability and Lifespan
- Maintenance and Care
- Design Options and Colors
- Best Uses for Epoxy Flooring
- DIY Epoxy Floor Kits
- Epoxy Flooring Cost Breakdown: DIY vs. Professional
- Frequently Asked Questions About Epoxy Flooring
- How long does epoxy flooring last?
- Is epoxy flooring slippery?
- Can epoxy flooring be applied over old concrete?
- How much does epoxy flooring cost?
- What is the difference between epoxy paint and real epoxy flooring?
- Can I install epoxy flooring myself?
- How long does epoxy floor coating take to cure?
- Can I apply epoxy over an existing epoxy floor?
- Can I apply epoxy to a brand-new concrete floor?
- What is the difference between epoxy and polyaspartic floor coatings?
- What is the difference between water-based and solvent-based epoxy?
- How do I prevent hot tire pickup on my epoxy garage floor?
- Final Thoughts
- Popular Epoxy Flooring Guides
What Is Epoxy Flooring?
Epoxy flooring is a high-performance floor coating system created by mixing two components: an epoxy resin (Part A) and a polyamine hardener (Part B). When these two components are combined, a chemical reaction called an exothermic cross-linking process begins. The molecules bond together to form a rigid, plastic-like material that adheres permanently to properly prepared concrete substrates.
The result is an epoxy floor coating that is significantly harder, thicker, and more durable than standard floor paint. While a coat of latex floor paint may be 2 to 3 mils thick, a professional epoxy system typically builds to 10 to 20 mils or more. This thickness, combined with the chemical bond to the concrete, is what gives epoxy resin flooring its exceptional resistance to wear, impact, chemicals, and moisture.
Epoxy flooring has been used in industrial and commercial settings since the 1950s. Over the past two decades, advances in formulation and decorative techniques have made it one of the most popular choices for residential garages, basements, and living spaces as well.
How Epoxy Flooring Works: The Chemistry
Understanding the basic chemistry helps explain why epoxy floors perform so well. Epoxy resin belongs to a class of polymers called thermosets. Unlike thermoplastics (such as vinyl or polyethylene) that soften when heated, thermoset polymers undergo an irreversible chemical cure. Once the resin and hardener react, the resulting material cannot be melted or reshaped.
The cross-linking reaction between the epoxide groups in the resin and the amine groups in the hardener creates an extremely dense molecular network. This network is responsible for the coating’s hardness, chemical resistance, and adhesion to concrete. The reaction generates heat (exothermic), which is why mixed epoxy has a limited working time, known as pot life, typically ranging from 20 to 45 minutes depending on the product and ambient temperature.
Once applied, an epoxy floor coating goes through several curing phases. It becomes tack-free within 12 to 24 hours, can accept light foot traffic in 24 to 48 hours, and reaches full chemical and mechanical cure in 7 to 14 days. During this period, the molecular cross-linking continues to densify, and the floor achieves its maximum hardness and chemical resistance.

Types of Epoxy Flooring
Not all epoxy floors are the same. The market offers a wide range of epoxy floor coating systems, each engineered for different performance requirements, aesthetic goals, and budgets. Here is a detailed breakdown of every major type.
Solid Epoxy (100% Solids)
A 100% solids epoxy system is the gold standard of epoxy flooring. It contains no solvents or water—every drop of the mixed material stays on the floor to form a thick, impenetrable shell. Professional-grade solid epoxy systems build to 10 to 20 mils per coat, creating a surface that can withstand decades of heavy use.
This is the type most commonly used by professional installers for residential garages, commercial showrooms, and industrial facilities. It offers the longest lifespan (15 to 20+ years), the highest chemical resistance, and the most robust mechanical performance. The tradeoff is that 100% solids epoxy requires skilled application—it cures faster, has a shorter pot life, and demands precise mixing ratios.
Epoxy Paint
Epoxy paint is a latex or acrylic paint that contains a small percentage of epoxy resin. It is widely available at home improvement stores as a single-part product, making it the most accessible and affordable option. However, it is not a true epoxy system. The thin film it creates (2 to 4 mils) offers limited protection compared to professional coatings.
Epoxy paint is suitable for light-duty applications like utility rooms or storage areas where appearance matters more than performance. In garages with hot tires, heavy foot traffic, or chemical exposure, epoxy paint typically begins peeling and wearing within 2 to 4 years. If you are considering this route, understand that you are getting a cosmetic upgrade rather than a long-term protective system.
Self-Leveling Epoxy
Self-leveling epoxy is designed to flow across uneven or damaged concrete flooring and settle into a perfectly flat, seamless surface. Applied at higher thicknesses (typically 1/8 to 1/4 inch), it uses gravity to fill minor imperfections, creating a smooth, monolithic finish.
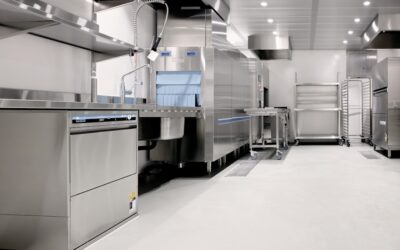
This type excels in commercial kitchens, pharmaceutical facilities, food processing plants, and any environment where a seamless, easy-to-clean surface is critical. Self-leveling epoxy can also rehabilitate old, rough concrete that would be too damaged for standard coatings. It is available in a wide range of colors and can incorporate quartz or metallic effects.
Metallic Epoxy Flooring
Metallic epoxy flooring uses specialty metallic pigments suspended in the epoxy resin to create stunning, one-of-a-kind visual effects. When manipulated with rollers, blowers, or brushes during application, the metallic particles shift and settle into patterns that resemble flowing lava, swirled marble, or liquid metal.
No two metallic epoxy floors are identical, making this one of the most sought-after options for homeowners and businesses who want a truly custom look. It is popular in showrooms, retail spaces, man caves, modern basements, and high-end residential garages. The application requires significant skill and artistic ability, which makes it one of the more expensive epoxy options at $8 to $12 per square foot installed.
Flake and Chip Epoxy
Flake (also called chip) epoxy systems incorporate decorative vinyl flakes broadcast into the wet epoxy. The flakes come in hundreds of color combinations and can be applied in partial or full coverage to create anything from subtle texture to a terrazzo-like appearance. After the epoxy cures, the surface is scraped smooth and sealed with a clear topcoat.
Flake epoxy is the most popular choice for epoxy garage floors because it provides excellent slip resistance, hides minor concrete imperfections, and creates a professional, finished look. It is also widely used in basements, commercial kitchens, veterinary clinics, and locker rooms. Cost typically ranges from $5 to $9 per square foot installed.
Quartz-Filled Epoxy
Quartz epoxy systems use colored quartz sand broadcast into the epoxy instead of vinyl flakes. The quartz aggregate creates a highly durable, slip-resistant surface that is especially well suited for areas subject to heavy foot traffic and moisture. Think school corridors, restroom floors, cafeterias, and commercial entryways.
Quartz-filled epoxy is typically thicker and more abrasion-resistant than standard flake systems. The natural mineral aggregate also gives the floor a refined, granite-like appearance. It is one of the most specified systems in commercial and institutional settings where both performance and aesthetics matter.
Terrazzo Epoxy
Terrazzo epoxy is a modern interpretation of traditional terrazzo flooring. Instead of using a cement binder, epoxy resin serves as the matrix for decorative aggregates such as marble chips, glass, shell, or recycled materials. The floor is poured, ground smooth, and polished to a high-gloss finish that reveals the aggregate in a seamless, artful pattern.
Epoxy terrazzo is lighter, more flexible, and faster to install than traditional cement terrazzo. It is commonly seen in airports, museums, hospitals, hotels, and high-end retail spaces. While it sits at the premium end of the epoxy spectrum, it delivers exceptional longevity (20+ years) and virtually limitless design possibilities.
Epoxy Types Compared
| Epoxy Type | Cost/Sq Ft (Installed) | Appearance | Durability | DIY-Friendly? | Best Use |
|---|---|---|---|---|---|
| Epoxy Paint | $3 – $5 | Flat, single color | Low (2–4 years) | Yes | Light-duty utility rooms |
| Solid Epoxy (100% Solids) | $5 – $8 | Smooth, glossy, solid color | High (15–20 years) | No | Garages, workshops, showrooms |
| Self-Leveling Epoxy | $6 – $10 | Smooth, seamless, glossy | High (10–20 years) | No | Commercial kitchens, warehouses |
| Metallic Epoxy | $8 – $12 | Marbled, flowing, unique | High (15–20+ years) | No | Showrooms, basements, retail |
| Flake/Chip Epoxy | $5 – $9 | Multi-color, textured | High (10–20 years) | Moderate | Garages, basements, commercial |
| Quartz-Filled Epoxy | $7 – $11 | Granite-like, textured | Very High (15–20 years) | No | Schools, restrooms, lobbies |
| Terrazzo Epoxy | $10 – $25 | Polished, aggregate mosaic | Very High (20+ years) | No | Airports, hospitals, luxury retail |
Residential vs. Commercial Epoxy Flooring
While the chemistry is the same, residential and commercial epoxy flooring differ in application approach, system thickness, and performance requirements.
Residential Applications
In homes, epoxy flooring is most commonly installed in garages, basements, laundry rooms, and workshops. Homeowners choose epoxy for its durability, easy maintenance, and ability to transform dull gray concrete into an attractive, finished surface. The most popular residential systems are flake epoxy and solid-color epoxy, typically applied at 10 to 15 mils total thickness.
Residential epoxy floors are designed to handle car traffic, foot traffic, tool drops, and chemical spills from automotive fluids. They do not typically need to meet the same regulatory standards as commercial installations, which keeps costs lower.
Commercial Applications
Commercial epoxy flooring must meet stricter performance criteria. Restaurants need floors that withstand thermal shock from hot water and resist bacterial growth. Warehouses require surfaces that can handle forklift traffic and heavy pallet loads. Healthcare facilities need seamless, non-porous floors that meet sanitation standards. Manufacturing plants may need chemical resistance to specific solvents or acids.
Commercial systems are typically thicker (20 to 60+ mils), use more coats, and may incorporate specialized topcoats such as polyurethane or polyaspartic for added UV stability or abrasion resistance. The installation process is often phased to minimize business disruption.
Epoxy Garage Floors
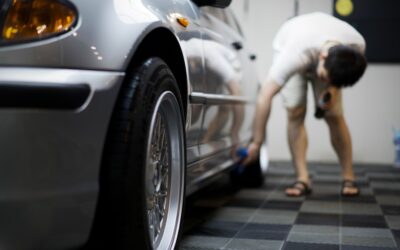
The epoxy garage floor is the single most common residential epoxy application. A well-installed epoxy coating transforms a garage from a dusty, stained concrete slab into a clean, professional-looking space that resists oil, chemicals, tire marks, and wear.
For a standard two-car garage (400 to 600 sq ft), homeowners typically invest $2,000 to $5,400 for professional installation with a flake or solid epoxy system. The process usually takes 2 to 3 days including surface preparation, coating, and initial cure time. For a full breakdown of pricing, see our epoxy flooring cost guide.
Key benefits of an epoxy garage floor include resistance to hot tire pickup, easy cleanup of oil and fluid spills, improved lighting from the reflective surface, and increased home resale value. Decorative options such as flake broadcasts, metallic finishes, and custom color schemes allow homeowners to personalize the space to match their style.
Epoxy Basement Floors
Basements are the second most popular residential application for epoxy flooring. An epoxy floor turns an unfinished basement into a usable living space—whether as a home gym, entertainment room, workshop, or additional living area.
The primary concern with basement flooring is moisture. Concrete basement slabs are in direct contact with the ground and can transmit moisture vapor upward through the pores of the concrete, a phenomenon called moisture vapor transmission. Before applying epoxy, installers must perform moisture testing (typically a calcium chloride test or relative humidity probe test) to ensure the concrete is dry enough for proper adhesion.
If moisture levels are elevated, a moisture-mitigating primer can be applied before the epoxy system. This adds $0.75 to $2 per square foot to the project but is essential for preventing coating failure. Once the moisture is addressed, basement epoxy floors perform beautifully and offer a seamless, waterproof surface that is far easier to maintain than carpet or pad in a below-grade environment.
Epoxy Flooring Cost Overview
The cost of epoxy flooring varies based on the type of system, the size and condition of the floor, and whether you hire a professional or tackle it yourself. On average, professionally installed epoxy flooring costs $3 to $12 per square foot. Here is a quick breakdown:
- Epoxy paint: $3 to $5 per sq ft installed
- Solid epoxy (100% solids): $5 to $8 per sq ft installed
- Flake/chip epoxy: $5 to $9 per sq ft installed
- Self-leveling epoxy: $6 to $10 per sq ft installed
- Metallic epoxy: $8 to $12 per sq ft installed
- Quartz-filled epoxy: $7 to $11 per sq ft installed
- Terrazzo epoxy: $10 to $25 per sq ft installed
For a detailed analysis of pricing by room, project size, and region, visit our dedicated epoxy flooring cost guide.
DIY vs. Professional Epoxy Flooring
One of the most important decisions you will face is whether to install epoxy yourself or hire a professional. The cost difference is significant, but so are the risks and results.
DIY Epoxy Flooring
DIY epoxy kits are available at home improvement stores for $50 to $600, making them appealing to budget-conscious homeowners. These kits typically include a water-based or solvent-based epoxy (not 100% solids), basic instructions, and sometimes decorative flakes.
The main challenges with DIY installation are surface preparation and product quality. Most DIY failures result from insufficient concrete preparation—the floor needs to be thoroughly cleaned, degreased, and mechanically profiled (acid-etched at minimum, diamond-ground ideally) for the epoxy to bond properly. DIY kits also apply much thinner than professional systems, resulting in shorter lifespans of 2 to 5 years.
DIY epoxy can be a reasonable choice for small utility rooms, storage areas, or temporary cosmetic upgrades where long-term durability is not critical.
Professional Epoxy Flooring
Professional installers bring industrial diamond grinding equipment, commercial-grade 100% solids epoxy, and the experience to handle moisture issues, crack repair, and decorative techniques. A professional epoxy floor coating will typically last 3 to 5 times longer than a DIY application.
Professionals also carry liability insurance and offer warranties on both materials and workmanship. For garages, basements, and any space where you want the floor to look great and perform well for 10 to 20 years, professional installation is the recommended approach. For a full cost comparison, see our epoxy flooring cost page.
The Epoxy Flooring Installation Process
Whether applied by a professional or as a DIY project, every epoxy floor installation follows the same fundamental steps. Here is the complete process from start to finish.
Step 1: Surface Preparation
Surface preparation is the single most important factor in the success of an epoxy floor. The concrete must be clean, dry, and mechanically profiled so the epoxy can bond at a molecular level. Professional preparation includes:
- Clearing and cleaning: Remove all items from the floor. Degrease any oil or chemical stains.
- Crack and spall repair: Fill cracks and divots with epoxy mortar or polyurea filler. Grind repairs flush with the surrounding surface.
- Diamond grinding: Use a floor grinder with diamond tooling to create a surface profile equivalent to CSP 2 to 3 (Concrete Surface Profile). This opens the pores of the concrete and creates the mechanical tooth needed for adhesion.
- Moisture testing: Perform a calcium chloride or relative humidity test to verify moisture levels are within acceptable limits.
- Vacuuming: Thoroughly vacuum all grinding dust and debris from the surface.
Step 2: Primer Application
A primer (also called a base coat or penetrating sealer) is applied to the prepared concrete. The primer soaks into the open pores of the concrete and creates a strong chemical bond between the substrate and the epoxy body coat. In spaces with elevated moisture, a moisture-mitigating primer is used instead.
The primer is typically applied with a squeegee and back-rolled with a 3/8-inch nap roller. It cures for 8 to 12 hours before the next coat is applied.
Step 3: Epoxy Body Coat Application
The epoxy body coat is the main layer of the system. The resin and hardener are measured precisely (ratio is critical), mixed thoroughly with a drill and mixing paddle, and applied to the floor within the product’s pot life window.
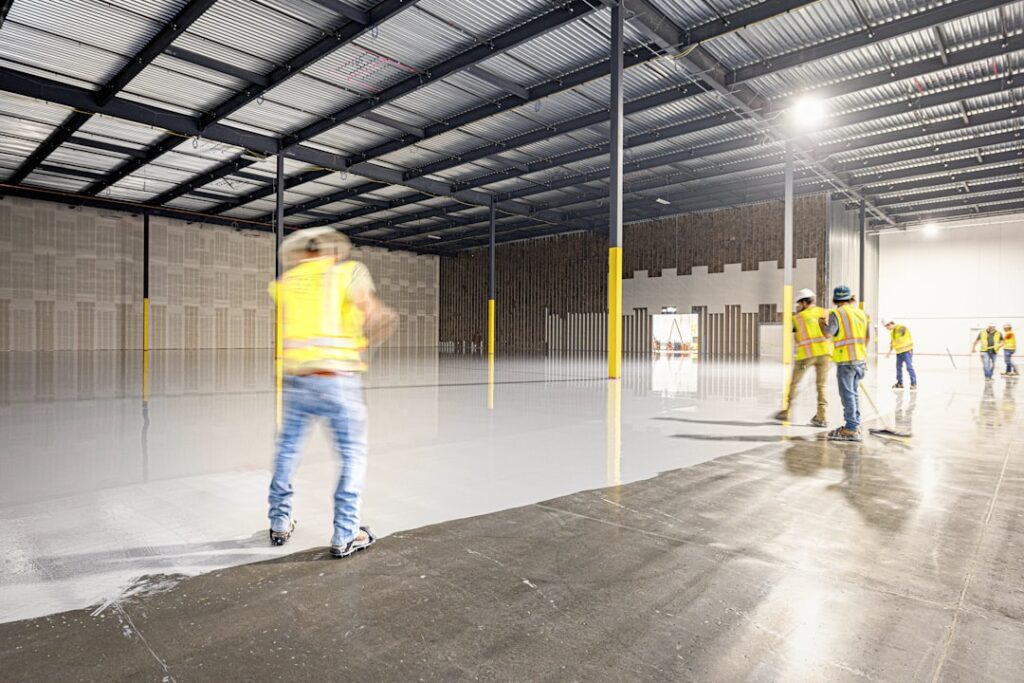
Application is done by pouring the mixed epoxy onto the floor in ribbons and spreading it evenly with a notched squeegee. A roller is then used to back-roll the surface and eliminate any air bubbles or lines. For flake systems, the vinyl flakes are broadcast by hand into the wet epoxy immediately after rolling. For metallic systems, the metallic pigments are manipulated with tools to create the desired visual effect.
Depending on the system, one or two body coats may be applied, with 12 to 24 hours between coats.
Step 4: Topcoat Application
A clear topcoat seals the entire system, adds UV protection, enhances gloss, and provides the final wear surface. Topcoat options include clear epoxy, polyurethane, and polyaspartic coatings. Polyurethane and polyaspartic topcoats offer superior UV resistance and abrasion performance compared to clear epoxy.
For flake floors, the cured flake surface is first scraped with a floor scraper to knock down any high points, then vacuumed before the topcoat is applied. This creates a smooth, easy-to-clean surface.
Step 5: Cure Time
After the final coat, the floor needs adequate time to cure before use:
- Light foot traffic: 24 to 48 hours
- Full foot traffic: 48 to 72 hours
- Vehicle traffic: 5 to 7 days
- Full chemical cure: 7 to 14 days
Temperature and humidity affect cure times. Warmer, drier conditions speed the cure, while cold or humid conditions slow it. Most professionals recommend maintaining a minimum temperature of 50 degrees Fahrenheit during application and curing.
Pros and Cons of Epoxy Flooring
Advantages
- Exceptional durability: Professional epoxy resin flooring withstands heavy foot traffic, vehicle traffic, impact, and abrasion for 10 to 20+ years.
- Chemical resistance: Epoxy resists oil, gasoline, brake fluid, antifreeze, bleach, and most household and industrial chemicals.
- Seamless and hygienic: No grout lines or seams mean no places for bacteria, mold, or dirt to accumulate.
- Easy maintenance: Regular sweeping and occasional mopping are all that is needed to keep an epoxy floor looking pristine.
- Design versatility: Available in virtually unlimited colors, patterns, and finishes from subtle solid hues to dramatic metallic swirls.
- Moisture resistance: A properly installed epoxy floor creates a waterproof barrier that protects the underlying concrete.
- Cost-effective long-term: Compared to other high-performance flooring, epoxy offers excellent value when lifespan is factored into the equation.
- Increased property value: A professional epoxy garage or basement floor is a recognized value-add in real estate.
- Light reflectivity: The glossy surface of an epoxy floor reflects light, brightening garages and basements by up to 300 percent.
Disadvantages
- Surface preparation is critical: Improper prep is the leading cause of epoxy failure. Shortcuts during this phase often lead to peeling and delamination.
- Slippery when wet: High-gloss epoxy can be slippery when wet unless an anti-slip additive or textured broadcast (flake, quartz) is incorporated.
- UV sensitivity: Standard epoxy can yellow or amber when exposed to prolonged direct sunlight. UV-stable topcoats or polyaspartic systems mitigate this issue.
- Long cure time: You cannot use the floor for several days after installation, which can be inconvenient for garages in daily use.
- Difficult to remove: Once installed, epoxy is very difficult and expensive to remove if you change your mind.
- Temperature sensitivity during application: Epoxy must be applied within a specific temperature window (typically 50 to 90 degrees Fahrenheit) for proper curing.
- Not suitable for every substrate: Epoxy requires a concrete or cementitious surface. It cannot be applied over wood, vinyl, or tile.
Durability and Lifespan
One of the most compelling reasons to choose epoxy flooring is its longevity. A professionally installed 100% solids epoxy system typically lasts 10 to 20 years in residential settings and 5 to 10 years in high-traffic commercial environments before requiring recoating. With proper maintenance and periodic topcoat renewal, an epoxy floor can remain in service for 20 to 25 years or more.
Factors that affect lifespan include the quality of the epoxy system, the thoroughness of surface preparation, the volume and type of traffic, exposure to chemicals, and the maintenance regimen. A garage floor that sees two passenger vehicles daily will last far longer than a commercial warehouse floor supporting forklift traffic eight hours a day.
When an epoxy floor does eventually show wear, it can usually be recoated rather than completely removed. A light sanding or grinding of the existing surface, followed by a new topcoat, restores the floor to like-new condition at a fraction of the original installation cost.
Maintenance and Care
One of the greatest advantages of an epoxy floor is how easy it is to maintain. The seamless, non-porous surface does not trap dirt, dust, or liquids, making cleaning fast and straightforward.
Routine Maintenance
- Sweep or dust mop: Remove loose dirt, sand, and debris regularly to prevent surface scratching from grit underfoot.
- Mop as needed: Use warm water with a mild, pH-neutral cleaner. Avoid harsh or acidic cleaners that can dull the finish over time.
- Spot clean spills: Wipe up chemical spills, oil, or other liquids promptly. While epoxy resists staining, prolonged exposure to certain chemicals can affect the topcoat.
Periodic Maintenance
- Deep clean: Use a mechanical floor scrubber or a deck brush with a degreasing cleaner every few months for garage and commercial floors.
- Inspect for damage: Check for chips, scratches, or areas of wear annually. Small areas can be touched up with matching epoxy to prevent damage from spreading.
- Recoat the topcoat: Depending on traffic levels, the clear topcoat may need renewal every 5 to 10 years. This is a straightforward process that restores gloss and protection without removing the entire system.
What to Avoid
- Do not use soap-based cleaners, which leave a haze on the glossy surface.
- Avoid dragging sharp or heavy objects across the floor without protection.
- Do not use abrasive scrub pads or steel wool, which can scratch the finish.
- Avoid exposing the floor to temperatures above 200 degrees Fahrenheit (e.g., from welding sparks or hot equipment) without a heat-resistant mat.
Design Options and Colors
Modern epoxy flooring offers an extraordinary range of design possibilities. Gone are the days when epoxy meant a plain gray or tan surface. Today’s systems can replicate the look of polished stone, flowing rivers, or custom branded environments.
Solid Colors
Solid-color epoxy provides a clean, uniform look. Popular colors include light gray, charcoal, beige, white, and black. Solid colors are the most affordable option and work well in garages, utility rooms, and commercial spaces where a clean, professional appearance is the priority.
Flake and Chip Patterns
Decorative vinyl flakes come in hundreds of color blends, from earth tones to bold multi-color combinations. Coverage can range from sparse (accent-level) to full broadcast (complete coverage). Full-broadcast flake floors resemble granite or terrazzo and are the most popular decorative choice for residential garages.
Metallic Effects
Metallic epoxy flooring creates dramatic, three-dimensional effects that shift with the light. Colors range from silver and copper to deep blue, emerald, and gold. The flowing, organic patterns make each floor a unique work of art. Metallic floors are increasingly popular in high-end residential basements, retail boutiques, and restaurants.
Quartz and Aggregate Finishes
Colored quartz aggregate creates a natural, stone-like finish with excellent slip resistance. Quartz systems are available in earth tones, neutral palettes, and vibrant color mixes. They are the preferred choice for commercial and institutional environments that need both beauty and safety.
Custom Logos and Patterns
Epoxy flooring can incorporate custom logos, borders, racing stripes, checkerboard patterns, and other design elements using stencils, vinyl decals, or multiple color pours. This capability makes epoxy a favorite for commercial branding, sports facilities, and homeowners who want a one-of-a-kind garage floor.
Best Uses for Epoxy Flooring
Epoxy flooring is remarkably versatile, but it excels in certain applications more than others. Here are the spaces where an epoxy floor coating delivers the greatest value.
Residential
- Garage floors: The number one application. Resists tire marks, oil, chemicals, and daily wear. See our garage flooring guide for more options.
- Basement floors: Creates a finished, moisture-resistant living surface. Explore more in our basement flooring guide.
- Workshops and hobby rooms: Easy cleanup and chemical resistance make epoxy ideal for workspaces.
- Laundry rooms: Waterproof, seamless surface protects against water damage.
- Home gyms: Withstands dropped weights and heavy equipment.
Commercial and Industrial
- Warehouses and distribution centers: Handles forklift traffic and heavy loads.
- Restaurants and commercial kitchens: Seamless surface meets health code sanitation requirements.
- Retail showrooms: High-gloss or metallic finishes create a premium shopping environment.
- Healthcare facilities: Non-porous surface supports strict hygiene protocols.
- Automotive shops and dealerships: Resists automotive chemicals, oils, and heavy equipment.
- Schools and universities: Quartz systems provide durability and slip resistance in high-traffic corridors.
DIY Epoxy Floor Kits
Retail DIY epoxy kits have made garage and basement floor coating accessible to handy homeowners. Understanding what is in a kit—and which product suits your project—is the first step to a result you will be happy with.
What Is in a Typical Kit
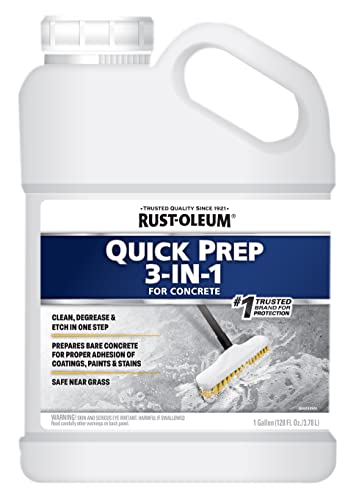
Most consumer kits contain a two-part water-based epoxy (resin plus hardener), an acid etch solution for surface preparation, decorative flake chips, and sometimes a clear topcoat. Coverage generally runs from 200 to 500 square feet depending on the product and the number of coats you apply.
Popular DIY Kits
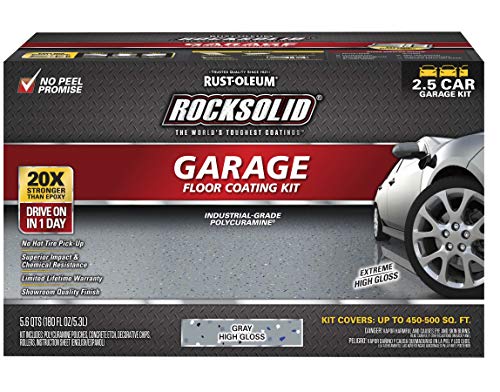
- Rust-Oleum RockSolid: A polycuramine formula (technically not a true epoxy, but similar in application) that cures in a single day and delivers good adhesion and a glossy finish. Covers about 500 square feet per kit. Roughly $120 to $170.
- Rust-Oleum EpoxyShield: A true water-based epoxy with decorative chips, applied as a two-coat system. It is the most widely stocked kit at home improvement stores. Covers 200 to 250 square feet per kit. Roughly $80 to $120.
- ArmorPoxy ArmorGarage: A more professional-grade kit with higher solids content and better abrasion resistance than typical big-box options. Includes primer, epoxy, and topcoat. Roughly $250 to $400 for a two-car garage kit.
- Epoxy-Coat Full Kit: A 100% solids kit built for experienced DIYers. It produces a thicker, more durable coating than water-based kits but requires faster application. Roughly $300 to $500 for a two-car garage.
DIY Success Tips
- Watch the temperature. Apply epoxy only when the concrete and air are between 50 and 85 degrees Fahrenheit. Too cold and it will not cure properly; too hot and it sets before you can spread it evenly.
- Never skip the etch or grind. It is tempting to shortcut surface prep, but a coating applied over unprofiled concrete will peel within months.
- Mix thoroughly. Scrape the sides and bottom of the container while mixing. Unblended resin or hardener leaves soft spots in the cured film.
- Work in sections and keep a wet edge. Epoxy that begins to set before you roll into it leaves visible overlap marks.
- Add a clear topcoat. A clear polyurethane or polyaspartic topcoat adds UV resistance, improves chemical protection, and makes the floor easier to clean.
Epoxy Flooring Cost Breakdown: DIY vs. Professional
Beyond the per-square-foot figures, it helps to see the full itemized cost of a real project. The numbers below are based on a standard two-car garage of approximately 450 square feet.
DIY With a Retail Kit
- Epoxy kit: $100 to $300
- Concrete cleaner and etch: $30 to $50
- Roller, brush, and mixing supplies: $30 to $50
- Clear topcoat (if not included): $60 to $100
- Total: $220 to $500
Professional Installation
- Single-color epoxy with broadcast flake: $1,800 to $3,500
- Full-broadcast flake system with clear topcoat: $3,000 to $5,500
- Metallic epoxy system: $4,000 to $8,000
- Commercial-grade system with multiple coats: $5,000 to $12,000
The DIY route saves roughly 60 to 80 percent over professional installation, but it produces a thinner, less durable coating. For a garage that sees moderate use and the occasional oil drip, a carefully applied DIY kit performs adequately. For showroom-quality results, maximum durability, and resistance to hot tire pickup, professional installation with a 100% solids system is worth the premium.
Frequently Asked Questions About Epoxy Flooring
How long does epoxy flooring last?
Professionally installed epoxy flooring typically lasts 10 to 20 years in residential settings such as garages and basements. In high-traffic commercial environments, expect 5 to 10 years before recoating is needed. The lifespan depends on the quality of the epoxy system, the thoroughness of surface preparation, traffic volume, and maintenance. DIY epoxy paint kits have a much shorter lifespan of 2 to 4 years. When an epoxy floor does wear, it can usually be recoated rather than replaced, extending its service life significantly.
Is epoxy flooring slippery?
A smooth, high-gloss epoxy floor can be slippery when wet. However, this is easily addressed by incorporating anti-slip additives into the topcoat or choosing a textured system such as flake, quartz, or aggregate epoxy. These decorative broadcasts create a naturally textured surface that provides excellent traction even when wet. For commercial applications where slip resistance is a safety requirement, quartz-filled systems are the standard choice. Always specify anti-slip properties when ordering your epoxy system if wet conditions are a concern.
Can epoxy flooring be applied over old concrete?
Yes, epoxy flooring can be applied over old concrete as long as the surface is structurally sound, clean, and properly prepared. Cracks, spalls, and divots must be repaired before coating. Previous coatings, sealers, or paint must be removed by diamond grinding, as epoxy will not bond to a sealed or painted surface. Moisture issues must also be resolved before application. A professional installer will assess the condition of your concrete and recommend any necessary repairs during the quoting process.
How much does epoxy flooring cost?
Epoxy flooring costs $3 to $12 per square foot for professional installation, depending on the type of system. Epoxy paint is the cheapest at $3 to $5 per square foot, while metallic and terrazzo systems can reach $12 to $25 per square foot. A standard two-car garage (500 sq ft) with a flake epoxy system typically costs $2,500 to $4,500. DIY kits range from $50 to $600 but produce inferior results. For a complete pricing breakdown, visit our epoxy flooring cost guide.
What is the difference between epoxy paint and real epoxy flooring?
Epoxy paint is a latex or acrylic paint with a small amount of epoxy resin added. It applies thin (2 to 4 mils), offers limited chemical and abrasion resistance, and typically lasts 2 to 4 years. True epoxy resin flooring is a two-component system (resin plus hardener) that undergoes a chemical cure to form a thick (10 to 20+ mils), rock-hard coating with superior adhesion, chemical resistance, and durability lasting 10 to 20 years. The performance difference is dramatic, which is why professionals strongly recommend true epoxy systems over epoxy paint for any application beyond a temporary cosmetic upgrade.
Can I install epoxy flooring myself?
You can attempt a DIY epoxy floor using retail kits, and for small, low-traffic spaces it may produce acceptable results. However, DIY epoxy installations have a high failure rate, primarily due to insufficient surface preparation. Professional installers use industrial diamond grinders that create the proper concrete surface profile for long-term adhesion—a step that most DIY kits replace with acid etching, which is far less effective. If you are coating a garage, basement, or any space where you expect 10+ years of performance, professional installation is strongly recommended. The upfront cost premium pays for itself many times over in longevity.
How long does epoxy floor coating take to cure?
Light foot traffic is typically safe after 24 hours. Vehicle traffic and heavy use require 48 to 72 hours for water-based products and up to 7 days for a 100% solids system. Full chemical resistance develops over 7 to 14 days. Temperature affects cure time significantly—cooler conditions extend it. Do not rush the cure, as premature use is a common cause of damage.
Can I apply epoxy over an existing epoxy floor?
Yes, provided the existing coating is well bonded and in decent condition. Scuff the surface with 80 to 120 grit sandpaper or a floor buffer fitted with a sanding screen to create an adhesion profile, clean it thoroughly, then apply the new coat. If the existing epoxy is peeling, flaking, or poorly bonded, it must be completely removed by grinding before you recoat.
Can I apply epoxy to a brand-new concrete floor?
New concrete must cure for at least 28 to 30 days before epoxy application, and many professionals recommend waiting a full 60 days to ensure the slab has fully dried. Always test moisture levels before applying. New concrete often has a surface curing compound that must be removed by grinding before the epoxy will adhere.
What is the difference between epoxy and polyaspartic floor coatings?
Polyaspartic coatings are a newer alternative that cures faster (4 to 6 hours versus 24-plus hours for epoxy), resists UV yellowing without an added topcoat, and stays flexible in cold temperatures. The tradeoffs are a higher price, a very short pot life that demands professional application, and slightly less chemical resistance than a 100% solids epoxy. Many professional systems now combine an epoxy base coat with a polyaspartic topcoat to get the best of both.
What is the difference between water-based and solvent-based epoxy?
Water-based epoxy has low VOCs, minimal odor, and easy soap-and-water cleanup, which makes it the most DIY-friendly and best suited to enclosed spaces with limited ventilation; it builds a thinner 3 to 5 mils per coat with slightly lower chemical resistance. Solvent-based epoxy penetrates deeper into the concrete and forms a harder, more chemical-resistant film at 5 to 8 mils per coat, but it releases strong fumes that require excellent ventilation and takes longer to dry. For maximum thickness and durability, a zero-VOC 100% solids system builds 10 to 20-plus mils per coat but is reserved for professional application.
How do I prevent hot tire pickup on my epoxy garage floor?
Hot tire pickup happens when tires warmed from driving bond to and lift a thin coating. To prevent it, choose a system rated for hot tire resistance, apply a thicker high-solids coating rather than a thin paint, and finish with a polyurethane or polyaspartic topcoat. Thorough surface preparation also matters, since a coating that is well bonded to a properly profiled slab is far more resistant to lifting.
Final Thoughts
Epoxy flooring stands out as one of the most durable, versatile, and visually appealing floor coating systems on the market. From a simple solid-color epoxy garage floor to a breathtaking metallic epoxy flooring installation in a commercial showroom, the range of options ensures there is an epoxy solution for virtually every space and budget.
The keys to a successful epoxy floor are thorough surface preparation, the right system for your specific application, and proper installation technique. While DIY kits can work for minor projects, professional installation remains the gold standard for any floor where long-term performance and appearance matter.
Whether you are upgrading your garage, finishing your basement, or exploring commercial epoxy flooring for your business, take the time to research your options, get multiple quotes, and invest in quality. A well-installed epoxy floor is a surface you will enjoy and rely on for years to come.
Popular Epoxy Flooring Guides
- Painting Garage Floor vs Epoxy: Key Differences Explained
- Polyurea vs Epoxy Garage Floor: Key Differences Explained
- Garage Floor Tiles vs Epoxy: Key Differences Explained
- Epoxy Grout vs Regular Grout: Which Should You Use?
- Is Epoxy Flooring Cheaper Than Tile? Cost Comparison
- Rubber Garage Flooring vs Epoxy: Which Is Better?
- Polycuramine vs Epoxy: Key Differences Explained
- Polyaspartic vs Epoxy: Which Garage Floor Coating Is Better?
- Epoxy Flooring vs Tiles: Which Is Better for Your Space?
- Garage Floor Paint vs Epoxy: Which Should You Choose?
- Epoxy vs Polyurethane Floor: Key Differences, Cost & Best Uses (2026)
- Epoxy Garage Floor Cost Per Square Foot: Average Prices and Budget Guide