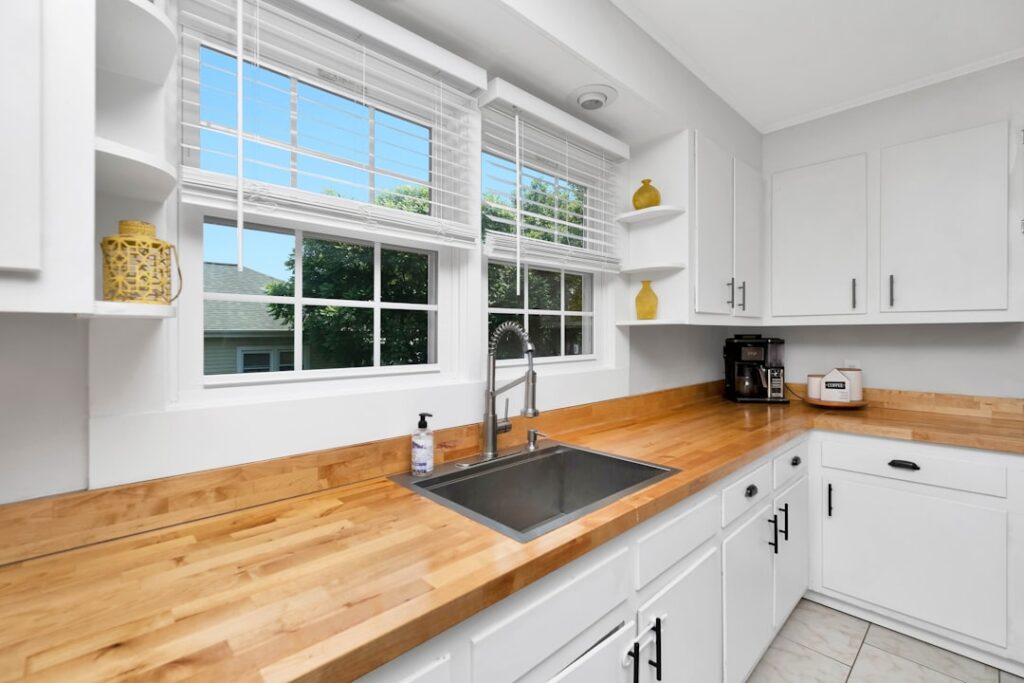
Building your own wood countertop from rough lumber is one of the most satisfying shop projects there is, and it’s genuinely achievable with intermediate woodworking skills. I’ve built edge-grain tops for my own kitchen, a rental unit, and several clients who wanted species the prefab market doesn’t carry. This guide covers how to make butcher block countertops start to finish: selecting and milling the lumber, running a glue-up that doesn’t turn into a panic, flattening the slab, and cutting it to final size. Expect a weekend of shop time per slab, plus cure and finish days, and a material cost of roughly half what a comparable prefab hardwood top sells for.
Part of our Countertops guide — explore the full guide →
Pick a Construction Style First
Everything downstream depends on which grain orientation you build.
- Edge grain — boards ripped into strips, flipped 90 degrees, and glued so the edges face up. This is the standard for countertops: strong, stable, reasonable glue-up complexity. It’s what this guide assumes.
- Face grain — wide boards glued edge-to-edge like a tabletop. Prettiest grain display, but softest surface and most seasonal movement. Fine for an island top you won’t chop on.
- End grain — the classic checkerboard chopping block. Kindest to knife edges and toughest surface, but it’s essentially two full glue-ups plus a flattening problem, and you cannot run end grain through most planers safely. Not a first project.
Choosing and Buying the Lumber
Buy 8/4 (two-inch rough) hardwood if you want a finished 1.5-inch-thick top, or 5/4 for a 1-inch top. Hard, closed-grain species are best for kitchen duty. Here’s what I’d expect to pay at a hardwood dealer in most US markets right now:
| Species | Rough 8/4 $/board ft | Notes |
|---|---|---|
| Hard maple | $6 – $9 | The classic; tight grain, food-friendly |
| Red oak | $4 – $7 | Cheap, but open pores trap gunk near sinks |
| White oak | $7 – $10 | Closed pores, water-resistant, great choice |
| Cherry | $7 – $10 | Softer; darkens beautifully with age |
| Black walnut | $10 – $16 | The showpiece; softer than maple but gorgeous |
| Ash | $4 – $6 | Underrated budget performer |
For a 25-inch by 96-inch by 1.5-inch top you need about 25 board feet of finished material — buy 35 to 40 board feet to cover milling loss, defects, and grain matching. That’s roughly $250 to $350 in hard maple. Pick straight-grained, flat boards; skip anything with pith, big knots on what will become the show edge, or twist you can see down the length. Let the lumber acclimate in your shop for a week minimum before milling.
Milling: Flat, Square, Repeatable
You need a jointer and a thickness planer for this project — or a friend with them. Mill in two sessions: skim mill everything 1/16 inch oversize, let the wood move overnight, then mill to final dimension.
- Rough-crosscut boards a couple inches over final length.
- Face-joint one face flat, then plane the second face parallel.
- Joint one edge square, then rip strips on the table saw about 1/8 inch over your final thickness target — for a 1.5-inch top, rip strips 1-5/8 wide from your 8/4 stock.
- Flip each strip so the ripped faces become top and bottom (that’s what makes it edge grain), and arrange them for grain and color. Chalk-mark a big triangle across the top so you can restore the order instantly.
Alternate the growth-ring orientation of adjacent strips if you can — it averages out cupping tendencies across the slab.
The Glue-Up: Strategy Beats Speed
A 25-inch-wide glue-up with 15-plus strips is unmanageable in one shot. Glue it in sub-panels of 5 to 6 strips each, then join the sub-panels. This keeps every glue-up inside your open time and lets you run the sub-panels through the planer before final assembly — a huge flattening shortcut if your planer is 13 inches wide.
- Dry-clamp first. Every joint should close with hand pressure. Fix gaps at the jointer now, not with clamp force later.
- Use Titebond III. Waterproof, food-safe cured, and its 10-minute open time is the most forgiving of the PVA family. A 16-ounce bottle does one countertop with some left over.
- Spread glue on both mating faces — a 3-inch rubber roller makes this fast. You want a thin, even film with small squeeze-out beads along the whole joint when clamped.
- Clamp alternating over-under every 8 to 10 inches, bottom clamps first, snugging from the center outward. Alternating sides balances the bowing force clamps induce. Aim for firm, even pressure — you should see a continuous line of small squeeze-out, not glue pouring out.
- Check for flat immediately. Lay a straightedge across the panel; if it’s crowning, a clamp across the top at the crown pulls it back. Cauls (straight boards clamped across the width, taped so glue won’t stick) are cheap insurance.
- Leave each sub-panel clamped 45 to 60 minutes, scrape the rubbery squeeze-out at that point (far easier than chiseling rock-hard beads tomorrow), and let panels cure a few hours before handling.
Then joint one edge of each cured sub-panel, plane them to a common thickness, and glue the sub-panels to each other the same way. This final joint is the one worth adding biscuits or splines to for alignment, because you can’t plane the assembled slab if it’s wider than your machine.
Flattening the Full Slab
If your sub-panels were planed before final assembly and the last glue-up was aligned carefully, you’re only leveling a couple of joints. Three routes:
- Belt sander then random orbit — 80 grit diagonally across the joints until level, then 100, 120, 150, 180 with the grain. This is the realistic DIY path; keep the sander moving and check with a straightedge often.
- Router flattening sled — a 1.5-inch surfacing bit riding on rails over the slab. Worth building if your glue-up came out wavy. Leaves mill marks you’ll sand out at 100 grit onward.
- Pay a cabinet shop — many will run your slab through a wide-belt sander for $50 to $100. Honestly the best money in this whole project.
Cutting to Size and Detailing
Trim the slab to final length with a track saw or circular saw against a straightedge, scoring the cut line first to prevent tear-out. Cut sink and cooktop openings with a jigsaw after drilling corner relief holes with a 1-inch bit — rounded inside corners resist cracking. Ease all edges with a 1/8-inch roundover or a hand-sanded chamfer; a crisp square edge on a wood top splinters at the first hip check. Seal every surface you can’t see later — underside, cutout edges, ends — with the same finish as the top. Unsealed undersides are the number one cause of cupped DIY tops, because the two faces gain and lose moisture at different rates.
Finishing and Installing
For a working surface you’ll cut on, flood with food-grade mineral oil until the wood stops drinking, then maintain monthly with oil or an oil-wax board cream. For a low-maintenance top you won’t chop on, a hardwax oil (Rubio Monocoat, Osmo TopOil) gives water resistance with easy spot repair; film-building polyurethane is toughest but must be fully stripped to repair. Install the finished top with screws through slotted or oversized holes in the cabinet stretchers — snug with washers, never glued down — so the slab can move seasonally. Across a 25-inch maple top, that movement is real: an eighth of an inch or more between January and July.
A few last shop truths. Buy more clamps than you think you need — a countertop glue-up wants at least ten. Don’t chase perfection on strip count and width; slight width variation in the strips reads as handmade character. And do the math before you start: at roughly $300 in maple, $20 in glue, and $30 in finish, you’ll build for well under half of a prefab walnut price and end up with a top in exactly the species, length, and thickness you wanted. That, plus the fact that you can say you built it, is the whole reason to make one.