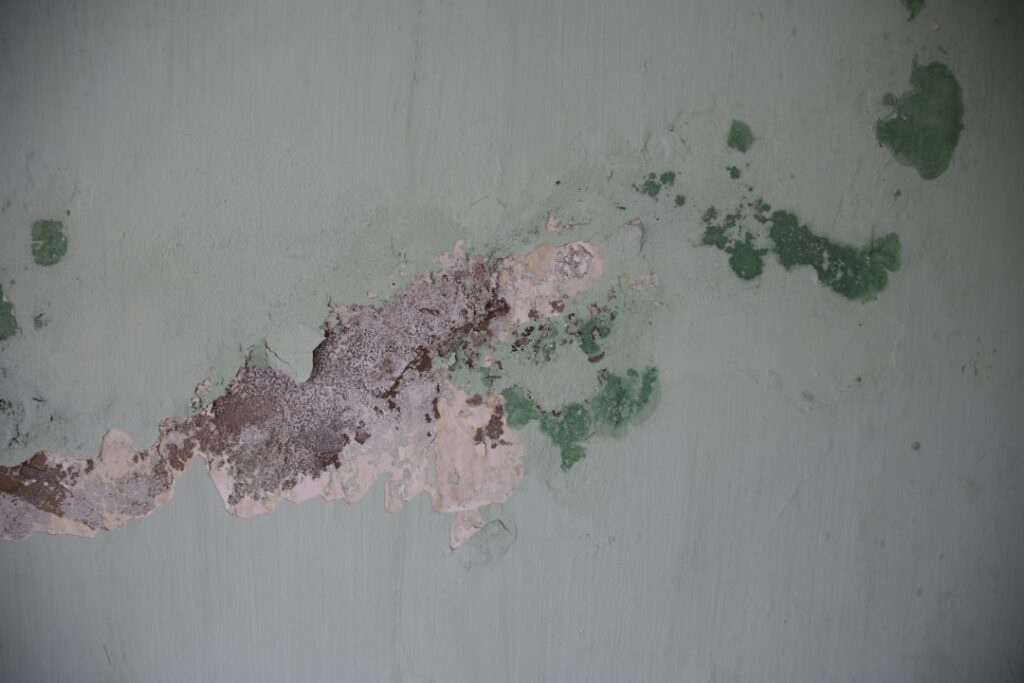
Chipped paint makes any room look neglected, but you don’t need to repaint the entire wall to fix it. Knowing how to repair chipped paint properly — with the right prep, filler, and blending technique — produces an invisible repair that lasts for years. This guide walks you through repairing chipped paint on every surface in your home: drywall, trim, doors, cabinets, and exterior siding.
Part of our Paint & Walls guide — explore the full guide →
- Why Paint Chips (And When to Worry)
- Tools & Materials Needed
- Repairing Chipped Paint on Walls (Drywall)
- Repairing Chipped Paint on Trim & Baseboards
- Repairing Chipped Paint on Doors
- Repairing Exterior Paint Chips
- How to Match Paint Perfectly
- Cost Breakdown
- Preventing Future Paint Chips
- Frequently Asked Questions
- Can I just paint over chipped paint without scraping?
- What is the best filler for chipped paint?
- How do I repair chipped paint on a textured wall?
- Why does my paint keep chipping in the same spot?
- How long does a paint chip repair take to fully cure?
- Is it better to brush or roll when touching up paint?
Why Paint Chips (And When to Worry)
Understanding the cause helps you choose the right repair method and prevent recurrence:
| Cause | What It Looks Like | Fix Difficulty |
|---|---|---|
| Impact damage (furniture, doorknobs) | Small localized chips with a clear impact point | Easy |
| Poor surface prep before painting | Paint peeling in sheets or large flakes | Moderate |
| Moisture infiltration | Bubbling or blistering before chipping; often near bathrooms, kitchens, or exterior | Moderate to difficult |
| Incompatible paint layers | Latex over oil (or vice versa) without proper primer | Moderate |
| Age & UV degradation | Chalky surface with fine cracking (alligatoring) | Moderate to difficult |
| Lead paint (pre-1978 homes) | Thick layers chipping in rigid flakes | Hire a certified professional |
Important safety note: If your home was built before 1978, test for lead paint before disturbing any chipped surfaces. Lead test kits cost $10–$15 at hardware stores. If positive, hire an EPA-certified lead abatement professional — do not sand or scrape lead paint yourself.
Tools & Materials Needed
| Item | Purpose | Cost |
|---|---|---|
| Putty knife (1.5″ and 4″) | Scrape loose paint, apply filler | $5–$10 |
| Lightweight spackle (or wood filler for trim) | Fill the chip depression | $5–$8 |
| Fine-grit sandpaper (150 and 220 grit) | Smooth filler, feather edges | $4–$6 |
| Sanding sponge | Contour sanding on curved surfaces | $3–$5 |
| Primer (bonding primer for tough spots) | Seal filler, improve paint adhesion | $8–$15 |
| Matching paint + small roller or brush | Top coat | $10–$20 (sample size) |
| Painter’s tape | Protect adjacent surfaces | $4–$6 |
| Damp cloth | Clean surface before priming | $0 |
| Drop cloth | Protect flooring | $3–$8 |
Total cost: $30–$70 for a typical repair — enough materials for multiple patches. Protect your hardwood floors or other flooring with a drop cloth before starting.
Repairing Chipped Paint on Walls (Drywall)
Step 1: Scrape Loose Paint
Use the 1.5-inch putty knife to scrape away all loose and flaking paint around the chip. Work outward from the center until you reach paint that’s firmly adhered. Don’t be shy — removing all loose material now prevents the repair from flaking later.
Step 2: Sand the Edges
Sand the transition between the chipped area and the surrounding paint with 150-grit sandpaper. The goal is a smooth, feathered edge with no sharp lip. This ensures the repair blends seamlessly.
Step 3: Clean the Surface
Wipe the area with a damp cloth to remove dust, grease, and debris. Let it dry completely (10–15 minutes).
Step 4: Apply Spackle
Load a small amount of lightweight spackle onto the 4-inch putty knife. Press it into the chip, overfilling slightly (spackle shrinks as it dries). Scrape the knife across the surface to level the filler flush with the surrounding wall. For chips deeper than 1/4 inch, apply in two thin layers rather than one thick layer.
Step 5: Sand Smooth
After the spackle dries fully (30–60 minutes for lightweight spackle), sand with 220-grit sandpaper until the patch is perfectly flush and smooth. Run your fingertips across the surface — you shouldn’t feel any edge.
Step 6: Prime
Apply a thin coat of primer to the patched area. Primer seals the spackle (which is more porous than the surrounding wall) so the top coat absorbs evenly. Without primer, the patched spot will appear duller or shinier than the rest of the wall — a dead giveaway.
Step 7: Paint
After the primer dries (1 hour minimum), apply matching paint using a small foam roller for walls or a brush for tight areas. Apply two thin coats rather than one thick coat, allowing 2–4 hours between coats. Feather the paint slightly beyond the repair area to blend.
Repairing Chipped Paint on Trim & Baseboards
Trim takes more impact damage than walls, especially near doorways and along laminate or hardwood baseboards where vacuum cleaners bump.
The process is similar to wall repair with two key differences:
- Use wood filler instead of spackle. Wood filler is harder when cured and holds up better to impacts on trim. Bondo or DAP Plastic Wood-X are excellent choices.
- Use a semi-gloss or gloss sheen. Trim is typically painted in a higher sheen than walls. Matching the sheen is as important as matching the color.
For deep gouges in wood trim, apply wood filler in layers, sanding between each. Shape the filler to match any molding profiles using a damp finger or a profile comb before it fully hardens.
Repairing Chipped Paint on Doors
Door edges and areas near handles chip from daily use. For a seamless repair:
- Scrape loose paint and sand the edges smooth.
- Apply auto-body filler (Bondo) for areas that take repeated impact — it’s harder than spackle and resists future chipping better.
- Sand to perfectly smooth and feather into surrounding paint.
- Prime with a bonding primer (Zinsser 1-2-3 or KILZ Adhesion).
- Apply 2 coats of matching paint. For doors, use a semi-gloss or satin finish for durability.
If a door is sagging and causing the paint to chip where it drags on the frame, fix the sag first — see our guide on how to fix a sagging door.
Repairing Exterior Paint Chips
Exterior repairs require weather-resistant materials and prompt attention — exposed wood absorbs moisture quickly and can rot.
- Scrape all loose paint with a stiff putty knife or paint scraper.
- Sand feathered edges with 80–100 grit sandpaper.
- Fill deep chips with exterior-grade wood filler or epoxy wood filler (for areas prone to moisture).
- Prime with an exterior bonding primer. Apply to bare wood and filler within 48 hours of scraping.
- Paint with 2 coats of exterior acrylic latex paint. Apply when temperatures are between 50°F and 85°F with no rain expected for 24 hours.
For larger exterior paint projects, an airless paint sprayer dramatically speeds up the process and provides a more even finish than brushing.
How to Match Paint Perfectly
The hardest part of any paint repair is matching the existing color. Here are your best options:
- Use leftover paint: If you saved the original can, stir it thoroughly (don’t shake). Even old paint stored properly works well for touch-ups.
- Take a chip to the paint store: Peel off a chip (dime-sized minimum) from an inconspicuous spot and have it color-matched at the paint counter. Most stores offer free computer matching.
- Use the color code: If you recorded the original paint formula (brand, color name, base), the store can mix an exact match.
- Buy a touch-up kit: Companies like Nix and ColorSnap offer smartphone-based color matching that’s surprisingly accurate for touch-ups.
Important: Even a perfect color match may look slightly different because the existing paint has faded from UV exposure. To minimize the contrast, feather the new paint well beyond the repair area and consider repainting the entire wall section from corner to corner.
Cost Breakdown
| Repair Scenario | DIY Cost | Professional Cost | Time |
|---|---|---|---|
| Small wall chip (under 2 inches) | $5–$15 | $75–$125 | 30 min + dry time |
| Multiple chips on one wall | $15–$30 | $100–$200 | 1–2 hours + dry time |
| Door or trim repair | $15–$35 | $100–$175 | 45 min + dry time |
| Exterior chip repair (small area) | $20–$50 | $150–$300 | 1–2 hours + dry time |
| Full wall repaint (to blend repairs) | $30–$60 | $200–$400 | 3–4 hours + dry time |
Preventing Future Paint Chips
- Always prime before painting. Primer is the adhesion layer — paint sticks to primer better than to bare surfaces or old paint.
- Use the right paint for the surface. Semi-gloss or satin on trim, doors, and high-traffic areas. Flat or matte on ceilings only.
- Install door bumpers ($2–$5) to prevent doorknobs from slamming into walls.
- Add chair rail or wainscoting in hallways and dining rooms where furniture causes repeated damage.
- Control humidity to prevent moisture-related chipping. Bathrooms need exhaust fans; kitchens need range hoods.
- Don’t apply latex over uncured or un-primed oil-based paint. The layers won’t bond and will peel within 1–2 years.
Frequently Asked Questions
Can I just paint over chipped paint without scraping?
No. Painting over loose paint creates a weak bond. The new paint will peel along with the old paint, often sooner than the original failure. Always scrape, sand, fill, and prime before applying the top coat.
What is the best filler for chipped paint?
For drywall walls, lightweight spackle (DAP DryDex or 3M Patch Plus Primer) is the best choice — it’s easy to sand, dries fast, and shrinks minimally. For wood trim, use a hardening wood filler like Bondo or DAP Plastic Wood-X. For areas taking repeated impacts, auto-body filler provides the most durable repair.
How do I repair chipped paint on a textured wall?
After filling and priming, replicate the texture before painting. For orange peel texture, use a can of spray-on texture (like Homax Orange Peel). For knockdown texture, apply joint compound with a knife, let it set for 10–15 minutes, then flatten slightly with a clean drywall knife. Practice on cardboard first to match the pattern.
Why does my paint keep chipping in the same spot?
Recurring chips in the same location usually indicate an underlying issue: moisture behind the wall, an impact source (like a door hitting the wall), or incompatible paint layers. Address the root cause before repairing — install a door stop, fix the moisture source, or strip the area back to bare surface and start fresh with a bonding primer.
How long does a paint chip repair take to fully cure?
Spackle dries in 30–60 minutes. Primer dries in 1 hour. Paint dries to the touch in 1–2 hours. However, full cure takes 2–4 weeks for latex paint. During curing, avoid washing or scrubbing the repaired area.
Is it better to brush or roll when touching up paint?
For small patches on smooth walls, use a 4-inch foam roller to match the existing roller texture. A brush leaves visible stroke marks that differ from the rolled surrounding area. For trim and molding, use a high-quality angled brush (Purdy or Wooster) to maintain a smooth finish.
Last updated: March 2026