Sealing brick the wrong way can cause more damage than leaving it bare. A glossy film-forming coating on an exterior wall can trap water inside the brick, and the next hard freeze pops the face right off. Knowing how to seal brick correctly comes down to choosing a breathable sealer, cleaning the surface first, and recognizing the situations where sealing is a bad idea in the first place.
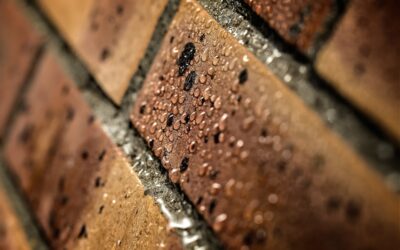
Brick is porous. It absorbs water when it rains and releases it as vapor when it dries. A good brick sealer reduces how much liquid water soaks in while still allowing vapor to escape. For most exterior brick, that means a penetrating silane, siloxane or blended silane/siloxane water repellent. For hearths and indoor brick, the goal shifts to stain and soot resistance, and the product choice shifts with it.
- How to Seal Brick: Decide Whether It Needs Sealing
- Choosing a Brick Sealer
- Tools and Materials
- Step 1: Inspect and Repair
- Step 2: Clean Efflorescence and Stains
- Step 3: Let the Brick Dry Completely
- Step 4: Protect Surroundings and Test
- Step 5: Apply the Sealer
- Step 6: Cure and Clean Up
- Ladder and Slip Safety
- Troubleshooting
- Cost Ranges
- When to Call a Professional
- Frequently Asked Questions
The steps are the same for patios, walls and hearths: inspect, clean, dry, test, apply and cure. The details differ, and the safety concerns differ too, from slippery patio surfaces to ladder work on tall walls.
How to Seal Brick: Decide Whether It Needs Sealing
Not every brick surface should be sealed. Skip it or get professional advice in these cases:
- Old, soft brick: handmade or low-fired brick from older homes (often pre-1900s) is soft and very porous. It needs to breathe, and sealers can trap moisture and salts, causing spalling. Many preservation specialists recommend leaving it unsealed.
- Active moisture problems: if water is coming through a wall from failed gutters, flashing or mortar, sealing the surface won’t fix it. Repair the source first.
- Cracked mortar joints: repoint failing joints before sealing, since water enters through gaps more than through the brick face.
- Brick that is already in good shape: modern, hard-fired brick in a dry climate often performs fine unsealed.
Good candidates include brick patios that stain from leaves, oil and grills; exterior walls exposed to wind-driven rain where water absorption tests show high porosity; and fireplace surrounds and hearths prone to soot staining.
Quick absorption test
Splash water on the brick. If it darkens and soaks in within a minute or two, the brick is absorbing a lot. If water beads or runs off, the brick is dense or was sealed before.
Choosing a Brick Sealer
The right sealer depends on location:
- Silane and siloxane penetrating repellents: the go-to choice for exterior walls and most patios. They soak into the pores and react to form a water-repellent lining, but leave the surface looking natural and breathable. Silanes penetrate deeply, siloxanes bond near the surface, and blends offer both.
- Film-forming acrylic sealers: create a coating on the surface, often with a sheen or “wet look.” They resist stains well on patios but reduce breathability and can turn slippery. Avoid them on exterior walls, especially in freeze-thaw climates.
- Hearth and fireplace sealers: water-based penetrating products formulated for interior masonry, often with stain resistance. The firebox interior is never sealed, and anything near the opening must be rated for the heat it will see.
For patios, look for a product that lists slip resistance or allows a grit additive. Wet-look sealers can make brick surprisingly slick in rain or when covered in leaves.
Tools and Materials
- Penetrating masonry sealer suited to the location
- Masonry sealer sprayer (low-pressure pump sprayer) or a wide masonry brush or roller
- Stiff nylon brush and a bucket
- Efflorescence cleaner or a masonry cleaner made for brick
- Garden hose with a spray nozzle
- Painter’s tape, plastic sheeting and drop cloths
- Chemical-resistant gloves, safety glasses and a respirator rated for the product’s vapors
- Extension ladder or scaffolding for walls, with a stable base
- Metal can with a lid for used rags
A low-pressure pump sprayer applies penetrating sealers efficiently on walls and patios. High-pressure airless sprayers can atomize the sealer and push it too far into the air, and they waste material.
Step 1: Inspect and Repair
Walk the surface and note cracked bricks, crumbling mortar, loose pavers and stains. Repoint damaged mortar and let it cure for the recommended time, often at least a few weeks, before sealing. Reset loose patio bricks and fix low spots that collect water, since sealing won’t stop puddles from causing problems.
On walls, check gutters, downspouts, window flashing and the top of the wall. Moisture coming from above or behind the brick has to be corrected first, or sealing may trap it inside.
Step 2: Clean Efflorescence and Stains
Efflorescence, the white chalky deposit on brick, is salt carried to the surface by moisture. Brush dry efflorescence off with a stiff nylon brush first. For stubborn deposits, use an efflorescence cleaner made for brick, following the label exactly. Wet the brick with water before applying an acidic cleaner, so the cleaner stays on the surface rather than soaking deep into the brick, then rinse thoroughly.
Never mix cleaning chemicals. Combining acid cleaners with bleach or other products can release toxic gas. Protect nearby plants, metal and glass from cleaners and rinse water.
For patios, scrub away moss, algae and dirt. Treat oil stains with a degreaser for masonry. On hearths, clean soot with a masonry soot cleaner and a brush, and avoid soaking the brick.
If efflorescence keeps coming back, water is moving through the brick. Find and fix that moisture source before sealing.
Step 3: Let the Brick Dry Completely
Brick must be dry for sealer to penetrate. Allow at least 24 to 72 hours of dry weather after cleaning or rain, depending on temperature and humidity. Check the label for temperature limits, often roughly 40 to 90°F, and avoid sealing in direct hot sun, which dries the sealer before it soaks in. Watch the forecast: you usually need 12 to 24 dry hours afterward.
Step 4: Protect Surroundings and Test
Cover windows, doors, plants, siding and trim. Mask off wood and metal. Ventilate any indoor area by opening windows and running fans, and turn off nearby pilot lights or flames if the sealer is solvent-based.
Test the sealer in a hidden area first and let it dry. Check for color change, darkening, gloss or slipperiness. Some penetrating sealers slightly darken brick, and enhancers do so deliberately.
Step 5: Apply the Sealer
Application technique is where how to seal brick differs most between surfaces, so match the method to the area you are treating.
Exterior walls
Apply from the bottom up with a low-pressure sprayer, saturating the brick until it runs down 6 to 8 inches below the spray. That “flood coat” method ensures the sealer soaks in. Work in manageable sections and keep a wet edge. Many products call for a second coat applied wet-on-wet, while the first is still damp; follow the label.
Patios
Spray or roll a thin, even coat. Avoid puddles, which dry into slick, glossy spots. Brush out any pooling in mortar joints or low areas. If using a film-forming sealer, mix in an anti-slip grit additive if the product allows it.
Hearths and indoor brick
Use a brush or roller, applying thin coats. Keep the fireplace cold and unused until the sealer cures. Never seal the firebox interior.
Wipe drips off glass and trim immediately.
Step 6: Cure and Clean Up
Keep foot traffic off a sealed patio for the time on the label, commonly 24 hours, and vehicles off longer. Keep the fireplace unused for the full cure time listed, which may be several days.
Handle rags carefully. Rags soaked with some solvent-based sealers can spontaneously combust as they dry. Lay them flat outdoors to dry, away from buildings, or put them in a sealed metal can filled with water. Dispose of leftover product according to local rules.
Ladder and Slip Safety
Sealing walls usually means ladder work. Set an extension ladder on firm, level ground with the base about 1 foot out for every 4 feet of height, and keep three points of contact. Don’t overreach while holding a sprayer. For walls of two stories or more, use scaffolding or hire a professional crew.
On patios, remember that any sealed brick can get slippery when wet, frosty or covered with leaves. Choose a non-glossy penetrating product or a slip-resistant additive, and keep doormats and outdoor rugs flat with non-slip backing so their edges don’t create a trip hazard.
Troubleshooting
White haze after sealing. Moisture was trapped, or excess film-forming sealer clouded. Light haze sometimes fades; heavy blushing may need a solvent recommended by the sealer maker.
Brick face flaking after a winter. Spalling suggests trapped moisture or soft brick. Stop sealing that area and consult a masonry professional.
Patio became slick. A glossy film was applied too heavily. Add grit in a top coat or have the film stripped.
Water still soaks in. The brick was damp during application, or the sealer has worn off. Recoat when the brick is dry.
Cost Ranges
Penetrating masonry sealer for a typical patio or one wall section usually costs from tens of dollars to over a hundred, depending on area and product quality. A pump sprayer and cleaner add a little more. Professional cleaning and sealing for a patio or a home’s brick walls varies widely, from a few hundred dollars for small areas to a few thousand for large multi-story homes, especially if repointing is needed.
When to Call a Professional
Hire a masonry contractor for historic or soft brick, active leaks, extensive repointing, spalling, or any wall over one story. A professional can test absorption, identify moisture sources, and choose a product that protects the brick without trapping water.
Frequently Asked Questions
How do you seal brick without trapping moisture?
Use a breathable penetrating silane, siloxane or blended water repellent, apply it only to dry brick, and fix leaks, mortar and drainage problems first.
Should I seal my brick patio?
Sealing helps resist stains, moss and weathering, but choose a product that keeps the surface slip-resistant. Penetrating sealers keep a natural look and better traction.
Can you seal a brick fireplace hearth?
Yes, with a sealer made for interior masonry. Never seal the inside of the firebox, and let the sealer cure fully before lighting a fire.
How often should brick be resealed?
Penetrating sealers on walls often last 5 to 10 years. Patios may need resealing every 2 to 5 years due to foot traffic and weather.
Why does white powder keep appearing on my brick?
That is efflorescence, caused by water carrying salts to the surface. Clean it, then find and fix the moisture source before sealing.