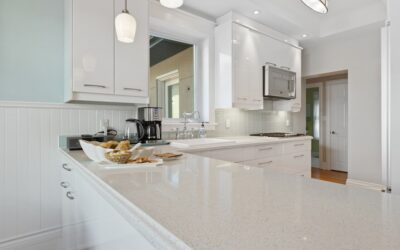
Two slabs sold under the same “quartzite” label can behave like completely different stones. One shrugs off a glass of red wine left overnight; the other drinks oil like a sponge and etches under a squeeze of lemon. Learning how to seal quartzite starts with figuring out which one you have, because porosity drives everything: how much sealer it needs, how many coats, and how often you will repeat the job.
Part of our Countertops guide — explore the full guide →
True quartzite is a metamorphic rock made of tightly fused quartz grains. It is hard and often fairly dense, but its porosity varies from slab to slab and even across a single slab. Some stones sold as quartzite are actually dolomitic marble or a mix, softer and more reactive to acids. Sealing doesn’t make any stone stain-proof. A good impregnating sealer slows liquid absorption so you have time to wipe spills before they soak in.
- How to Seal Quartzite: Test the Stone First
- Choosing a Sealer
- Tools and Materials
- Step 1: Clean and Dry the Countertop
- Step 2: Ventilate and Protect
- Step 3: Test the Sealer in a Hidden Spot
- Step 4: Apply the First Coat
- Step 5: Add More Coats if Needed
- Step 6: Let It Cure
- How Often to Reseal Quartzite
- Troubleshooting
- Cost Ranges
- When to Call a Stone Professional
- Frequently Asked Questions
The process takes an afternoon of work plus cure time. With the right tests up front, you will know whether your countertop needs sealing now, needs multiple coats, or barely needs anything at all.
How to Seal Quartzite: Test the Stone First
The water-drop test
Pour a few small puddles of water, about the size of a quarter, on different parts of the countertop: near the sink, near the cooktop, in a low-traffic corner and along any veining. Set a timer.
- Water beads and stays dark-free after 30 minutes: the stone is dense or already well sealed. Sealing can wait.
- The spot darkens within 5 to 15 minutes: the stone absorbs moderately and should be sealed.
- The spot darkens in under 5 minutes: the stone is quite porous and will likely need two or three coats.
Wipe the water away after the test. Darkened spots fade as the stone dries, which can take an hour or more.
The lemon test
Pick a hidden spot, such as the underside of an overhang or a remnant piece from the fabricator. Place a few drops of lemon juice and leave them for about 10 minutes, then rinse and dry. Run your fingers over the spot and look at it at an angle under a light.
If the surface turned dull or rough, the stone contains calcite and is behaving like marble. That doesn’t change the sealing steps, but it tells you that acids like lemon, vinegar and tomato sauce will etch the surface regardless of sealer, because etching is a chemical reaction rather than a stain. True quartzite usually passes the lemon test with no change.
The glass scratch test (optional)
On a remnant, try scratching the stone with a glass tile edge. Real quartzite is harder than glass and won’t scratch, while marble will. Never try this on your installed countertop.
Choosing a Sealer
Use an impregnating sealer (also called a penetrating sealer) made for natural stone. These sealers soak into the pores and leave behind a water- and oil-repellent barrier below the surface. They don’t change the stone’s look much, and they let it breathe.
- Solvent-based impregnators penetrate deeply and are often favored for dense stones like quartzite, because the solvent carrier helps the resin get into tight pores. They have stronger fumes.
- Water-based impregnators have less odor and easier cleanup. They work well on more porous stones and are a good choice in a home with poor ventilation.
- Enhancing sealers darken and enrich color, giving a “wet look.” Test on a remnant first since the change is permanent.
Avoid topical coatings or film-forming sealers on countertops. They sit on the surface, scratch, peel and can look cloudy, and they make future resealing a chore.
Check the label for food-contact safety after curing. Most impregnating stone sealers are considered safe for kitchen countertops once fully cured.
Tools and Materials
- Impregnating stone sealer suited to dense natural stone
- pH-neutral stone cleaner
- Lint-free microfiber cloths (several)
- Foam brush or small applicator pad
- Painter’s tape and plastic sheeting to protect cabinets and backsplash
- Nitrile gloves and safety glasses
- Respirator rated for organic vapors if using a solvent-based product, per the label
- Timer
Step 1: Clean and Dry the Countertop
Remove everything from the counters. Clean with a pH-neutral stone cleaner and warm water. Avoid vinegar, bleach, ammonia and abrasive powders, which can etch or dull the surface or interfere with sealer bonding.
Pay attention to existing stains. Sealing locks stains in place, so treat them first. An oil stain may need a poultice (a paste that draws oil out of the stone), applied and left for 24 to 48 hours. Water rings typically dry out on their own.
Let the countertop dry completely. Stone holds moisture, and sealer can’t penetrate water-filled pores. Wait at least 24 hours after cleaning, longer after a poultice or in humid weather.
Step 2: Ventilate and Protect
Open windows and run the range hood or a fan. Turn off any gas pilot lights and avoid open flames, since solvent vapors are flammable. Put on gloves and eye protection, and a respirator if the label calls for it. Never mix sealer with other chemicals or cleaners.
Tape off the edge of wood cabinets, painted walls and any backsplash you don’t want sealed.
Step 3: Test the Sealer in a Hidden Spot
Apply a small amount of sealer to an inconspicuous area, follow the full process, and let it cure. Check for haze, darkening or blotching. Every slab reacts a little differently.
Step 4: Apply the First Coat
Work in sections of roughly 3 to 4 square feet. Pour or spray a small amount of sealer onto the stone and spread it evenly with a foam brush or applicator pad. The surface should look uniformly wet without puddles.
Let it dwell for the time on the label, often 5 to 15 minutes. If spots dry and lighten during that time, they are absorbing quickly, so add a little more sealer there while the rest stays wet.
Before the sealer dries on the surface, wipe off all excess with a clean, dry microfiber cloth, buffing until the surface feels dry to the touch. Leftover sealer that dries on top leaves a sticky, hazy film that is harder to remove.
Step 5: Add More Coats if Needed
Most labels call for a second coat after a set time, often 20 minutes to an hour. Porous slabs that failed the water test quickly may take a third. Dense true quartzite sometimes absorbs so little sealer that a second coat just sits on top. If the stone stops absorbing, stop applying.
Repeat the water-drop test in a few spots after the final coat has dried. Water should bead or at least stay on the surface for much longer before darkening.
Step 6: Let It Cure
Impregnating sealers keep curing after the surface feels dry. Avoid setting anything wet on the countertop for the time on the label, often 24 hours, and avoid heavy cleaning for 48 to 72 hours. Full cure can take up to a week for some products.
Dispose of used rags as the label instructs. Rags soaked with some solvent-based sealers can heat up and catch fire as they dry. Lay them flat outdoors to dry, or put them in a sealed metal can filled with water before disposal.
How Often to Reseal Quartzite
Dense quartzite may need resealing only every two to five years. More porous slabs, or heavily used areas like around the sink, may need it yearly. Repeat the water-drop test every few months. When water darkens the stone within about 10 minutes, it is time to reseal.
Troubleshooting
Even with careful prep, a few problems come up often for people learning how to seal quartzite.
Hazy or streaky film after sealing. Excess sealer dried on top. Apply a small amount of fresh sealer to re-wet the area, then buff hard with a dry cloth.
Water still soaks in after sealing. The stone may need another coat, or the sealer couldn’t penetrate because the stone was damp. Let it dry and recoat.
Dull spots that look like water marks. These are likely etches from acids, not stains. Etching needs polishing, often by a stone professional.
Dark stain that won’t come out. Try a poultice made for the type of stain (oil, organic or rust). Deep stains may need professional help.
Cost Ranges
A bottle of quality impregnating sealer usually costs somewhere in the range of a modest dinner out and will cover a typical kitchen at least once or twice. Microfiber cloths, cleaner and tape add a little more. Professional sealing for an average kitchen usually costs a few hundred dollars, often more if cleaning, stain removal or polishing is included.
When to Call a Stone Professional
Call a stone restoration professional if your countertop has deep stains, widespread etching, cracks, or a failed topical coating that needs stripping. A pro can also confirm whether your slab is true quartzite or a softer stone, which helps set expectations for care and maintenance.
Frequently Asked Questions
Does quartzite need to be sealed?
Most quartzite benefits from sealing, but some very dense slabs absorb almost nothing. The water-drop test tells you whether yours needs it.
How many coats of sealer does quartzite need?
One to three coats, depending on porosity. Stop when the stone no longer absorbs sealer, and always buff off the excess.
Can I use granite sealer on quartzite?
Many impregnating sealers are labeled for granite, quartzite and other natural stones. Check that the label lists dense natural stone and follow the instructions.
Why did lemon juice dull my quartzite?
The stone likely contains calcite, which reacts with acid. Sealer won’t prevent this kind of etching, so wipe up acidic spills quickly.
How long after sealing quartzite can I use the countertop?
Light use is usually fine after 24 hours, but avoid wet items and heavy cleaning until the label’s full cure time has passed.