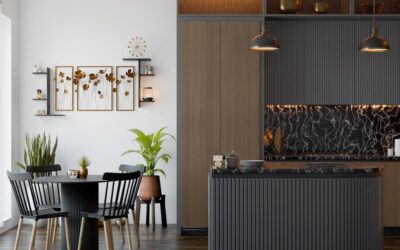
An industrial kitchen island borrows its look from old factories and commercial kitchens: raw metal, honest wood, exposed hardware, and nothing dressed up to look like something it isn’t. I build a lot of these because the style forgives wear. A scratch on a stainless top or a ding in reclaimed oak just adds character. If you want an island that looks intentional and takes a beating, this is the direction to go.
Part of our Kitchen Remodeling guide — explore the full guide →
What Makes an Island Read as Industrial
The style comes down to materials and exposed structure. A true industrial kitchen island shows its bones instead of hiding them behind finished panels. Think a welded steel frame you can see, bolted brackets, open shelving instead of closed cabinets, and a work surface that looks like it belongs in a shop. Warm it up with wood and it feels like a home; keep it all metal and it feels like a prep line. Most of my clients want something between the two.
The Core Materials
Four materials do most of the work in this style. You can mix them, but each brings its own cost and upkeep.
- Stainless steel: The commercial-kitchen classic. A 16-gauge stainless top is nearly indestructible, food-safe, and heat-resistant. Expect $70 to $150 per square foot fabricated. It scratches into a soft patina over time, which most people grow to like.
- Reclaimed wood: Salvaged barn oak, heart pine, or old-growth fir gives instant age. Reclaimed slabs run $40 to $120 per square foot depending on species and thickness. Seal it with a food-safe finish and it works as a real prep surface.
- Butcher block: New maple or walcut butcher block is the affordable workhorse at $30 to $80 per square foot. Oil it every few months and it lasts decades. It pairs perfectly with a black steel base.
- Concrete: A poured or precast concrete top reads heavy and modern-industrial. Budget $65 to $135 per square foot. It needs sealing to resist stains, and it’s heavy enough that the base has to be built for the load.
The Frame Does the Heavy Lifting
A black steel frame is the signature move. Powder-coated or blackened square tube steel, usually 1.5- or 2-inch stock, welded into a table-style base with visible corner joints and a lower shelf. A fabricator will build a custom base for $1,200 to $3,500 depending on size and detail. If you’re handier, prefabricated steel pipe-and-fitting kits let you assemble a smaller base for a few hundred dollars.
Exposed brackets and hardware sell the look. Angle brackets, carriage bolts, and turnbuckle-style tie rods all read industrial. Leave the fasteners visible instead of countersinking them. On open bases I’ll add a lower slat shelf in the same wood as the top to store baskets, cutting boards, and stock pots in plain sight.
Rolling Islands and Casters
One of the best things about this style is that it doesn’t have to be built-in. A freestanding industrial island on heavy-duty casters gives you a movable prep station, and it fits the factory-cart heritage perfectly. Use locking casters rated for the load; a loaded island can top 300 pounds, so look for casters rated at 200 to 300 pounds each. Cast-iron or steel casters with a brake read more authentic than plastic ones.
A few caster notes from experience:
- Buy locking casters on at least two of the four wheels so the island stays put while you work.
- Add caster height, usually 4 to 6 inches, into your total. A 34-inch base plus 4-inch casters plus a 1.5-inch top gets you close to standard 36-inch counter height.
- Skip casters entirely if you’re plumbing a sink or wiring outlets into the island. Rolling and utilities don’t mix.
What It Costs to Build
Cost depends almost entirely on the top and whether you go custom or off-the-shelf. Here’s what I see in 2026:
- Freestanding cart-style island: $600 to $2,000 for a prefab steel-and-wood unit on casters.
- Custom steel base plus butcher block or reclaimed top: $2,500 to $5,500 fabricated and installed.
- Stainless or concrete top on a custom frame: $4,000 to $8,000 for a large island.
Add plumbing or electrical and you’re layering another $800 to $2,500 on top, same as any built-in island. The metalwork and the top are where the money goes, not the assembly.
Styling It Without Overdoing It
Industrial tips into cold or cluttered easily. A few rules keep it warm and deliberate:
- Pair exactly one metal with one wood. Black steel with warm walnut, or raw steel with weathered oak. Two woods and two metals starts to look busy.
- Hang metal-shade or caged-bulb pendants above it. Aged brass or matte black domes, 30 to 36 inches above the top, tie the whole zone together.
- Use open shelving and hanging rails for tools and cast-iron pans. The clutter is the point when it’s organized.
- Keep the wood finish matte. High-gloss polyurethane fights the raw aesthetic; a hardwax oil or matte sealer looks right.
Sizing and Layout Basics
The industrial look doesn’t change the fundamentals of island planning. Keep 36 to 42 inches of clear walkway on every side, and more on the working side where a dishwasher or oven door swings open. A standard island runs about 36 by 72 inches at 36 inches tall, and that’s a fine starting point for an industrial build.
If you’re adding seating, give each stool 24 inches of width and 12 inches of counter overhang for knee room. On a steel-frame island, that overhang usually cantilevers off the frame itself, so tell your fabricator up front how far the top needs to project. A butcher block or reclaimed slab can carry a modest overhang on its own, but a heavy concrete top will need steel support brackets underneath, spaced every 24 to 30 inches.
Upkeep by Material
Each surface asks for something different, and knowing this before you buy saves regret later:
- Stainless steel wipes clean with mild soap and water. It will scratch and haze into a patina, which is part of the look; a stainless polish restores shine if you want it.
- Butcher block and reclaimed wood need food-safe mineral oil or a hardwax finish every one to three months, more often around the sink. Reseal any spot that starts to look dry or gray.
- Concrete must be sealed on install and resealed every year or two. Even sealed, it can etch from acids like lemon or vinegar, so treat it like a natural stone.
- Powder-coated steel frames are essentially maintenance-free; a raw or blackened steel frame may need an occasional wax to prevent surface rust in humid kitchens.
Storage and Function on an Open Frame
The open-frame look is beautiful, but it trades enclosed storage for display, so plan around that. A lower slat shelf carries the everyday load: stock pots, mixing bowls, and baskets that corral smaller items. Overhead, a hanging pot rack or a wall-mounted rail with S-hooks keeps cast-iron pans within reach and reinforces the working-kitchen feel.
If you need more closed storage than an open frame allows, you don’t have to abandon the style. A few approaches keep the look while adding function:
- Add one bank of metal or wood drawers at one end of the frame, leaving the rest open.
- Slide a pair of vintage-style rolling bins or metal crates onto the lower shelf.
- Mount a magnetic knife strip and a paper-towel bar on the steel frame itself.
- Hang a wire grid panel on the end for utensils and small tools.
The trick is to let the storage stay visible and organized. In this style, well-arranged tools out in the open are a feature, not a compromise, so lean into it rather than trying to hide everything behind doors.
Is It the Right Choice for You
An industrial island suits open-plan kitchens, lofts, and any home where a little rawness reads as intentional rather than unfinished. It’s forgiving, it ages well, and it costs less than a fully cabineted island if you go the open-frame route. If your kitchen leans traditional or you need every cubic inch enclosed for storage, a closed cabinet island may serve you better. But for a durable, characterful centerpiece that shrugs off daily abuse, an industrial build is hard to beat.