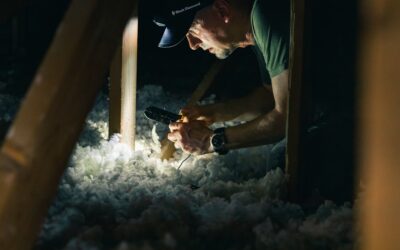
Spray foam is the only common insulation that air-seals and insulates in one pass, which is why it has become the go-to for rim joists, cathedral ceilings, and crawlspace walls. Installing spray foam insulation is also one of the least forgiving jobs a homeowner can take on: the chemistry has to be right, the temperature has to be right, and the safety gear is not negotiable. Get it wrong and you end up with shrinking, cracking foam, lingering odors, or a wall cavity you have to dig out by hand. This guide walks through the full process so you can decide whether to do a small DIY section or hand the job to a certified installer.
Before Installing Spray Foam Insulation: Know Your Foam
Every decision about installing spray foam insulation starts with choosing between open-cell and closed-cell foam. They look similar coming out of the gun but behave very differently once cured.
| Property | Open-cell | Closed-cell |
|---|---|---|
| Density | About 0.5 lb/cu ft | About 2 lb/cu ft |
| R-value per inch | About R-3.5 to R-3.8 | About R-6 to R-7 |
| Vapor retarder | No (vapor open) | Yes at roughly 1.5 to 2 in |
| Typical use | Interior walls, roof decks in some climates, sound control | Rim joists, basements, crawlspaces, exterior walls, high R-value in thin cavities |
Closed-cell foam adds some racking strength to walls and resists water, which makes it the better choice below grade and anywhere moisture is a concern. Open-cell foam expands much more, fills irregular cavities easily, and costs less per unit of R-value in deep spaces like rafter bays. Climate and your local energy code determine which is appropriate for a roof assembly, so check requirements before you buy.
DIY Kits vs. Professional Rigs
Homeowners typically work with two-component disposable kits. These come as a pair of pressurized tanks (the “A” side isocyanate and the “B” side resin blend) connected by hoses to a gun with a mixing nozzle. Kits are sold by board feet, meaning one square foot at one inch thick. A 200 board-foot kit runs roughly $350 to $500, and a 600 board-foot kit runs about $800 to $1,100.
Professional installers use truck-mounted proportioners that heat both components and hold precise pressure and ratio. That equipment produces more consistent foam over large areas, and contractor pricing usually lands around $1.00 to $1.50 per board foot for open-cell and $1.50 to $3.00 per board foot for closed-cell, including labor. For an entire attic or a whole house, professional installation is generally both safer and cheaper per board foot than stacking dozens of kits.
Where DIY kits make sense: rim joists, small crawlspace walls, sealing penetrations around a bump-out, or a single cathedral bay. Where they usually do not: whole attics, entire wall systems, or anywhere you cannot ventilate well.
Safety Gear and Ventilation
During application, spray foam releases isocyanate vapor and aerosols that can cause respiratory sensitization, and once someone is sensitized even small later exposures can trigger asthma-like reactions. Treat this section as mandatory.
- Respiratory protection: Follow the kit manufacturer’s instructions. Many specify a full-face respirator with organic vapor cartridges and particulate prefilters for small jobs; manufacturers and occupational safety guidance often call for supplied-air respirators for larger or enclosed work.
- Skin and eyes: Disposable coveralls with a hood, nitrile gloves, and eye protection (a full-face respirator covers this).
- Ventilation: Exhaust air from the work area to the outdoors with a fan, and keep make-up air coming in.
- Occupants: Keep family members and pets out of the house or the affected zone during application and for the re-entry period listed on the product, often 24 hours or more.
Shut off pilot lights, furnaces, and any ignition sources in the area. Components and some cleaning solvents are flammable, and freshly sprayed foam gives off heat as it cures.
Prep: Temperature, Surfaces, and Masking
Most application problems trace back to temperature. Kits typically want the chemical tanks warmed to roughly 70 to 85°F before spraying, and the substrate usually needs to be above a minimum temperature stated on the label, commonly around 60°F. Cold tanks produce off-ratio foam that stays soft, smells, or pulls away from framing. Bring tanks indoors a day ahead, and use a space heater to warm a cold basement before you start, then turn it off before spraying.
Surfaces must be clean, dry, and free of frost, oil, and loose debris. Wood moisture content should generally be under about 19 percent. Scrape off old insulation remnants, vacuum dust from rim joists, and fix any water leaks first, because foam will hide them.
Mask everything you do not want foamed. Overspray travels farther than people expect and bonds permanently to windows, flooring, wiring, and ductwork. Use plastic sheeting and painter’s tape, cover electrical boxes, and wear a hat under your hood. Any electrical work in the cavities should be finished and inspected before foam goes in.
Step-by-Step Application
- Shake and connect. Shake each tank per the instructions (often about a minute), attach the hoses, and open the valves fully.
- Test spray. Spray into a cardboard box or trash bag. The foam should come out the same color throughout, typically a uniform light color, and begin rising within seconds. Streaks or two-tone foam mean the ratio is off; stop and check tank temperature and valves.
- Spray in passes. Hold the gun roughly 18 to 24 inches from the surface and move steadily. For closed-cell foam, limit each pass to the maximum lift the manufacturer lists, commonly about 1 to 2 inches, and let it cool before adding the next. Spraying too thick at once can overheat the foam, causing shrinkage, cracking, or in rare cases fire.
- Seal edges first. Hit the joints where framing meets sheathing or foundation, then fill the field. At rim joists, run a bead along the sill plate and the top of the band joist before building up depth.
- Keep moving. Once you stop for more than about 30 seconds, the mixed chemical in the nozzle begins to cure. Swap nozzles when you pause; kits include extras for this reason.
- Check depth. Push a depth gauge or marked wire into fresh foam to confirm thickness, and add passes until you reach your target R-value.
Leave a small gap from electrical boxes, recessed fixtures, and flue pipes. Heat-producing appliances and chimneys require specific clearances to insulation, and foam must never contact a flue.
Curing, Trimming, and Covering
Foam becomes tack-free within minutes but continues to cure for hours. Keep ventilation running through the re-entry period stated on the product. Once cured, open-cell foam that bulges past the framing can be trimmed flush with a long serrated knife or a foam saw; closed-cell foam is harder and should be sprayed closer to final depth to avoid waste.
Building codes generally require spray foam in habitable spaces to be covered by an approved thermal barrier, most often 1/2-inch gypsum drywall, because exposed foam burns quickly and produces heavy smoke. In attics and crawlspaces entered only for service, an ignition barrier or a specially tested intumescent coating may be allowed instead. Your local building department sets the final word, so confirm which barrier applies before you finish the space.
Common Mistakes to Avoid
- Spraying from cold tanks or onto cold, damp surfaces.
- Applying closed-cell foam in one thick pass instead of multiple lifts.
- Filling a roof deck assembly without checking whether the attic will be vented or unvented, which changes code requirements.
- Burying knob-and-tube wiring or covering junction boxes that need to stay accessible.
- Ignoring re-entry times and moving the family back in too soon.
- Foaming over roof leaks, plumbing drips, or wet sheathing.
If a section turns out soft, discolored, or keeps smelling fishy days after application, it may be off-ratio. That foam generally needs to be removed and reapplied, which is far more work than getting the prep right the first time.
When to Call a Licensed Professional
Hire a trained, certified spray foam contractor for whole-attic, whole-wall, or unvented roof projects, for any job in an occupied home where you cannot isolate the area, and for anyone in the household with asthma or chemical sensitivities. Professionals should provide proper respiratory protection, ventilation plans, and product documentation, and many regions require permits and inspections for insulation work. Also bring in a licensed electrician if the cavities contain old or damaged wiring, and a roofer or building-science consultant when converting a vented attic to a sealed one.
Ask contractors which product they will use, its re-entry time, how many passes they plan for closed-cell foam, and which thermal or ignition barrier the finished assembly will get. A good installer will answer those questions without hesitation.
Is DIY Worth It?
For a few hundred board feet in an unfinished basement, a DIY kit can pay for itself quickly by sealing the leaky rim joist that most houses have. Beyond that, the math and the risk tilt toward professionals. Whichever path you choose, successful installing spray foam insulation comes down to the same fundamentals: the right foam type for the location, warm chemicals, clean and dry surfaces, proper protective equipment, controlled pass thickness, and a code-approved covering once the foam cures.