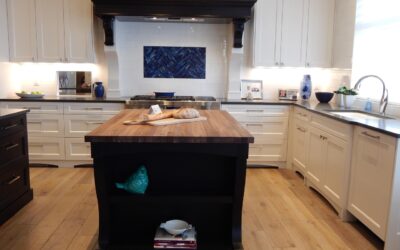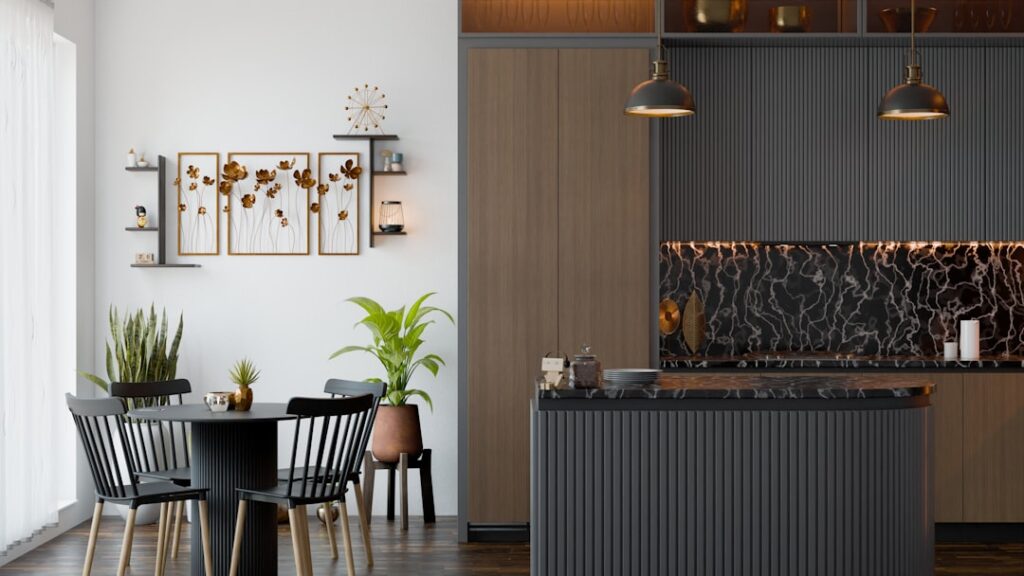
A kitchen island is the hardest-working piece of furniture in a modern home. It stores gear, seats the family, preps dinner, and anchors the whole room visually. If you are gathering kitchen island ideas photos for a remodel, the trick is to pair the look you love with real dimensions and clearances that make the island livable. Below I walk through the most popular styles, describe how each reads in photos, and share the sizing rules I use on every island I build.
Part of our Kitchen Remodeling guide — explore the full guide →
Waterfall Islands
The waterfall island is the showstopper in most design photos. The countertop material, usually quartz or a bold veined marble, wraps down the sides all the way to the floor, so the stone appears to pour over the edge like water. In photos it reads as sleek, modern, and expensive, and it is especially striking with a dramatic vein that continues around the corner in a bookmatched pattern. Budget for it: the extra stone and the precise mitered corners add $1,500 to $4,000 over a standard island top. Waterfall ends work best where the island is visible from a living space and you want a furniture-quality focal point.
Two-Tone Islands
One of the easiest ways to make an island pop is to finish it in a different color than the perimeter cabinets. Picture crisp white shaker wall and base cabinets around the room with a deep navy, forest green, or natural walnut island in the center. In photos this two-tone contrast gives the space depth and a designed, intentional feel without any structural change. It is also forgiving on budget, since you are only paying for a different finish on a handful of cabinets. Popular pairings I install constantly are white-and-navy, white-and-black, and painted perimeter with a stained wood island.
Seating Layouts
How you seat an island changes both the photo and the function. Three approaches dominate:
- Standard counter-height seating (36 in.): Stools tuck under a flush countertop, giving a clean, continuous line in photos. Best for casual eating and homework.
- Raised bar (42 in.): A second, higher tier hides prep mess from view and creates a classic bar look. It reads as more traditional and separates the cook from guests.
- Waterfall with seating on the long side: Modern and open, with the counter cantilevered so knees fit underneath.
Sizing rule: allow 24 inches of width per stool and at least 12 inches of countertop overhang for comfortable knee room, or 15 inches if the seating faces the room without a support panel underneath.
Storage and Function Ideas
The best islands earn their footprint with smart storage. In design photos, look past the pretty stone at what the base is doing. Deep pot drawers on the kitchen side, open shelving or wine cubbies on the seating end, a microwave drawer tucked below the counter, and a hidden trash pull-out all turn an island into a workhorse. Adding a prep sink or a second dishwasher makes a large island a true second workstation. If you cook often, an island with a cooktop and downdraft or an overhead hood becomes the heart of the kitchen, though it demands careful ventilation planning.
Materials and Finishes
Countertop choice sets the tone of every island photo. Quartz dominates now for its durability and consistent patterns; a marble-look quartz gives the high-end veined appearance without the staining risk of real marble. Butcher block on an island adds warmth and a farmhouse feel and photographs beautifully against painted cabinets. For a rustic or industrial look, a live-edge wood slab or a concrete top makes a strong statement. On the base, mixing a painted island with brass or matte-black hardware and a couple of statement pendant lights completes the picture that makes these islands so photogenic.
Lighting That Makes the Photo
Pendant lighting is what elevates an island from functional to magazine-worthy. The rule I follow: two to three pendants over a standard island, hung so the bottom of each fixture sits about 30 to 36 inches above the countertop. Space them evenly, and for a run of two pendants, center them within the island rather than aligning to the whole room. Oversized woven, glass globe, or matte-black dome pendants are the styles I see photographed most, and they instantly give the island a designer finish.
Island Shapes and Specialty Ideas
Most inspiration photos show a simple rectangle, but the shape is worth rethinking for your room. A standard rectangular island suits the majority of kitchens and is the easiest to fabricate. An L-shaped or angled island can wrap a cooktop and seating into two zones, ideal for open-concept great rooms. A double island, two separate rectangles, has become a signature of large luxury kitchens in photos: one dedicated to prep and cleanup, the other to seating and serving, with a wide walkway between them. Rolling or furniture-style islands, essentially a freestanding piece on casters or turned legs, give smaller kitchens flexibility and a curated, unfitted look that photographs with warmth.
A few specialty ideas that consistently photograph well and function beautifully: a curved seating end that softens a hard-edged kitchen, a built-in banquette attached to one end of the island for casual dining, open lower shelving to display cookbooks and baskets, and a contrasting butcher-block prep section set into a stone top. Panel-ready appliances tucked into the island, like a beverage fridge or a warming drawer, keep the look clean while adding real utility.
The trap with browsing endless island photos is falling for a look that fits a magazine kitchen but not yours. Before you commit, pull three or four images that share a common thread, whether it is a two-tone palette, a waterfall edge, or a specific pendant style, and hold them against your actual floor plan and cabinet finishes. Painters tape on the floor mapping the island footprint and its walkways is the cheapest, most eye-opening test you can run; stand at the imaginary counter and open your existing appliance doors to feel the clearances. If a full island crowds the space, a peninsula that attaches to the perimeter cabinets delivers much of the same seating and storage without demanding a walkway on all four sides.
Sizing and Clearance Rules
No island idea works if you cannot walk around it. These are non-negotiable dimensions I hold to on every job:
- Walkways: Minimum 36 inches of clearance around the island, and 42 to 48 inches on the working sides where the dishwasher or oven doors swing open.
- Minimum island size: Do not squeeze an island into a kitchen smaller than about 13 by 13 feet, or it will choke the walkways.
- Typical island footprint: 3 to 4 feet deep and 4 to 7 feet long for a comfortable, useful island.
- Support for stone: Overhangs past 12 inches need steel brackets or corbels so the countertop cannot crack under a leaning elbow.
Utilities are the other planning piece the photos never show. If your island will have a sink, a cooktop, an outlet run, or a dishwasher, the plumbing, gas, and electrical must be routed through the floor before the slab and cabinets go in, which means planning during rough construction, not after. Code also requires receptacle outlets on islands over a certain size, and they can be mounted in the side panel or a pop-up unit to keep the countertop clean. Factor the cost of trenching a slab or routing under a crawlspace into your budget early; it is a common surprise that adds $1,000 to $3,000 to an otherwise simple island.
Measure your room before you fall in love with a photo. As you collect kitchen island ideas photos, note the scale of the surrounding kitchen in each shot, because a waterfall showpiece that dazzles in a 300-square-foot kitchen will overwhelm a galley. Match the style you love to the space you actually have, respect the clearances, and your island will look as good in real life as it does in the inspiration photos. Start from function, layer in the style you have collected, and the finished island will be both the prettiest and the most useful surface in your kitchen.