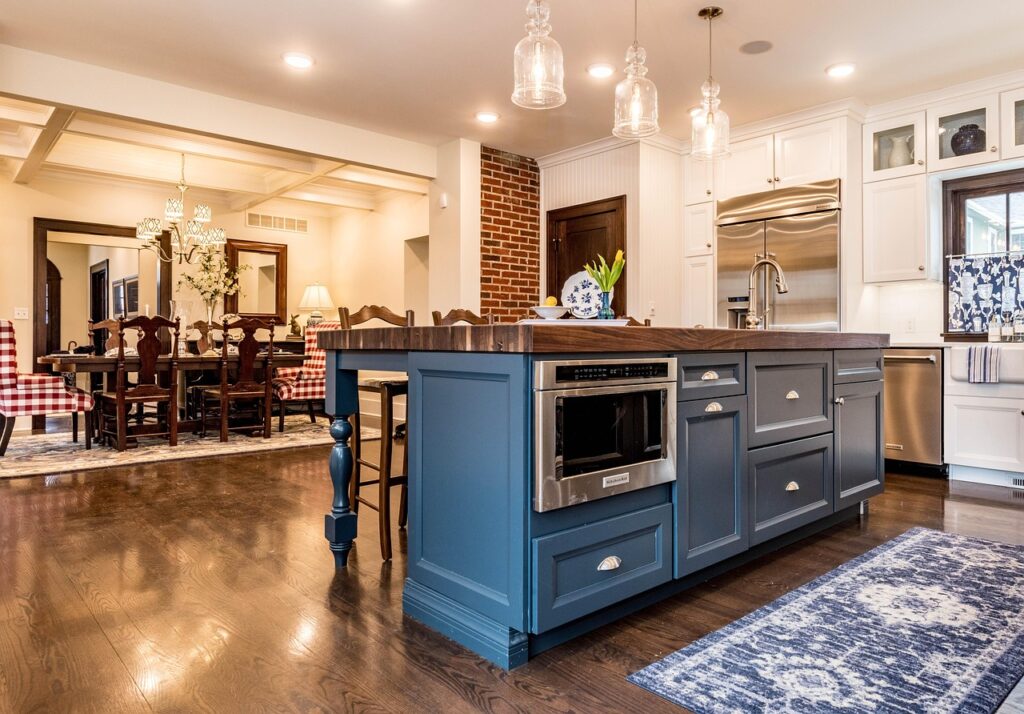
Putting the cooktop on the island is the design move that makes a kitchen feel like the heart of the home — the cook faces the room instead of a wall, and conversation flows while dinner comes together. But a kitchen island with cooktop is also the layout most likely to go wrong, because it introduces ventilation, clearance, and safety challenges that a wall-mounted range never faces. Get the planning right and you gain a social, functional centerpiece; get it wrong and you end up with grease on the ceiling and no room to work.
Part of our Kitchen Remodeling guide — explore the full guide →
- The Big Question: Ventilation
- Clearances and Work Space
- Gas vs Induction vs Electric
- Seating and the Cooktop
- Electrical, Gas, and Plumbing Runs
- Code and Safety Requirements
- What It Costs
- Countertop Material Around the Cooktop
- Sizing the Island Around a Cooktop
- Downdraft vs Overhead Hood in Practice
- Frequently Asked Questions
- Final Planning Advice
The Big Question: Ventilation
An island cooktop’s number-one challenge is capturing smoke and grease with no wall behind it to mount a hood. You have two realistic solutions, and this decision shapes the whole design.
- Island (ceiling-mounted) hood — a hood suspended from the ceiling above the island. It vents effectively but is a large visual element and requires ductwork routed through the ceiling. Expect at least a 600 CFM hood for gas.
- Downdraft ventilation — a vent that rises behind the cooktop or sits flush and pulls smoke downward, ducted through the floor or cabinet base. It keeps sightlines open but is generally less effective than an overhead hood, especially for tall stockpots.
Overhead hoods clear the air better; downdrafts preserve the open look. Choose based on how much and how heavily you cook.
Clearances and Work Space
A cooktop needs surrounding counter space to be usable and safe. Landing area on both sides is where you set hot pans and prep. Follow these clearances:
- At least 12 inches of counter on one side of the cooktop and 15 inches on the other — 18 to 24 inches is better
- Never put the cooktop at the very edge of the island; keep pot handles away from walkways
- 36 to 42 inches of walkway around the island so people can pass while you cook
- Keep the cooktop away from any seating side so guests aren’t next to hot burners and splattering oil
Cramming a cooktop into a small island with no landing space is the most common and most dangerous planning mistake.
Gas vs Induction vs Electric
The cooktop type affects ventilation needs, safety, and installation.
- Gas — beloved by cooks for instant heat control, but it produces the most combustion byproducts and demands the strongest ventilation and a gas line run to the island.
- Induction — the smart choice for an island. It heats the pan, not the air, so it generates far less ambient heat and smoke, stays cool to the touch around the burner, and is the safest option near seating and children.
- Radiant electric — a budget-friendly middle ground, though the surface stays hot after cooking.
For an island, induction is worth serious consideration — its safety and lower ventilation burden fit the layout better than gas.
Seating and the Cooktop
Many homeowners want both a cooktop and bar seating on the island, and you can have both if you plan the geometry. The key is separation: place seating on the opposite side or end from the cooktop, ideally with a raised counter or a slight offset so diners aren’t in the splatter and heat zone. A two-level island — cooking surface at 36 inches and a raised bar at 42 inches — creates a natural barrier between the hot zone and guests.
Electrical, Gas, and Plumbing Runs
Everything the cooktop needs has to travel to the middle of the room, which drives cost and complexity. Depending on your choice you may need:
- A dedicated 240-volt circuit for an induction or electric cooktop
- A gas line run through the floor to the island for a gas cooktop
- Ductwork through the ceiling or floor for ventilation
- Adequate cabinet clearance below for the cooktop’s depth and any downdraft mechanism
These runs are why island cooktops cost more than wall installations. Routing them is far easier during new construction or a full remodel than as a retrofit.
Code and Safety Requirements
Local codes govern island cooktops, and they exist for good reason. Common requirements include minimum clearances to combustibles, proper ventilation sizing, and a receptacle placement that keeps cords away from the cooking zone. Gas installations require a licensed plumber and often an inspection. Always pull the required permits — an unpermitted gas or 240-volt install can void insurance and create real hazards. When in doubt, hire licensed trades for the gas, electrical, and ventilation work.
What It Costs
A kitchen island with cooktop costs more than a standard prep island because of the utilities and ventilation.
- The cooktop: $600 to $2,500 depending on type and quality
- Ventilation (hood or downdraft): $800 to $3,000 plus ducting labor
- Gas/electrical/duct runs: $1,000 to $4,000 in labor and materials
- Island cabinetry and countertop: $2,000 to $8,000+
All told, a full island-with-cooktop project commonly lands between $5,000 and $15,000, with high-end designs going well beyond.
Countertop Material Around the Cooktop
The surface flanking the cooktop takes heat and the occasional slid-across hot pan, so choose a heat-tolerant material. Quartz resists stains and scratches but can discolor under extreme direct heat, so always use a trivet. Granite and quartzite handle heat exceptionally well and are natural choices around a cooktop. Whatever you choose, plan for a non-combustible material immediately surrounding the burners per code.
Sizing the Island Around a Cooktop
A cooktop steals usable island real estate, so the island itself has to be big enough to give it back. As a rule of thumb, plan an island at least 7 feet long if it carries a 30-inch cooktop plus the landing space code and safety demand, and longer still if you also want seating. Depth matters too: a standard 25-inch-deep island barely fits the cooktop and leaves no room behind it, so many island-with-cooktop designs run 27 to 42 inches deep, which also creates a buffer between the burners and anyone seated on the far side.
If your kitchen can’t spare a 7-foot island, it’s usually better to keep the cooktop on a perimeter wall and reserve the island for prep, seating, or a sink. Forcing a cooktop into an undersized island is how homeowners end up with pans hanging over the edge and nowhere to set a hot lid.
Downdraft vs Overhead Hood in Practice
The ventilation choice deserves a closer look because it affects both performance and resale. Overhead island hoods should extend a few inches beyond the cooktop on each side and hang about 30 to 36 inches above the surface — high enough to clear sightlines and tall pots, low enough to actually capture smoke. For gas, size the hood at roughly 100 CFM per 10,000 BTUs of burner output, and remember that any hood moving 400 CFM or more may trigger a code requirement for make-up air.
Downdraft systems appeal because they vanish when not in use, but they fight physics — heat and smoke rise, and a downdraft has to pull them the wrong way. They perform acceptably with induction and low-profile cookware and poorly with tall stockpots or a wok. If you cook heavily or love gas, an overhead hood is the honest choice; if the open sightline is non-negotiable and you cook lighter, a quality downdraft paired with induction is a reasonable compromise.
Frequently Asked Questions
Do I legally need a range hood over an island cooktop?
Code varies by jurisdiction. Many areas require mechanical ventilation vented to the outside for any cooktop, while some allow recirculating (ductless) systems. Gas installations almost always require exterior-vented ventilation. Check your local code and pull a permit before finalizing the design.
Is induction really safer for an island with seating?
Yes. Induction heats only ferrous cookware, so the surface around the pan stays relatively cool, there’s no open flame, and most units shut off when the pan is removed. That combination makes it the safest choice when children or seated guests are near the cooking surface.
Can I add a cooktop to an existing island?
Sometimes, but it’s rarely simple. You’ll need to run electrical, gas, or ductwork to the island’s location — often through a slab or crawlspace — and confirm the island is large enough for required clearances. Retrofits cost more than building the utilities in during a full remodel.
Final Planning Advice
A kitchen island with cooktop can be the best decision in your remodel or the most frustrating, and the difference is entirely in the planning. Solve ventilation first, guarantee generous landing space on both sides, keep seating clear of the hot zone, and strongly consider induction for its safety and lower ventilation demands. Budget realistically for the utility runs, pull the right permits, and use licensed trades for gas and electrical. Nail those fundamentals, and you’ll have a social, hard-working centerpiece that makes cooking a shared experience instead of a solitary one.