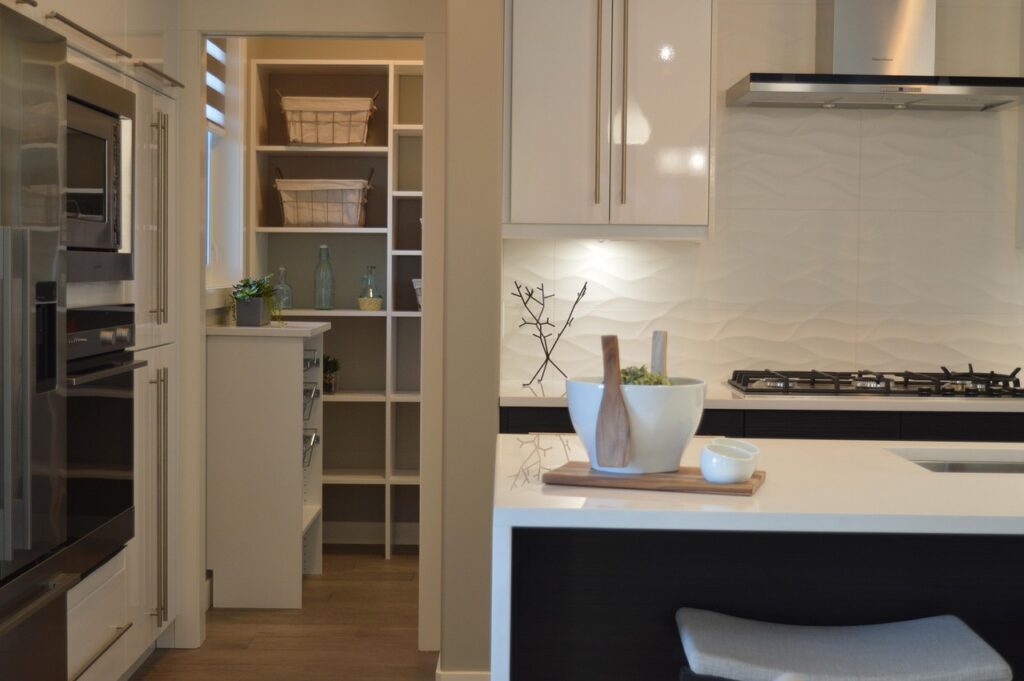
Cooking at the center of the room, facing your guests, is the appeal that drives many remodels. Designing a kitchen island with stove involves more than dropping a cooktop into a counter; you must plan ventilation, clearances, utilities, and safety. This guide covers everything you need to build one that works and meets code.
Part of our Kitchen Remodeling guide — explore the full guide →
- Cooktop vs. Range in an Island
- Ventilation Is Non-Negotiable
- Clearances and Safety
- Gas vs. Electric vs. Induction
- Running Utilities to the Island
- Seating and the Cooktop
- Sizing the Island
- Counter Material Considerations
- Realistic Cost Range
- Downdraft vs. Overhead Hood in Detail
- BTU and Power Requirements
- Working With Permits and Inspections
- Storage Around the Cooktop
- Common Mistakes to Avoid
- Induction Cooktops for Islands
- Countertop Overhang and Support
- Planning the Overall Layout
- Final Thoughts
Cooktop vs. Range in an Island
Most island cooking setups use a drop-in cooktop rather than a full freestanding range, because a cooktop keeps the island profile clean and frees the space below. If you want an oven in the island, a slide-in range is possible but limits under-island storage and changes the ventilation plan. Many homeowners pair an island cooktop with wall ovens elsewhere.
Ventilation Is Non-Negotiable
Island cooktops need dedicated ventilation, and this is the biggest design driver. Because there is no wall behind the cooktop, you cannot use a standard wall-mounted hood.
- Island (ceiling-mounted) hood: Hangs above the cooktop; needs ducting through the ceiling.
- Downdraft vent: Rises from behind the cooktop and pulls smoke down and out; frees overhead sightlines but is less effective for tall pots.
Size the hood to cover the full cooktop, ideally extending 3 inches past each side, and aim for at least 300 to 600 CFM for typical home cooking.
Clearances and Safety
Building codes and manufacturer specs set minimum clearances that keep the island safe.
- Leave at least 9 to 12 inches of counter on each side of the cooktop for pot handles and safe landing space.
- Maintain 30 inches of vertical clearance between the cooktop and a combustible surface above, or follow the hood’s rating.
- Keep 36 to 48 inches of walkway around the island so people can pass while you cook.
Gas vs. Electric vs. Induction
Your fuel choice affects utilities and ventilation. Gas cooktops need a gas line run to the island and stronger ventilation for combustion byproducts. Electric and induction need a dedicated 240-volt circuit. Induction is increasingly popular for islands because the surface stays cooler, reducing burn risk where kids and guests gather, and it produces less ambient heat.
Running Utilities to the Island
An island cooktop requires services routed through the floor, which usually means opening the subfloor.
- Electric or induction: a dedicated 240V, 40 or 50 amp circuit run through the slab or floor joists.
- Gas: a gas supply line stubbed up inside the island cabinetry, pressure-tested by a licensed plumber.
- Ventilation: ductwork routed up through the ceiling for an island hood, or down through the floor for a downdraft.
These runs are why island cooktops cost more than a standard island; expect to add for electrical, gas, and possibly a permit and inspection.
Seating and the Cooktop
Combining seating with a cooktop takes careful zoning. Keep diners out of the splatter and heat zone. A raised bar behind the cooktop creates a barrier, or place seating at the opposite end of the island. Never seat guests directly across a flush cooktop where hot pans and grease are within reach of children.
Sizing the Island
A cooktop island needs to be larger than a simple prep island. Plan for the cooktop width (usually 30 or 36 inches) plus 9 to 12 inches of landing space on each side, so the island should be at least 60 to 72 inches long. Depth of 40 to 42 inches allows the cooktop plus a comfortable overhang or a second work zone.
Counter Material Considerations
Choose a heat-tolerant countertop around the cooktop. Quartz resists stains but can scorch under direct heat, so use trivets. Granite and porcelain handle heat better. Whatever the material, the fabricator must cut a precise opening and support the counter around it, since a cooktop cutout weakens the slab.
Realistic Cost Range
A kitchen island with a built-in cooktop typically costs more than a plain island because of utilities and ventilation. Budget roughly:
- Cooktop: $500 to $2,500.
- Island hood or downdraft: $600 to $3,000.
- Electrical and gas runs: $800 to $3,000.
- Cabinetry, counter, and cutout: $2,000 to $8,000.
All in, a functional cooktop island commonly lands between $5,000 and $15,000.
Downdraft vs. Overhead Hood in Detail
The ventilation choice deserves a closer look because it shapes the whole island. Overhead island hoods are the most effective at capturing rising smoke, steam, and grease, since heat naturally rises into them. The downside is a large fixture hanging in the middle of the room, which can block sightlines in an open floor plan. Downdraft vents pop up from behind the cooktop and pull air down and out, preserving clean sightlines, but they fight physics by pulling heat downward and are less effective with tall stockpots or high-BTU gas burners. Choose overhead for serious cooking and downdraft when open sightlines are the priority.
BTU and Power Requirements
Match your ventilation and utilities to the cooktop’s output. Gas cooktops are rated in BTUs; a typical residential burner runs 5,000 to 18,000 BTU, and high-output models demand stronger ventilation, often 100 CFM of hood capacity per 10,000 BTU. Electric and induction cooktops need a dedicated 240-volt circuit, commonly 40 or 50 amps for a 36-inch unit. Undersizing the circuit or the ventilation is a common and costly mistake, so size both to the appliance you actually plan to buy.
Working With Permits and Inspections
Island cooktop projects almost always require permits because they involve electrical, gas, or both.
- Pull the appropriate permits before work begins; your contractor usually handles this.
- Gas lines must be pressure-tested and inspected before the cooktop is connected.
- 240-volt circuits must be inspected for proper wire gauge and breaker sizing.
- Keep the signed-off inspection records for insurance and future resale.
Skipping permits can void insurance coverage and complicate a home sale, so it is never worth the shortcut on gas or high-voltage work.
Storage Around the Cooktop
A cooktop consumes island storage space, so plan the remaining cabinetry carefully. The area directly below a gas cooktop often houses the burner box and cannot be a standard drawer, while an induction unit leaves more usable space beneath. Flank the cooktop with deep pan drawers for pots and a pull-out for cooking oils and utensils, keeping everything you reach for while cooking within an arm’s length. A built-in utensil rail or spice pull-out keeps the counter clear.
Common Mistakes to Avoid
Skipping proper ventilation is the top error; grease and moisture will coat nearby cabinets and ceilings. Undersizing landing space is second, leaving nowhere to set hot pans. And forgetting the permit can create insurance and resale problems, since gas and 240V work usually requires inspection.
Induction Cooktops for Islands
Induction is an increasingly popular island choice for good reason. Because it heats the pan directly through magnetism rather than heating the surface, the cooktop stays cooler to the touch, which is safer where guests and children gather around an island. Induction also produces less ambient heat and requires less powerful ventilation than a high-BTU gas burner, since there are no combustion byproducts. The trade-offs are a dedicated 240-volt circuit and the need for magnetic (ferrous) cookware. For open-concept island cooking, induction’s safety and cool operation are compelling.
Countertop Overhang and Support
If your island combines a cooktop with seating, the overhang for stools needs proper support. A standard overhang of 12 inches can cantilever on most stone, but longer overhangs require corbels or steel supports underneath to prevent cracking, especially where a cooktop cutout has already weakened the slab. Discuss the layout with your fabricator so the cutout and the seating overhang are engineered together. Skimping on support risks a cracked counter around the very cooktop opening that concentrates stress.
Planning the Overall Layout
Position the cooktop island within the kitchen work triangle so the sink, refrigerator, and cooking zone are all a comfortable few steps apart. Keep the cooktop oriented so pot handles do not extend into walkways where they could be bumped. Leave landing space beside the cooktop for setting down hot pans, and route the primary walkway around, not through, the cooking zone. Thoughtful placement makes the island both safer and more pleasant to cook at every day.
Final Thoughts
A well-designed kitchen island with stove puts the cook at the heart of the home, but it demands more planning than an ordinary island. Prioritize proper ventilation, keep generous clearances and landing space, route utilities with licensed pros, and separate seating from the heat zone. Plan carefully and you will have a centerpiece that is as safe as it is impressive.