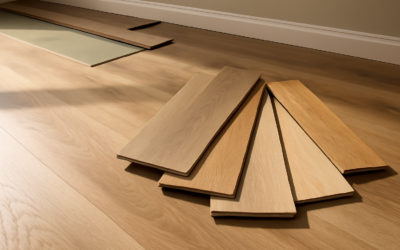
If you searched lamiate flooring, you’re looking for laminate — the multilayer flooring built around an HDF core, a printed decor film, and a tough aluminum-oxide wear layer. It’s one of the most misspelled products in the industry, but the technology is straightforward and the current generation finally competes with engineered hardwood on looks and waterproofing. Here’s what to know before you spend $1,500-$6,000 on a typical install.
How Laminate Is Built
Four layers compose every laminate plank. The backing is a stabilizing melamine sheet that resists moisture from below. The core is high-density fiberboard (HDF) — denser than MDF, which gives laminate its impact resistance. The decor layer is a high-resolution photograph of wood, stone, or tile printed on paper. The top wear layer is aluminum oxide melamine resin, the same compound used on commercial countertops.
Premium laminate adds embossed-in-register texture (the surface bumps line up with the printed graining) and beveled micro-bevels at every plank edge for realistic depth.
AC Ratings Explained
- AC1: Light residential, closets and bedrooms only — avoid
- AC2: Moderate residential, dining and living rooms
- AC3: Heavy residential and light commercial — the residential standard
- AC4: Light commercial and heavy residential — best for kitchens and entryways
- AC5: Heavy commercial — overkill for homes but durable in rentals
For most homes, AC3 is the minimum and AC4 is worth the small premium ($0.25-$0.50 per sq ft) if you have pets or kids.
Top Laminate Brands
Pergo TimberCraft and Pergo Extreme set the benchmark for waterproof laminate, with the latter offering full waterproofing rather than splash-resistance. Mohawk RevWood Plus delivers waterproof performance at AC4 with realistic embossed visuals. Quick-Step Impressive Ultra offers 12mm thickness with hydroseal coatings on plank edges. Shaw Repel and Mannington Restoration round out the upper tier.
Pricing: $1.50 per sq ft (basic AC3) to $4.50 per sq ft (premium waterproof AC4 with attached underlayment). Installation adds $1.50 to $2.50 per sq ft.
Waterproof vs Water-Resistant
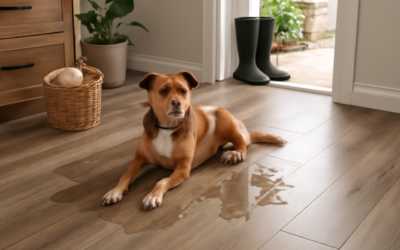
This is the biggest source of buyer confusion. Water-resistant laminate (most products) tolerates spills wiped up within 30-60 minutes. Waterproof laminate uses HydroSeal or similar edge coatings and modified HDF cores to handle standing water for 24 to 72 hours. Pergo Extreme, Mohawk RevWood Premier, and Shaw Repel are the genuinely waterproof options.
Even waterproof laminate is not for bathrooms or basements with chronic moisture. The plank-to-wall expansion gaps and lack of caulked seams mean water can still infiltrate the subfloor over time.
Where Laminate Beats Vinyl
Laminate sounds more like real wood underfoot than LVP — the HDF core gives it density vinyl can’t replicate. It also resists denting better than 5mm SPC LVP because HDF is harder than the vinyl core. Heat tolerance is higher too: laminate handles direct sun and south-facing windows without the warping that affects vinyl.
And the visuals at the premium tier are excellent. A side-by-side comparison of Pergo TimberCraft against the equivalent-priced LVP usually favors the laminate for wood realism under raking light.
Where Vinyl Beats Laminate
LVP is fully waterproof to the core, so kitchens and powder rooms still favor vinyl. Vinyl is also quieter to walk on without underlayment because of its softer composition. And SPC vinyl handles temperature swings (sunrooms, three-season porches) better than laminate, which can buckle in extreme heat without proper expansion gaps.
Installation Specifics
Subfloor flatness matters: 3/16-inch over 10 feet is the standard. Acclimate boxes 48 hours in the room at 65-85°F. Use the supplied underlayment or a 3-in-1 IXPE pad with vapor barrier if installing on concrete. Leave 5/16-inch expansion gaps at all walls and vertical fixtures.
Stagger end-joints by at least 12 inches between adjacent rows for visual realism and mechanical strength. For rooms over 25 feet in either direction, plan T-molding transitions to manage seasonal movement. A DeWalt DCS393 cordless circular saw with a 60-tooth fine-finish blade gives clean cuts without chipping the wear layer.
The Real Downsides
Three drawbacks remain even at the premium tier. First, laminate cannot be refinished — once the wear layer is gone (typically 15-25 years), you replace the floor. Second, it sounds hollow under foot without proper underlayment, especially over concrete. Third, resale appraisers credit it less than real hardwood or premium LVP, even when it looks better.
Maintenance and Lifespan
Use a microfiber dust mop daily and a damp (not wet) mop with Bona Stone Tile and Laminate Floor Cleaner weekly. Never use vinegar, steam mops, or oil soaps — they degrade the wear layer and can void warranties. Felt furniture pads under all legs, replaced annually.
Expect 20-25 years from AC3 in a residential setting and 25-35 years from AC4 waterproof products. Spot repair requires lifting planks from a wall, replacing the damaged piece, and clicking back in — feasible but tedious.
Buying Checklist
- AC3 minimum, AC4 for pets/kitchens/entryways
- Waterproof rating in writing if you need it
- 12mm thickness for the best sound and feel
- Attached underlayment saves install time and cost
- FloorScore certification for indoor air quality
- 10% overage on order quantity for cuts and future repairs
Done right, laminate flooring at the AC4 waterproof tier delivers most of the look of hardwood at a third of the price, with better scratch and dent resistance than the wood it imitates. The misspelling doesn’t change the math.
DIY Installation Tips
Laminate is among the most DIY-friendly flooring categories. A homeowner with basic tools can complete a 500 sq ft room over a weekend. Required tools: tapping block, pull bar, spacers, rubber mallet, chop saw or jigsaw, and a tape measure. Total tool investment under $150 with a basic DeWalt or Milwaukee setup.
Start with the longest, straightest wall and the tongue side facing the wall. Use 5/16-inch spacers along that wall and stagger plank end joints by at least 12 inches between adjacent rows. Cut the last plank in each row to length and use the offcut as the starting plank for the next row to reduce waste. For doorways, undercut casing with a flush-cut handsaw and slide the plank underneath rather than scribing around it. Trim quarter round or shoe molding covers expansion gaps at the wall — paint or stain it before installing for a cleaner finish.
Prefer to explore on your own?
See how new flooring looks in your actual room in seconds — free, no signup.
Try the free Floor Studio →