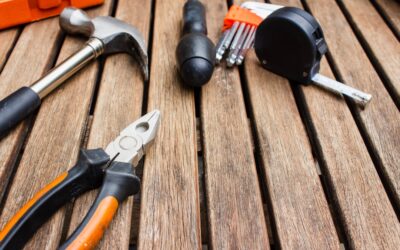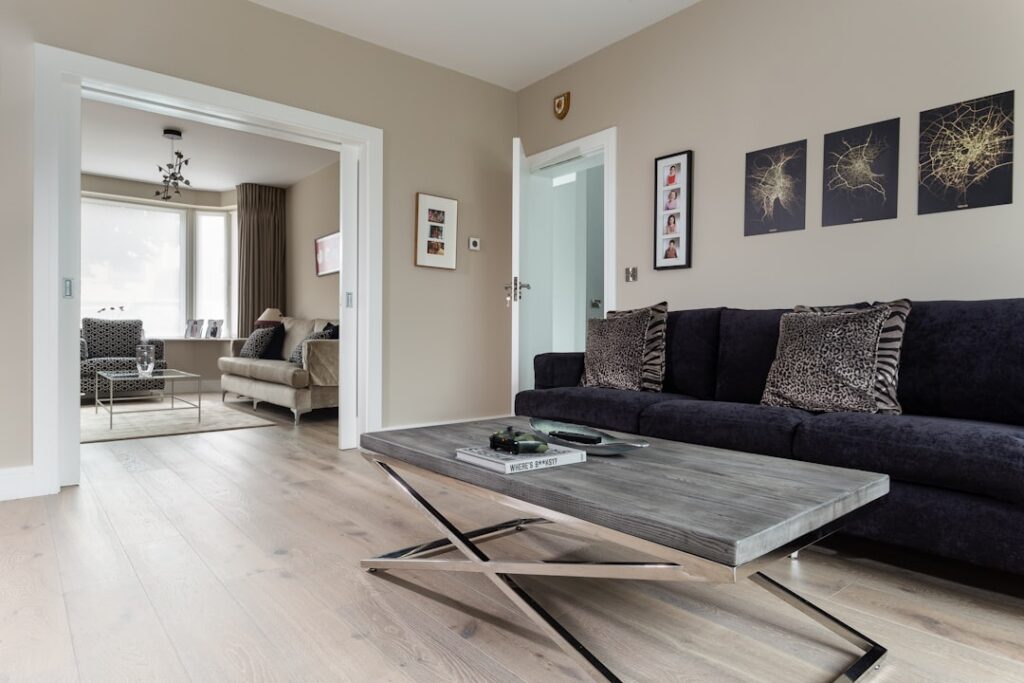
Installing laminate flooring is one of the most popular DIY home improvement projects because the click-lock system is designed for homeowners to handle without professional help. But having the right tools on hand before you start is the difference between a smooth, efficient installation and hours of frustration. Missing a single tool can halt your progress and send you scrambling to the hardware store mid-project.
This guide gives you a complete tool checklist organized by priority, explains what each tool does during installation, and helps you decide what to buy versus rent based on your budget and project size.
Essential Tools You Must Have
These are the non-negotiable tools required for any laminate flooring installation. Without them, you cannot complete the job properly.
Measuring and Marking Tools
- Tape measure (25-foot): You will use this constantly to measure room dimensions, plank lengths, and gaps. A 25-foot tape with a 1-inch wide blade is ideal for flooring work because it stays rigid when extended. Cost: $10 to $20.
- Carpenter’s square or speed square: Essential for marking straight, perpendicular cut lines across planks. A speed square is faster for repetitive crosscuts. Cost: $8 to $15.
- Pencil: A sharp mechanical pencil or carpenter’s pencil for marking cut lines. Keep several on hand because they disappear constantly during a project.
- Chalk line: Useful for snapping straight reference lines across the subfloor, particularly when establishing the first row in large rooms. Cost: $5 to $10.
Cutting Tools
- Miter saw (10-inch or 12-inch): The primary cutting tool for laminate flooring. A miter saw makes fast, accurate crosscuts and angle cuts. Fit it with a fine-tooth blade (80 to 100 teeth) for chip-free cuts on laminate. Cost: $150 to $350 to buy, $40 to $60 per day to rent.
- Table saw or circular saw with guide: Required for ripping the first and last rows of planks to width. A portable jobsite table saw is ideal, but a circular saw with a clamped straightedge works in a pinch. Cost: $200 to $400 to buy, $50 to $70 per day to rent.
- Jigsaw: Handles curved cuts around pipes, toilet flanges, and irregular walls. Use a fine-tooth, downcut blade to minimize chipping on the laminate surface. Cost: $50 to $150.
- Utility knife: For cutting underlayment, trimming vapor barrier, and scoring laminate for quick snap breaks on thin material. Keep extra blades handy. Cost: $5 to $15.
Installation-Specific Tools
- Tapping block: A specially shaped block used to tap planks together without damaging the locking edge. Generic tapping blocks work, but manufacturer-specific blocks designed for your flooring’s lock profile give better results. Cost: $5 to $15.
- Pull bar: A flat, angled metal bar used to pull the last plank in each row tight against its neighbor when there is no room to swing a hammer and tapping block. Essential for the final row and any planks near walls. Cost: $5 to $15.
- Spacers: Maintain a consistent 1/4-inch expansion gap around the perimeter of the room. You can buy plastic spacers or cut small blocks from scrap wood. Cost: $5 to $10 for a bag of plastic spacers.
- Rubber mallet or dead-blow hammer: Used with the tapping block to join planks together. A rubber mallet or dead-blow hammer applies force without damaging the laminate. A regular hammer works too, but only when used with a tapping block, never directly on the plank. Cost: $10 to $25.
Subfloor Preparation Tools
- Pry bar and hammer: For removing existing baseboards, quarter-round molding, and old flooring. A flat pry bar minimizes wall damage during baseboard removal. Cost: $10 to $20.
- Level (4-foot or 6-foot): Check the subfloor for flatness. The subfloor must be flat to within 3/16 inch over 10 feet. A long level reveals high and low spots that need correction. Cost: $20 to $40.
- Floor scraper: Removes old adhesive, paint, or debris from the subfloor. A long-handled scraper saves your back. Cost: $15 to $30.
Nice-to-Have Tools That Make the Job Easier
These tools are not strictly required but significantly improve speed, accuracy, and comfort during installation.
Oscillating Multi-Tool
An oscillating multi-tool with a flush-cut blade undercuts door casings and jambs so laminate planks slide neatly underneath. Without one, you would need to manually chisel door trim, which is slower and produces rougher results. This tool alone can save hours on a whole-house installation. Cost: $50 to $150.
Laminate Flooring Cutter
A manual guillotine-style laminate cutter makes straight crosscuts without power, dust, or noise. It is perfect for working in occupied homes, apartments with noise restrictions, or when you want to cut in the same room where you are installing. It cannot replace a miter saw for angled cuts or a table saw for rip cuts, but it handles 60 to 70 percent of crosscuts quickly and cleanly. Cost: $40 to $80.
Knee Pads
You will spend the entire installation on your knees. Quality knee pads with gel inserts prevent soreness and protect against long-term knee damage. Cheap foam pads compress within hours and become useless. Invest in a pair with hard caps and thick gel cushioning. Cost: $20 to $50.
T-Square or Drywall Square
A 48-inch T-square lets you mark cut lines across wide planks quickly and accurately without measuring from both edges. It speeds up repetitive crosscuts significantly. Cost: $15 to $30.
Moisture Meter
A pin-type or pinless moisture meter tests subfloor moisture levels before installation. Excess moisture causes laminate to swell, warp, and fail. Moisture meters cost $25 to $60 for a basic model and provide peace of mind, especially over concrete subfloors or in humid climates.
Contour Gauge
A contour gauge copies the profile of irregular shapes like door casings, moldings, and curved walls so you can transfer the shape directly onto a plank for cutting. It eliminates guesswork on complex cuts. Cost: $10 to $25.
Shop Vacuum
A shop vacuum connected to your miter saw or table saw’s dust port captures the majority of sawdust at the source. It also keeps the work area clean, which is important when you are installing and cutting in the same space. Cost: $50 to $100.
Roller Stands
Adjustable roller stands support long planks on both sides of a miter saw or table saw, preventing the material from tipping during cuts. They improve accuracy and safety, especially when working alone. Cost: $20 to $40 each.
Tools for Finishing Touches
After the laminate is down, you need a few additional tools to complete the room.
- Brad nailer or finish nailer: Reinstalls baseboards and quarter-round molding. A pneumatic or cordless 18-gauge brad nailer is ideal. Cost: $60 to $150 to buy, $30 to $40 per day to rent.
- Coping saw: Copes baseboard joints at inside corners for a professional look that does not gap when wood contracts. Cost: $10 to $20.
- Caulk gun and color-matched caulk: Seals gaps between baseboards and the floor or wall. Choose a flexible, paintable caulk. Cost: $5 to $15.
- Nail set: Drives brad nail heads below the surface of baseboards for a clean finish. Cost: $3 to $8.
- Wood putty: Fills nail holes in baseboards before painting. Cost: $5 to $10.
Rental vs Buy: Making the Right Decision
Your budget, project size, and future DIY plans should guide your rental-versus-purchase decisions.
Tools Worth Buying
Any tool you will use again on future projects is worth buying. For most homeowners, this includes a tape measure, speed square, utility knife, jigsaw, rubber mallet, pry bar, level, knee pads, and oscillating multi-tool. These versatile tools serve many purposes beyond flooring and will pay for themselves over time.
If you plan to do more than one flooring project, buy a quality 10-inch miter saw. A mid-range model from DeWalt, Makita, or Ridgid costs $200 to $300 and will last through countless home projects. The same applies to a portable table saw if you have storage space.
Tools Worth Renting
Rent tools that serve a single, specialized purpose or that you need for only one day. A floor scraper or sander for subfloor preparation, a professional-grade laminate cutter, or a high-end sliding compound miter saw falls into this category for most DIYers. Check rental rates at Home Depot, Lowes, or local tool rental shops.
Budget Breakdown by Project Size
Here is what you can expect to spend on tools for different project sizes, assuming you own basic household tools like a hammer, tape measure, and utility knife.
Single room (150 to 300 sq ft): $100 to $250 total. Rent a miter saw, buy installation-specific items (tapping block, pull bar, spacers, knee pads). Borrow a jigsaw and table saw if possible.
Multiple rooms (500 to 1,000 sq ft): $300 to $600 total. Buy a miter saw, jigsaw, oscillating tool, and all installation items. Rent or buy a table saw. At this scale, purchasing tools saves money versus multi-day rentals.
Whole house (1,000+ sq ft): $500 to $1,000 total. Buy everything on the essential list plus nice-to-have items like a laminate cutter, contour gauge, and shop vacuum. The investment pays off through faster installation, better results, and tools available for future maintenance.
Tool Setup and Workspace Tips
Setting up your tools and workspace properly before starting saves time and improves results throughout the installation.
Cutting Station Setup
Position your miter saw on a stable surface at a comfortable working height, ideally on a portable workbench or saw stand. Place it near the room entrance so you can walk back and forth efficiently between cutting and installing. If working indoors, lay a drop cloth under the saw and connect a shop vacuum to the dust port.
Set up your table saw next to the miter saw with enough room to feed full-length planks through without obstruction. Adjust the fence to the most common rip width you will need before starting.
Organizing Your Work Area
Keep spacers, tapping block, pull bar, and rubber mallet in a small bucket or tool bag that moves with you across the room. Stack unopened laminate boxes along one wall, and keep the box you are working from open and accessible near your installation front.
Lay all underlayment before you start installing planks. Cutting and fitting underlayment while simultaneously installing laminate slows you down and increases the chance of misalignment.
Blade Changes and Maintenance
Start with a fresh, sharp blade. A dull blade chips laminate, burns wood, and forces the motor to work harder. If you notice increased chipping or resistance during cuts, stop and swap the blade. For a typical 500-square-foot room, one quality blade should last the entire project. Larger projects may require a second blade.
Common Tool Mistakes to Avoid
Even with the right tools, incorrect use leads to poor results.
- Using a general-purpose blade: The 24-tooth blade that came with your miter saw is designed for framing lumber, not laminate. It will chip the decorative surface badly. Switch to a fine-tooth (80+ teeth) blade before your first cut.
- Skipping the tapping block: Hitting planks directly with a hammer or mallet crushes the locking profile and creates gaps. Always use a tapping block.
- Forgetting the pull bar: Trying to close the last row with a tapping block damages the wall or fails to fully engage the joint. The pull bar is the only correct tool for this task.
- Not undercutting door casings: Cutting planks to fit around door casings creates ugly gaps and weak joints. An oscillating tool takes 30 seconds per door frame and produces a far superior result.
- Cutting face-down on a miter saw: Laminate should be cut with the decorative face up on a miter saw because the blade enters from the top. Chipping occurs where the blade exits the material, so you want that on the back side.
Printable Tool Checklist
Use this consolidated checklist to prepare for your laminate flooring installation.
Essential (Must Have)
- Tape measure (25-foot)
- Speed square or carpenter’s square
- Pencil
- Chalk line
- Miter saw with fine-tooth blade
- Table saw or circular saw with guide
- Jigsaw with downcut blade
- Utility knife with extra blades
- Tapping block
- Pull bar
- Spacers (1/4-inch)
- Rubber mallet or dead-blow hammer
- Pry bar
- 4-foot or 6-foot level
- Floor scraper
Nice to Have
- Oscillating multi-tool
- Laminate flooring cutter
- Knee pads (gel-insert)
- T-square or drywall square
- Moisture meter
- Contour gauge
- Shop vacuum
- Roller stands
Finishing
- Brad nailer (18-gauge)
- Coping saw
- Caulk gun and caulk
- Nail set
- Wood putty
Final Thoughts
Gathering the right tools before you open the first box of laminate sets you up for a successful, efficient installation. Prioritize the essentials, add nice-to-have items based on your project size and budget, and rent specialty tools you will only use once. With the proper tools in hand, installing laminate flooring is a manageable weekend project that delivers dramatic results for a fraction of the cost of professional installation.
If you are still deciding on your flooring material, explore luxury vinyl plank as another DIY-friendly option, or check out engineered wood flooring for a premium look with similar floating installation methods.
Prefer to explore on your own?
See how new flooring looks in your actual room in seconds — free, no signup.
Try the free Floor Studio →