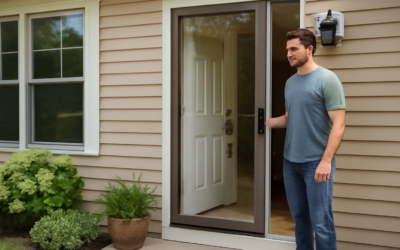
When a storm door handle sticks, wobbles, or snaps off, the whole door feels broken even though the door itself is fine. A Larson storm door handle is one of the most commonly replaced storm door parts, partly because Larson is the largest storm door maker in the U.S. and partly because handles take daily abuse from every family member and gust of wind. The good news is that swapping one is a straightforward 20-minute job once you identify the right replacement. This guide covers handle types, how to find your exact model, step-by-step replacement, and common fixes.
Part of our Windows & Doors guide — explore the full guide →
- Why Storm Door Handles Wear Out
- Why Larson Handles Are Worth Matching Correctly
- Types of Larson Handles
- Finding the Right Replacement
- Replacing the Handle Step by Step
- Common Handle Problems and Fixes
- What Replacement Costs
- Upgrading While You’re At It
- Understanding Larson’s Easy-Change System
- Matching Handle to Latch Type
- Extending the Life of Your New Handle
- Final Thoughts
Why Storm Door Handles Wear Out
A Larson storm door handle endures more cycles than almost any hardware in the house. Kids yank it, the wind slams it, and the thin aluminum door frame flexes with temperature swings. Over years, the internal latch mechanism wears, set screws loosen, and the mounting holes elongate, leaving the handle loose or non-functional.
Because storm doors are thinner than entry doors, their handle hardware is specific and not interchangeable with regular door knobs. That’s why matching the correct Larson part matters more than with a standard door.
Why Larson Handles Are Worth Matching Correctly
Larson has been building storm doors for decades and holds a dominant share of the U.S. market, which is both good and bad news for the homeowner. The good news is that parts are widely available at home centers and online, so you can almost always find a replacement. The catch is that Larson has produced many handle designs over the years, and they aren’t universally interchangeable, so grabbing a generic storm-door handle off the shelf often leads to a return trip.
Because storm doors are thin and the handle hardware is proportioned specifically for that thin stile, a handle meant for a thicker entry door simply won’t seat properly. Spending a few minutes to match the exact Larson part, or at minimum the correct hole spacing and latch type, saves the frustration of a handle that looks right but won’t operate the latch.
Types of Larson Handles
Larson has used several handle styles over the decades, and knowing which you have narrows the search fast.
- Mortise handle sets — the most common, with a lever or push-button on the outside and a matching interior handle, operating a mortise latch built into the door edge.
- Surface-mount / Easy-Change handles — Larson’s tool-free system that lets you swap the exterior handle color and style without removing the latch.
- Traditional grip / thumb-latch handles — a colonial-style grip with a thumb press, common on older doors.
- Keyed handles — versions with a deadbolt or key cylinder for added security.
Finding the Right Replacement
Ordering the wrong handle is the biggest time-waster, so measure before you buy. Larson’s site has a handle-finder, but you can also match by these key dimensions:
- Hole spacing (center-to-center): the distance between the two mounting screw holes, commonly around 3-3/8 inches, but confirm yours.
- Bore configuration: whether the latch is a mortise set into the door edge or a separate cylinder.
- Handle style and finish: match the look, or use it as a chance to upgrade to brushed nickel, bronze, or black.
- Larson’s Easy-Change compatibility: newer doors accept snap-in exterior handles that don’t require touching the latch.
If you can find the original invoice or a model sticker on the door frame, that speeds identification. Otherwise, remove the old handle and take it to the store for comparison.
Replacing the Handle Step by Step
- Open the storm door and locate the two screws on the interior handle plate.
- Remove those screws; the interior and exterior halves separate.
- Pull the exterior handle out, noting how the spindle or connector engages the latch.
- If replacing the latch too, remove the screws on the door edge holding the mortise latch and slide it out.
- Slide the new latch in and secure it, then insert the new exterior handle so its connector engages the latch.
- Hold the interior handle in place and drive the two through-screws to join both halves.
- Test the latch several times before closing the door, adjusting the strike plate if it doesn’t catch cleanly.
The whole swap runs 20 to 30 minutes with just a Phillips screwdriver. Snug the screws firmly but don’t overtighten into the thin frame or you’ll strip the holes.
Common Handle Problems and Fixes
Not every issue needs a full replacement. Work through these before buying parts.
- Loose handle: usually just loose mounting screws; tighten the two interior plate screws.
- Latch won’t catch: the strike plate is misaligned; loosen it, reposition, and retighten so the latch slides in.
- Push-button won’t depress: dirt or a worn spring in the latch; clean it and apply a dry lubricant, or replace the latch.
- Handle spins freely: the internal spindle connection has failed; replace the handle set.
- Door won’t stay closed in wind: combine a strike adjustment with a working closer and a tight sweep.
What Replacement Costs
A genuine Larson storm door handle set runs about $25 to $60 depending on style and finish, with keyed and premium designs at the higher end. The mortise latch alone, if that’s all that failed, costs roughly $15 to $30. Because it’s a simple DIY job, you typically avoid any labor charge; a handyman would bill perhaps $50 to $100 for the visit if you’d rather not do it yourself.
Upgrading While You’re At It
Since the handle is right there, many homeowners take the chance to update the look. Larson’s Easy-Change exterior handles let you switch to satin nickel, oil-rubbed bronze, or matte black to match your entry door hardware in minutes. Coordinating the storm door handle with the main door’s knob and hinges is a small change that noticeably sharpens curb appeal.
Understanding Larson’s Easy-Change System
Larson’s tool-free Easy-Change handle system deserves a closer look because it makes updates genuinely effortless. On compatible doors, the exterior handle snaps into a mounting bracket without touching the interior latch mechanism. That means you can change the handle’s style or finish, or swap a broken exterior grip, in a couple of minutes with no screwdriver at all.
If your door has this system, you’ll see the exterior handle clicks in and releases with a small tab rather than being held by through-screws. It’s a nice feature for renters and for anyone who likes to refresh hardware finishes without committing to a full latch replacement. Confirm compatibility before ordering an Easy-Change handle, since it won’t fit older mortise-only doors.
Matching Handle to Latch Type
One reason replacements go wrong is a mismatch between the handle and the latch it drives. Larson handles are engineered to work with specific latch mechanisms, so the connector on the handle has to engage the latch correctly. When you buy, note whether your door uses:
- A mortise latch set into the edge of the door, common on most Larson storm doors.
- A tubular or bore latch, less common but present on some styles.
- A keyed deadlock integrated with the handle for extra security.
Buying a complete handle-and-latch set from the same product line guarantees the parts mate correctly. Mixing a handle from one system with a latch from another is the most common cause of a handle that turns but won’t retract the latch.
Extending the Life of Your New Handle
A little care keeps a fresh handle working smoothly for years. Storm door hardware sits exposed to weather and sun, so give it occasional attention. Wipe the exterior handle to keep grit out of the mechanism, and once or twice a year apply a dry silicone or graphite lubricant to the latch, never oily grease that attracts dust and gums up in cold weather.
- Adjust the door closer so the door doesn’t slam and shock the handle hardware.
- Keep the strike plate aligned so the latch isn’t forced or bent each time it closes.
- Snug the mounting screws each season, since the thin frame lets them loosen over time.
- Replace a worn latch promptly rather than forcing a sticky one, which stresses the handle.
Final Thoughts
A failing Larson storm door handle is one of the easiest home repairs you’ll tackle, requiring one screwdriver and a correctly matched part. Measure your hole spacing, identify whether you have a mortise or Easy-Change system, and order the exact replacement. Tighten the screws firmly into the thin frame, adjust the strike so the latch catches cleanly, and consider upgrading the finish while you’re in there. Twenty minutes later your storm door will feel brand new.