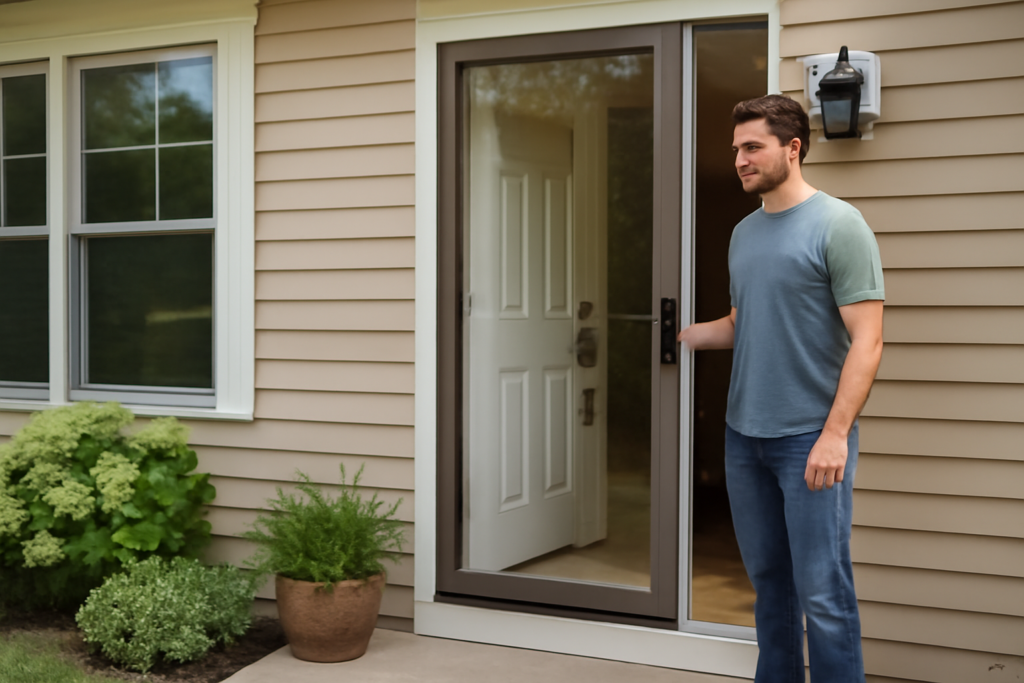
A larson storm door is one of the most common upgrades homeowners make to a front or back entry, and for good reason: Larson is the largest storm-door manufacturer in the U.S., sold through Home Depot and Menards, with a model for nearly every budget and need. But the lineup is broad — from $150 basic doors to $600-plus retractable-screen models — and picking the wrong series means either overpaying or missing a feature you’ll wish you had. This guide walks through the models, glass options, sizing, and installation so you buy once and buy right.
Why Add a Storm Door at All
A storm door does three jobs. It adds an insulating air gap in front of your entry door, cutting drafts and trimming energy loss in winter and summer. It lets you swap glass for screen to bring in a breeze while keeping bugs out. And it protects your primary door from rain, sun, and wear, extending its life. On an exposed entry, a storm door pays for itself in comfort and protection.
The Main Larson Series
Larson organizes its doors into tiers. Knowing them narrows your choice fast:
- Signature / Signature Classic: The entry-level, budget-friendly line. Solid basics — interchangeable glass and screen, decent hardware — at $150 to $300. Good for a rental or a low-traffic door.
- Tradewinds and mid-tier: Step-up build quality, better hardware, and more style options.
- Secure Elegance: Larson’s security-focused line with heavy-duty stainless steel mesh (Screen Away) and a laminated glass option — a screen and security door in one.
- Platinum / premium: The top tier, with the best weatherstripping, hardware, color options, and warranty coverage. $350 to $650-plus.
Within each tier you choose the glass configuration, which is really the heart of the decision.
Glass and Ventilation Options
How the glass and screen work together defines how you’ll use the door day to day:
- Full-view: A single large glass panel you manually swap for a screen seasonally. Maximum view and light; more effort to change over.
- Retractable screen (Screen Away): Larson’s signature feature — the screen hides in the frame and you pull the glass down or up to ventilate, no storing panels. The most convenient, and worth the premium for many.
- Ventilating (high-low): Two glass panels; slide one to open a screened vent at top or bottom. A classic, reliable design.
- Mid-view / high-view: Glass over a solid or partial bottom panel — more durable against kicks and dogs, common on back doors.
If you’ll ventilate often, the retractable-screen models eliminate the hassle of hauling glass panels to the garage every spring and fall.
Measuring for the Right Fit
Larson doors come in standard sizes to fit typical openings, but you must measure your existing frame. Storm doors mount to the exterior door frame (the brickmould or trim), not the door itself. Standard widths are 32, 34, and 36 inches; standard height is 81 inches (to fit an 80-inch opening plus frame).
Measure the width at top, middle, and bottom of the opening and use the smallest; do the same for height. Note your door’s handing — which side the hinges go on — determined by which way is most convenient and which way the main door swings. Many Larson doors are reversible or come with a Z-bar you mount on either side, but confirm before buying.
Hardware and Closer Features
The everyday feel of a storm door comes down to its hardware. Larson doors typically include a handle set (often with a keyed deadbolt on better models), one or two pneumatic closers, and a safety chain or wind-hold device. That wind chain is important — a gust catching an open storm door can tear the closer out or bend the frame, so the hold-open and chain prevent damage. Upgraded models offer smoother closers, sturdier handle sets in finishes like nickel, bronze, brass, black, or white, and heavier corner brackets.
Installation: DIY or Pro
Installing a Larson storm door is a manageable weekend DIY project for a handy homeowner, thanks to the pre-hung frame and the mounting system. The basic sequence:
- Attach the hinge-side Z-bar (mounting rail) to the frame, plumb and to the correct height.
- Hang the door on that rail and check the swing and gaps.
- Trim and attach the top and latch-side rails to seal the door against the frame.
- Install the sweep at the bottom, adjusting for a clean seal to the sill.
- Mount the handle/deadbolt and the pneumatic closer(s), then set the closer tension.
A crooked or out-of-square opening is where DIYers struggle — the frame has to be shimmed plumb. If your opening is irregular or you want a warranty-clean install, Home Depot and Menards offer professional installation for $150 to $350.
Cost and Value
Expect $150 to $300 for a Signature-series door, $300 to $500 for mid-tier and retractable-screen models, and $500 to $700-plus for premium Platinum and Secure Elegance doors. Professional installation adds $150 to $350. Against that, a storm door protects a $300 to $2,000 entry door and improves comfort — a reasonable return, especially on a weathered or drafty entry.
Warranty and Longevity
One of Larson’s selling points is warranty coverage — many models carry a limited lifetime warranty on the door and multi-year coverage on glass, screen, and hardware, with the strongest terms on the premium lines. Register your door after install to protect that coverage. With basic care — cleaning the tracks, lubricating the closer, and replacing worn weatherstrip — a Larson storm door will serve reliably for 15 to 20 years. Match the series to how you’ll actually use the door, measure carefully, and you’ll get a durable, good-looking upgrade to your entry.
Color and Curb Appeal
A storm door is one of the first things visitors see, so color matters. Larson offers factory finishes well beyond plain white — black, bronze, sandstone, almond, and more depending on the series — plus some paintable models if you want a custom shade. The safe move is to match or complement your entry door and trim: a black storm door over a white frame reads crisp and modern, while a bronze finish warms up a wood or earth-toned entry. Full-view glass models maximize the view of a nice front door behind them, effectively showing off the entry rather than hiding it. If your entry door is the focal point, a full-view glass Larson lets it shine while still adding protection.
Maintenance to Extend Its Life
Storm doors are low-maintenance, but a few habits keep one working smoothly for two decades:
- Clean the tracks and weep holes so water drains and the glass/screen panels slide freely.
- Lubricate the pneumatic closer and hinges once a year with dry silicone.
- Adjust the closer tension seasonally as the door expands and contracts.
- Replace worn weatherstripping and the bottom sweep when they harden or tear, restoring the seal.
- Check the wind chain and hold-open regularly — a failed one lets a gust wreck the door.
Frequently Asked Questions
Can I install a Larson storm door myself?
Yes — the pre-hung frame and Z-bar mounting system make it a doable weekend job for a handy homeowner. The tricky part is shimming an out-of-square opening plumb. Home Depot and Menards offer pro installation if you’d rather not.
What’s the difference between the Signature and Platinum series?
Signature is the budget line with solid basics; Platinum is the premium tier with better weatherstripping, hardware, more color options, and the strongest warranty. Mid-tier and Secure Elegance sit between them.
Do Larson doors come with a screen?
Yes. Depending on the model, the screen is either an interchangeable panel you swap for the glass seasonally or a retractable Screen Away system that hides in the frame.
Which Larson series is best for a busy family door?
Look at a mid-view or high-view model with a solid lower panel, which resists kicks, dogs, and scuffs far better than full-view glass. If security and ventilation both matter, the Secure Elegance line pairs a stainless steel mesh screen with a laminated glass option in one door.