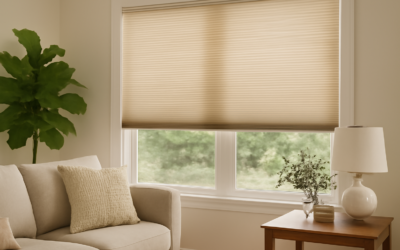
After hanging window treatments in a few hundred homes, I still reach for Levolor roller shades when a client wants clean lines without the fuss of blinds or the expense of custom drapery. They sit flat against the glass, tuck the fabric into a slim tube, and disappear when you raise them. That simplicity is exactly why Levolor roller shades have become a default recommendation for kitchens, offices, and rental turns where I need a reliable product I can install in under twenty minutes per window.
This guide walks you through the fabric choices, honest pricing, how to measure so you don’t end up with light gaps, and the small installation habits that separate a professional-looking job from something that looks like it came out of the box crooked.
What You Actually Get With the Levolor Line
Levolor is owned by Hunter Douglas and sells both a ready-made program (sold at Lowe’s and online) and a made-to-measure custom program. The ready-made shades come in fixed widths, usually 23, 27, 31, 35, and 39 inches, at a 72-inch length you can cut down. Custom shades are built to your exact opening within about an eighth of an inch.
The core roller offerings break down into a few families:
- Light filtering fabrics that soften daylight and give you daytime privacy without total darkness.
- Room darkening fabrics with a tighter weave or a coated backing that block most light but not every edge.
- Blackout shades with an opaque backing, best for bedrooms and nurseries.
- Solar screen shades rated by openness factor (3%, 5%, 10%) that cut glare and UV while keeping your view.
Openness factor matters more than people think. A 5% solar shade blocks roughly 95% of the incoming light and heat while still letting you see out during the day. A 10% openness weave gives a clearer view but less glare control. For a west-facing room that cooks in the afternoon, I steer folks toward 3% or 5%.
Real Pricing, Not Sticker Fantasy
Here is what I actually see homeowners pay in 2026, before any promo pricing:
- Ready-made light filtering rollers: roughly $30 to $70 depending on width.
- Custom light filtering or room darkening: about $90 to $180 per shade for a standard 36-by-60-inch window.
- Custom blackout: figure $120 to $220 each.
- Solar screen (3% to 10%): $110 to $250 depending on the fabric grade.
- Cordless or motorized upgrades: add $60 to $200 per shade.
Motorization is where the price runs. A basic rechargeable battery motor adds around $100 to $150 per shade; a hardwired or smart-hub setup pushes it higher. For a bank of three or four windows behind a couch you can’t easily reach, the motor is worth every dollar. For a single guest room, save your money and go cordless manual.
Inside Mount vs. Outside Mount
Before you touch a tape measure, decide where the shade lives. An inside mount sits inside the window frame for a built-in, trim-flush look. An outside mount hangs on the wall or casing above the opening and overlaps the frame, which hides light gaps and can make a small window look larger.
Choose an inside mount when you have at least 2 inches of flat depth inside the jamb for the brackets and you want that recessed look. Go outside mount when your frame is shallow, out of square, or when light control is the priority. In a nursery, I almost always go outside mount and oversize it so the fabric laps the wall.
How to Measure Without a Callback
Measuring is where most DIY jobs go wrong. Use a steel tape, not a cloth one, and record to the nearest eighth of an inch.
- Inside mount width: measure the inside of the frame at the top, middle, and bottom. Use the narrowest number. Levolor takes your exact width and makes its own deductions, so do not subtract anything yourself on a custom order.
- Inside mount height: measure left, center, and right. Use the longest number.
- Outside mount width: measure the opening and add 3 to 4 inches total, roughly 1.5 to 2 inches of overlap per side.
- Outside mount height: add 2 to 3 inches above the opening for the bracket, plus overlap at the sill.
- Check for square: measure both diagonals. If they differ by more than a quarter inch, the opening is out of square and an outside mount will look cleaner.
One more habit: note which side you want the control chain or motor. Getting the control side wrong is the single most common reorder I see.
Installing the Shade Step by Step
A roller shade install is genuinely beginner-friendly. Here is the sequence I follow:
- Unbox and identify the front-loading bracket (with the pin slot) and the rear or clip bracket for the round pin end.
- Hold a bracket at the top corner, level it, and mark screw holes. For an inside mount, push the bracket tight to the front of the jamb so the fabric clears the frame.
- Pre-drill pilot holes. Into drywall without a stud, use the included self-drilling anchors rated for the shade weight.
- Screw both brackets in, then set a torpedo level across them. Even a slight tilt shows badly on a long window.
- Snap the roller into the brackets: idle end first, then click the control end into place.
- Test the travel. On cordless models, gently pull the fabric down and let it retract to check tension.
Budget about 15 to 25 minutes per window once you have the rhythm. A cordless drill, a level, a pencil, and a tape measure cover the whole job.
Cordless, Corded, and Motorized: Which to Pick
Levolor sells continuous-cord loop, cordless spring-lift, and motorized options. Cordless is now the default for good reason, and it matters for safety. Corded shades are a strangulation hazard, and current U.S. safety standards push cordless for any home with kids or pets. If you have young children, do not put a corded product in a room they use.
Cordless spring shades operate with a gentle tug down and a light pull to raise. They can lose a little tension over years of heavy use, but a hidden tension adjuster on many models lets you re-tighten. Motorized shades run on a rechargeable lithium battery that lasts roughly six months to a year per charge depending on use, and many integrate with a hub for app or voice control.
Common Mistakes I See Homeowners Make
- Mounting inside a shallow frame. If you don’t have the depth, the shade projects out and looks like an afterthought. Measure depth first.
- Ignoring light gaps. Every inside-mount roller leaves a small gap on each side. If you need true darkness, go outside mount or add side channels.
- Skipping the level. Windows lie. Trust your torpedo level over the frame every time.
- Over-tightening screws into the fabric side. Keep brackets clear of the fabric drop or you’ll get scraping and fraying.
- Buying blackout for a room that only needs privacy. Blackout fabric feels heavier and shows more dust; a light-filtering shade is often the smarter, cheaper call.
Are They Worth It?
For the money, Levolor rollers hit a sweet spot between the throwaway shades at a big-box store and true high-end custom treatments. The ready-made line is a fair pick for a rental or a quick refresh, while the custom program gives you exact sizing, better fabrics, and a cleaner reveal. Pair a 5% solar shade on a sun-blasted living room window with a blackout roller in the primary bedroom and you’ll cover the two problems most homes actually have: glare and sleep.
Measure twice, decide your mount before you order, keep a level in your hand during install, and these shades will look sharp and run smoothly for a decade. That is the quiet payoff of a well-chosen roller: you stop thinking about the windows and just enjoy the room.