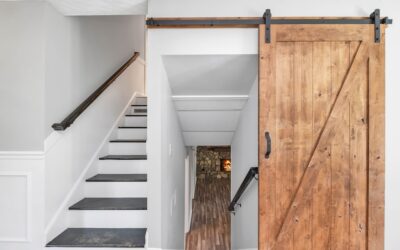
If you love the look of a sliding barn door but hate how much a bulky track sticks out from the wall, low profile barn door hardware is the fix. These systems shrink the gap between the door and the wall to as little as 1 inch, keep the track slim, and let a door glide within a few inches of a ceiling or adjacent trim. I have installed both flashy oversized kits and these minimalist ones, and in tight hallways the low-profile versions win every time.
Part of our Windows & Doors guide — explore the full guide →
The right low profile barn door hardware depends on your wall clearance, door weight, and whether you need one door or a pair. Let me break down what actually matters before you buy.
What “Low Profile” Really Means
Standard barn door hardware holds the door 1.5 to 2 inches off the wall and uses a track that is often 1/4 inch thick with tall roller straps. Low profile hardware does two things differently: it shortens the standoff spacers so the door sits closer to the wall, and it uses compact roller hangers that reduce the total height above the door.
That matters in two situations. First, in a narrow hallway where a protruding door catches shoulders and elbows. Second, when you want the door to clear a window casing, crown molding, or a ceiling that sits just above the opening. Every inch you save is an inch of usable space.
Track Styles You Will See
Not all low-profile systems are built the same. Here are the main configurations:
- Flat-track top mount: A flat steel bar bolts to the wall or header, with rollers that ride on top. Slimmest common option, usually 1 to 1.25 inches of wall clearance.
- Bypass hardware: Lets two doors slide past each other on staggered tracks for a wide opening, ideal for closets and pantries.
- Ceiling-mount brackets: Suspends the track from the ceiling when you lack a solid header, keeping the wall completely clear.
- Recessed or hidden track: The premium tier, where the track tucks into a soffit or valance so only the door is visible.
Weight Ratings and Door Sizing
Match the hardware rating to your door. Most residential low-profile kits handle 150 to 200 pounds, which covers a solid-core interior door. A typical 36-inch by 84-inch solid-core door weighs about 90 to 110 pounds, so a 200-pound kit gives comfortable margin.
Your track should be twice the door width so the door can slide fully clear of the opening. For a 36-inch door, buy a 72-inch track. If a manufacturer sells a fixed 6.6-foot track and your door is 42 inches wide, the door will only expose about 37 inches of the opening, so plan accordingly.
Kits Worth Buying
These are the systems I recommend by budget:
- National Hardware low-profile flat track: Around $90 at hardware stores, rated to 200 pounds, clean powder-coated finish. A reliable value pick.
- SMARTSTANDARD compact kit: Roughly $70 on Amazon, holds 200 pounds, and the mini rollers keep total height low. Good for a first install.
- Real Sliding Hardware bypass system: $250 to $400, precision-machined, for double doors or heavier custom slabs.
- Custom Service Hardware ceiling-mount: About $180, solves the no-header problem when opening a wall to a soffit above.
Installation: Where People Go Wrong
The single most important step is mounting into structure, not just drywall. A sliding door and its hardware can put 150 pounds of dynamic load on the wall, and drywall anchors will fail. Locate the studs behind the opening, and if they do not line up with your mounting holes, install a mounting board first.
I always screw a 1×6 primed board horizontally across the header, anchored into at least three studs, then attach the track to that board. This spreads the load and gives you flexibility on hole placement. Here is the sequence:
- Mark a level line for the track so the door will clear the floor by about 1/2 inch
- Attach the mounting board into studs with 3-inch structural screws
- Bolt the track to the board using the low-profile spacers provided
- Hang the door on the rollers and set the anti-jump discs and floor guide
Do not skip the floor guide. Without it, a low-profile door swings and scrapes the wall, undoing the tidy look you paid for.
Solving the Privacy and Gap Problem
Barn doors have a well-known weakness: because they slide flat against the wall rather than sealing into a jamb, there is a gap around the perimeter. Low-profile hardware actually helps here, since pulling the door closer to the wall shrinks the side gaps. For a bathroom or bedroom where privacy matters, add an L-shaped door jamb or a strip of felt weatherstripping along the edges to close the light gap and cut sound transmission.
For a lock, standard deadbolts do not work on a sliding door. Instead, use a surface-mounted barn door latch or a hook-and-eye privacy lock made specifically for sliders. Several manufacturers sell teardrop and flush privacy locks in finishes that match common track colors, running $15 to $40. Plan the lock into your order rather than treating it as an afterthought, because retrofitting one cleanly is harder than installing it during the initial hang.
Measuring Before You Order
A little math up front prevents the most common ordering mistakes. Work through these measurements before you buy anything:
- Opening width: Measure the finished opening, then size the door 2 to 3 inches wider on each side so it overlaps and blocks light
- Track length: Buy a track at least twice the door width so the door slides fully clear of the opening
- Wall space beside the opening: Confirm you have enough flat, unobstructed wall for the door to park; light switches and outlets in that zone are a problem
- Header clearance: Check the distance from the top of the opening to the ceiling or any crown molding, since low-profile hardware needs less but still needs some
- Floor clearance: Plan for about 1/2 inch under the door so it clears rugs and thresholds
Sketch the wall with these numbers before ordering. The single most common return I see is a track that is too short because the buyer sized it to the opening instead of to twice the door width.
Clearance and Finishing Details
Because the door rides so close to the wall, thick baseboards can become an obstruction. If your baseboard is more than 1/2 inch proud, either add a spacer behind the door bottom or notch the door corner. Test the swing before final tightening.
Finish-wise, matte black remains the most popular for a modern farmhouse look, but oil-rubbed bronze and brushed nickel blend better with traditional trim. Buy handles and a floor guide in the same finish as the track for a cohesive result.
Soft-Close and Anti-Jump Upgrades
Two add-ons dramatically improve how a low-profile door feels day to day. A soft-close mechanism catches the door in the last few inches of travel and eases it shut instead of letting it slam against the stop. On a heavy door this is worth every penny of the $30 to $60 it adds, both for the quiet operation and for sparing the hardware from repeated impact.
Anti-jump discs or blocks are small but essential. They sit above the rollers and keep the door from bouncing off the track if it is yanked or bumped, which matters even more on low-profile systems where the roller-to-track engagement is shallow. Most quality kits include them, but confirm before you buy, because a door that hops its track is both a hazard and a headache. Together these upgrades turn a basic slider into something that operates like a much more expensive built-in.
Is It Worth the Extra Cost?
Low-profile kits run $10 to $40 more than standard barn hardware of the same weight rating, and the premium hidden-track versions cost considerably more. For a wide-open den or bedroom, standard hardware is fine. But in a hallway, a small bathroom, or anywhere the door competes with trim and passersby, the slimmer profile earns its keep. You get the sliding-door aesthetic without a track that dominates the wall or a door that keeps bumping into people. For most tight-space projects, that trade is easily worth it.