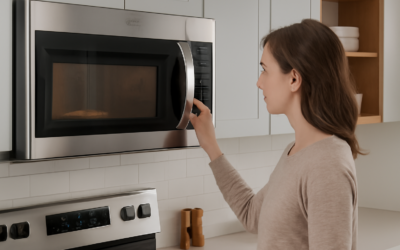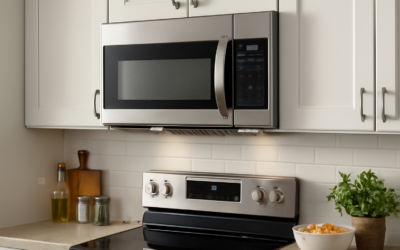
An over-the-range microwave frees up counter space and replaces a separate hood in one move, which is why it shows up in so many kitchens. The catch is that a microwave with vent is a compromise: it heats food well, but its exhaust fan is usually weaker and sits farther back than a true range hood. Picking the right one means matching width, airflow, venting method and clearance to your cooktop and cabinets before you ever look at finishes.
Here is the quick version. Measure the opening (most are 30 inches wide), confirm there is at least 66 inches from the floor to the top of the unit and enough gap above the cooktop per the maker’s instructions, check if you can duct outdoors, and check that a dedicated outlet is in the cabinet above. If you cook with gas or do a lot of high-heat searing, aim for the strongest ducted fan you can find, or consider a real hood instead.
- What to Look For in a Microwave With Vent
- Ducted vs Recirculating: How the Vent Actually Works
- Gas Ranges, Carbon Monoxide and Ventilation
- Clearance, Measuring and Electrical Requirements
- Installation Steps for an Over-the-Range Microwave
- Troubleshooting
- Cost Ranges
- When to Call a Licensed Professional
- Frequently Asked Questions
The rest of the article covers sizes and capacity, airflow, ducted versus recirculating venting, installation steps, electrical and gas safety, troubleshooting, cost ranges and when to call a pro.
What to Look For in a Microwave With Vent
Over-the-range microwave combos look similar, but a few specifications decide how well one will work in your kitchen.
- Width. The standard is 30 inches, matching a 30-inch range. A 30 inch over the range microwave with exhaust fan fits nearly every standard kitchen. Some 36-inch models exist for wider ranges, though the selection is limited.
- Height and depth. Most units are 15 to 18 inches tall and about 15 to 17 inches deep. Deeper units cover more of the front burners, which improves capture but can crowd taller cooks.
- Capacity. Interior volume runs from about 1.5 to 2.2 cubic feet. A 1.6 cubic feet microwave over the range handles most dinner plates; larger interiors fit casserole dishes.
- Fan airflow (CFM). Typical vent fans move roughly 300 to 400 cubic feet per minute on high. Compare that with wall hoods, which often start around 400 and go well above.
- Fan speeds and lighting. Multiple fan speeds and bright cooktop lights make daily use easier. Some models switch the fan on automatically when they sense heat below.
- Finish. Stainless steel over the range units are the most common, while white above range microwave models and black or slate finishes match other appliances. Choose to match your range.
Ducted vs Recirculating: How the Vent Actually Works
Every microwave hood fan can be set up one of two ways, and the choice matters more than the CFM number.
Ducted (Vented Outdoors)
The fan pushes cooking air through a duct to the outside, either straight up through the cabinet and roof, or out the back through an exterior wall. Ducting outdoors removes heat, moisture, odors and combustion byproducts from gas burners. It is the better choice whenever the layout allows, and some local codes require outdoor exhaust for gas ranges.
Recirculating (Ductless)
Air passes through a grease filter and a charcoal filter, then blows back into the kitchen through the grille above the door. It traps some grease and odor but does not remove heat, humidity or combustion gases. Charcoal filters need replacing every 6 months or so to keep working at all.
Most units ship set for recirculation and must be converted for ducting by rotating the blower motor inside, following the installation manual. Check before mounting, because the blower is much harder to reach once the unit is on the wall.
Gas Ranges, Carbon Monoxide and Ventilation
Gas burners produce carbon monoxide, nitrogen dioxide and lots of water vapor. A recirculating fan does nothing to remove those gases. If you cook with gas:
- Duct the fan outdoors whenever possible and run it every time you cook, starting before you light a burner and continuing for several minutes after.
- Use the back burners when you can, since an over-the-range unit captures rear burners better than front ones.
- Install CO alarms on every level of the home and near sleeping areas, and test them monthly.
- Never use a gas range or oven to heat the house.
- If you smell gas, leave the house and call the gas utility from outside. Gas connections and range installation belong to a licensed professional.
Clearance, Measuring and Electrical Requirements
Before ordering, measure carefully:
- Cabinet opening width. Measure between cabinets at the top and bottom. Most need exactly 30 inches.
- Cooktop clearance. Measure from the cooking surface to the bottom of the upper cabinet. Manufacturers typically require the bottom of the microwave to sit a set distance above the cooktop and the top of the microwave to be at least 66 inches from the floor. Follow the specific numbers in the installation manual.
- Cabinet depth. Upper cabinets should be at least 12 inches deep to support the top bolts.
- Outlet location. The unit plugs into a grounded outlet inside the cabinet above.
Most manufacturers call for a dedicated 120-volt, 15- or 20-amp circuit for the microwave. If there is no outlet in the cabinet above, or the existing outlet shares a circuit with other kitchen appliances, have a licensed electrician add a dedicated circuit. Never use an extension cord or adapter; plug the unit directly into its own receptacle. For any work at an existing outlet, turn off the breaker and confirm power is off with a non-contact voltage tester first, and never test live wiring.
Installation Steps for an Over-the-Range Microwave
Installing one is a two-person job. Most units weigh 50 to 70 pounds, and you have to hold the unit at shoulder height while threading bolts from above.
- Turn off power at the breaker if you are removing an old hardwired hood. Confirm with a non-contact voltage tester, then disconnect and cap the wiring per the manual or have an electrician handle it.
- Remove the old hood or microwave with a helper supporting the weight.
- Tape up the wall template that comes with the new unit. Level it, mark the stud locations, and mark the holes for the mounting plate, the top cabinet bolts and the power cord.
- Attach the mounting plate with lag screws into at least one stud, ideally two. Use the supplied toggle bolts only where no stud exists, as the manual directs.
- Drill the top cabinet using the top template for bolt holes and the power cord hole. Add a grommet or tape to smooth the cord hole edge.
- Set up the blower for ducted or recirculating use and prepare the duct connection and damper if venting outdoors.
- Lift and hook. With one person lifting, tilt the unit onto the lower tabs of the mounting plate while feeding the cord through the cabinet. Rotate it up against the cabinet bottom.
- Bolt from above. Thread the top bolts through the cabinet into the microwave and snug them evenly. Do not overtighten, which can crush the cabinet floor.
- Connect the duct with foil tape, plug in the unit, restore power and test the fan, light and damper.
Troubleshooting
Smoke and steam escape around the unit. Front burners sit outside the capture zone. Cook on back burners, use the highest fan speed, and consider a model with a deeper body or a hood if this is constant.
Fan is loud but weak. The blower may still be set for recirculation while ducted, the damper may be stuck, or the duct may be undersized or crushed.
Grease drips from the filters. Clean metal grease filters monthly in hot soapy water or a dishwasher if the manual allows.
Breaker trips. The microwave is probably sharing a circuit with another appliance. A dedicated circuit installed by an electrician fixes it.
Cost Ranges
Basic over-the-range units with modest fans typically start in the low hundreds of dollars, while models with sensor cooking, convection or quieter, stronger fans can run several hundred to over a thousand. Professional installation often adds a couple hundred dollars, more if ducting must be run through a wall or roof. A new dedicated circuit is a separate electrician charge that varies with panel location and wall access.
When to Call a Licensed Professional
Hire a licensed electrician to add a dedicated circuit or a cabinet outlet, or to remove a hardwired hood. Hire an HVAC or appliance installer to cut new duct paths through exterior walls or roofs, which may require a permit. Any gas line work, including moving the range, is licensed-pro only. If your cabinets are flimsy or you cannot find a stud, a cabinet installer can add blocking so the unit hangs securely.
Frequently Asked Questions
Is a microwave with vent as good as a range hood?
Not usually. Over-the-range fans move less air and capture front burners poorly. They are adequate for light cooking, while frequent high-heat or gas cooking benefits from a dedicated hood.
Can an over-the-range microwave vent outside?
Yes. Most can exhaust up through the cabinet or out the back through an exterior wall once the blower is rotated per the installation manual.
How much space do I need above the stove?
Follow the manufacturer’s installation manual. Most require a minimum gap between the cooktop and the unit’s bottom and a top height of at least 66 inches from the floor.
Does an over-the-range microwave need its own circuit?
Most manufacturers call for a dedicated 120-volt circuit. A licensed electrician can add one if the cabinet outlet is shared or missing.
Are 36 inch over-the-range microwaves available?
A few exist for wider ranges, but choices are limited. Some homeowners install a 30-inch unit with filler panels instead.
How often should I change the charcoal filter?
In recirculating mode, plan on about every 6 months, or sooner with heavy cooking. Grease filters should be cleaned roughly monthly.