Pearl gray grout has become the default choice for designers and tile setters who want a grout line that’s practical without looking harsh, and once you understand why, you’ll spot it everywhere from subway-tile kitchens to marble bathrooms. It’s a soft, light-to-medium gray, lighter than a true medium gray but with enough tone to hide the everyday dirt that turns pure white grout dingy within months. If you’re torn between stark white and a darker gray and want a neutral that flatters almost any tile, pearl gray is the safe, sophisticated middle ground. This guide covers where it works best, how it compares to other shades, and how to keep it looking clean.
Part of our Tile & Grout guide — explore the full guide →
Grout color is one of the most underrated decisions in a tile project. The same tile can look completely different depending on whether the grout blends in or contrasts, and pearl gray tends to strike a balance that reads intentional rather than accidental. Delta and Bright White read crisp but stain fast; charcoal makes a bold graphic statement; pearl gray splits the difference, giving definition without demanding attention.
Why Pearl Gray Is So Versatile
The appeal of pearl gray comes down to its neutrality. It has just enough gray to provide subtle contrast against white and light tile, so grout lines are visible and the tile pattern reads clearly, but it’s light enough that it doesn’t box in each tile the way charcoal grout does. That makes it forgiving across a huge range of tile colors and styles. It works with warm and cool tones alike because it sits close to a true neutral gray, avoiding the blue or beige cast that can clash.
Practically, its light-medium tone is a smart middle path for maintenance. Pure white grout shows every coffee drip and mildew spot; very dark grout can show soap scum, efflorescence, and hard-water residue. Pearl gray disguises everyday soil better than white while staying bright enough that it doesn’t look dirty on its own.
Best Tile Pairings for Pearl Gray Grout
Certain combinations are proven winners. Here are the pairings where pearl gray consistently shines:
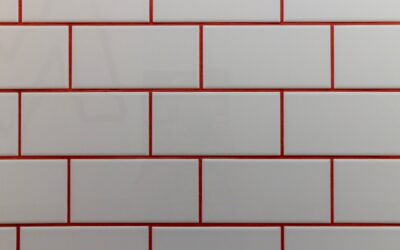
- White subway tile: The classic. Pearl gray gives the subway pattern subtle definition without the stark, high-contrast look of dark grout, keeping a kitchen or bathroom feeling fresh and timeless.
- Gray and greige tile: A near-match that lets larger-format gray tile read almost seamless with soft, low-contrast lines.
- Marble and marble-look tile: Pearl gray echoes the natural gray veining in Carrara and Calacatta, blending elegantly instead of fighting the stone.
- White and light hexagon mosaics: Softens busy small-tile patterns so the floor doesn’t look like a grid of harsh lines.
- Wood-look and light porcelain plank: A quiet grout that keeps the focus on the tile surface.
Where pearl gray is less ideal is with very dark or richly colored tile, where a matching darker grout usually looks more cohesive. If your tile is deep navy, black, or espresso, pearl gray lines can look chalky by contrast.
Sanded vs. Unsanded in Pearl Gray
Pearl gray is offered in both sanded and unsanded formulas, and the choice depends on your grout joint width, not the color. Use unsanded grout for narrow joints of 1/8 inch or less, common with wall tile and polished stone that sanded grout could scratch. Use sanded grout for wider joints of 1/8 inch and up, typical of floor tile, where the sand adds strength and resists cracking. Many brands also offer pearl gray in premixed and epoxy formulas.
For the most durable, stain-resistant result, consider an epoxy or a high-performance premixed grout in pearl gray. These cost more but resist staining and cracking far better than traditional cement grout, and they don’t require separate sealing, which is a real advantage in showers and busy kitchens.
Sealing and Protecting the Color
Standard cement-based pearl gray grout is porous and should be sealed after it cures, typically 48 to 72 hours after installation. A penetrating sealer keeps water, oil, and dirt from soaking into the grout and dulling or staining the color. Reseal cement grout every one to two years in wet or high-traffic areas. If you chose an epoxy or premixed urethane grout, sealing isn’t necessary since those formulas are naturally non-porous.
Keeping Pearl Gray Grout Clean
One reason homeowners love pearl gray is that it forgives daily life, but a little routine care keeps it looking its best. Wipe tile surfaces regularly with a pH-neutral cleaner and avoid harsh acids or bleach, which can erode cement grout and, over time, lighten or blotch the color. For built-up grime, a soft brush with a baking-soda paste lifts dirt from the joints without damaging the grout. In showers, squeegee the walls after use and run the fan to cut down on the mildew that discolors any grout. With sealing and simple upkeep, pearl gray grout holds its soft, clean look for years and remains one of the most reliable, low-drama choices you can make for a tile project.
How Pearl Gray Compares to Other Popular Grouts
To appreciate why so many designers reach for pearl gray, it helps to see it against the alternatives on the color card. Bright white and delta white grout create the crispest, cleanest contrast against white tile, which some people love, but they show every stain and turn dingy fastest, demanding the most maintenance of any color. Silver and medium gray push the contrast further than pearl, giving a more defined grid that suits industrial and modern looks but reading busier on small mosaics. Charcoal and black grout make each tile pop dramatically and hide dirt superbly, but they can look heavy in a small room and show light-colored soap scum and mineral residue. Warm tones like bone and almond flatter cream and beige tile but can clash with cool grays. Pearl gray sits comfortably in the middle of all of these, which is precisely why it works when you’re unsure or want a look that won’t feel dated in five years.
Brand naming adds a little confusion worth clearing up, because most major manufacturers offer their own version of this shade under slightly different names. What one company calls pearl gray, another labels as platinum, silver shadow, or light smoke, and the actual tone can vary subtly between brands. For that reason, never choose grout from the name or an online swatch alone. Buy a small sample, mix a little, and let it cure on a scrap of your actual tile, because cured grout almost always dries a shade or two lighter than it looks when wet, and that difference can change whether the finished line reads soft and blended or slightly darker than you intended.
Getting the Best Results on Installation Day
A great pearl gray result depends as much on technique as on the color. Mix the grout to a consistent, uniform batch and, on a large job, mix all your bags together first so subtle batch-to-batch color differences don’t create blotchy sections across the floor. Clean the excess off the tile with a barely damp sponge in gentle circular passes, changing the rinse water often; scrubbing too hard or too wet pulls pigment and water out of the joints and leaves patchy, uneven color once everything dries. Let the grout haze form, then buff it off with a dry cloth for a clean, even finish. Handled with a little patience, pearl gray grout cures to the soft, sophisticated neutral that made it a favorite in the first place.
Prefer to explore on your own?
See how new flooring looks in your actual room in seconds — free, no signup.
Try the free Floor Studio →