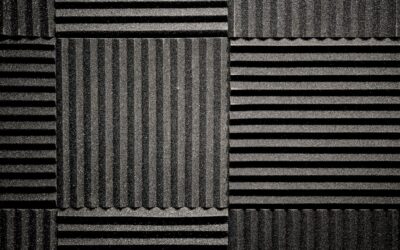
Most people buy peel and stick acoustic panels hoping to block a noisy neighbor, then discover the panels do something else entirely. Adhesive-backed panels are excellent at taming echo, flutter, and harsh reflections inside a room, but they do very little to stop sound from passing through a wall. Once you know which problem you are solving, these panels become one of the cheapest, fastest acoustic upgrades available. This guide covers materials, performance ratings, installation, removal, and what you should expect to spend.
- What Peel and Stick Acoustic Panels Actually Do
- Understanding NRC Ratings
- Material Options Compared
- Fire Safety and Indoor Air
- How to Install Peel and Stick Acoustic Panels
- Surfaces That Cause Trouble
- Removing Panels Without Damaging Walls
- Cost of Peel and Stick Acoustic Panels
- Pairing Panels With Other Soft Surfaces
What Peel and Stick Acoustic Panels Actually Do
Sound in a room bounces off hard surfaces such as drywall, glass, tile, and hardwood. Those reflections pile up and make speech muddy, video calls echoey, and music harsh. Peel and stick acoustic panels are porous materials that absorb part of that reflected energy and convert it to a tiny amount of heat. The result is a room that sounds calmer and clearer.
What they do not do is soundproof. Blocking sound transmission requires mass, airtightness, and decoupling: extra layers of drywall, damping compounds, resilient channels, solid-core doors, and sealed gaps. A half-inch felt panel weighs almost nothing and cannot stop bass from a subwoofer next door. If your goal is privacy between rooms, spend money on door seals and wall assemblies first, then add panels to fix echo.
- Good fit: home offices, podcast corners, empty-feeling living rooms, hallways, playrooms, and hard-floored basements.
- Poor fit: blocking traffic noise, stopping footfall from upstairs, or containing a drum kit.
Understanding NRC Ratings
The key number on any acoustic product is the Noise Reduction Coefficient (NRC). It runs from 0 to 1 and represents the average share of sound absorbed across speech frequencies. An NRC of 0.70 means the panel absorbs roughly 70 percent of the mid-range sound that hits it. Painted drywall sits around 0.05, which is why bare rooms ring.
Thickness drives NRC more than anything else. Thin panels handle high frequencies like consonants and clatter but let lower tones pass. Thicker panels, or panels mounted with an air gap behind them, reach deeper into the low-mid range. Adhesive mounting presses the panel flat against the wall, so a peel-and-stick panel of a given thickness usually performs slightly below the same panel on standoffs.
| Panel type | Typical thickness | Approx. NRC range |
|---|---|---|
| PET felt tiles | 9-12 mm (3/8-1/2 in) | 0.20-0.45 |
| Polyurethane foam wedges | 1-2 in | 0.40-0.80 |
| Fabric-wrapped fiber panels | 1-2 in | 0.70-1.00 |
| Cork tiles | 1/4-1/2 in | 0.10-0.30 |
Look for published lab results tested to ASTM C423. Listings that give an NRC with no test reference, or a suspiciously round “NRC 1.0” for a thin felt tile, are marketing rather than measurement.
Material Options Compared
PET felt panels
Polyester felt made from recycled plastic bottles is the most popular peel-and-stick style today. It comes in hexagons, squares, and slatted designs in dozens of colors, cuts cleanly with a utility knife, and does not shed fibers. Felt is dense and durable, which makes it good for kids’ rooms and hallways. Its limitation is thickness: most tiles are under half an inch, so they treat echo but not boominess.
Acoustic foam
Open-cell polyurethane foam in wedge or pyramid profiles absorbs more for the money than felt. It is lightweight and easy to stick up, but it fades and crumbles over a few years in sunlight, and cheap foam is often not fire rated. Foam also looks like a studio, which some homeowners like and others do not.
Fabric-wrapped panels with adhesive backs
Some manufacturers sell rigid fiber panels wrapped in fabric with adhesive strips or peel-away backing. These give the highest absorption per square foot and a finished, furniture-like appearance. They are heavier, so adhesive alone may not hold them long term on textured or painted walls; many kits include backup Z-clips or impaling clips.
Cork and wood-slat tiles
Cork and slatted wood-veneer panels bring a warm, decorative look. Cork absorbs modestly; slat panels backed with felt or mineral wool perform better. Treat these as design pieces that also help acoustics, rather than as heavy-duty treatment.
Fire Safety and Indoor Air
Anything you glue to a large wall area adds fuel to a room. Check the flame-spread rating before buying. Products tested to ASTM E84 with a Class A rating (flame spread index 0-25) are the safest choice for interior walls, and many landlords, schools, and commercial spaces require it. Uncoated budget foam often carries no rating at all and can burn quickly with dense smoke.
Odor is the other concern. New foam and some adhesives off-gas for several days. Unpack panels in a garage or ventilated room for 48 to 72 hours before installing, and look for low-VOC certifications if the panels are going in a bedroom or nursery.
How to Install Peel and Stick Acoustic Panels
Good adhesion depends almost entirely on surface prep. Adhesive tapes grab clean, smooth, fully cured surfaces and fail on dusty, greasy, or freshly painted walls.
- Wait for paint to cure. Latex paint needs about 2 to 4 weeks to fully cure. Sticking panels to week-old paint is the most common cause of panels sliding or peeling paint off later.
- Clean the wall. Wipe with a damp microfiber cloth, then with isopropyl alcohol on a rag. Let it dry completely.
- Warm the room. Most pressure-sensitive adhesives want 60-80°F during installation. Cold walls on exterior sides of a room often cause failures.
- Lay out the pattern. Mark a level line with a laser or chalk line. Tape paper templates to the wall to preview spacing before exposing adhesive.
- Peel partially. Remove half the backing, align the panel, press, then peel the rest while smoothing outward.
- Apply firm pressure. Press each panel for 30 seconds, working over the whole surface. Adhesive strength builds over 24 to 72 hours, so avoid bumping panels during that window.
Placement matters as much as quantity. Put panels at the first reflection points: the spots on side walls where sound from your speakers or your voice bounces straight to your ears. A friend sliding a mirror along the wall while you sit in your usual spot will reveal those points. Behind a desk or monitor, and on the wall facing a microphone, are the next priorities. Ceilings also reflect strongly, but gravity makes adhesive-only ceiling mounting risky for anything heavier than thin felt.
Surfaces That Cause Trouble
Not every wall suits peel-and-stick. Heavily textured drywall such as knockdown or orange peel reduces contact area, so panels can hold for a month and then drop. On textured walls, add a few dots of removable mounting putty, use double-sided mounting squares at corners, or step up to a construction adhesive if you do not plan to move them.
- Flat and eggshell paint: holds well once cured.
- Satin and semi-gloss: holds, but removal is more likely to lift paint.
- Wallpaper: avoid; the paper will come off with the panel.
- Brick, stone, and concrete block: too porous and rough for tape; use masonry-friendly adhesive or furring strips.
- Bathrooms and laundry rooms: humidity weakens adhesives and felt can absorb moisture; choose closed-surface products or skip these rooms.
Removing Panels Without Damaging Walls
Renters and anyone who redecorates often should plan removal before installing. Warm each panel with a hair dryer on medium for 30 to 60 seconds to soften the adhesive. Slide dental floss or fishing line behind the panel and saw gently side to side rather than prying from an edge. Remove leftover adhesive with a citrus-based remover or a small amount of mineral spirits on a rag, testing in a hidden spot first.
Some damage is still likely on fresh or glossy paint. Keep a small can of the original wall color and a putty knife with lightweight spackle on hand. Many homeowners who want zero risk mount felt panels on removable picture-hanging strips instead of the factory adhesive, trading a slightly weaker grip for easy cleanup.
Cost of Peel and Stick Acoustic Panels
Prices vary widely by material and design:
- PET felt tiles: roughly $2 to $6 per sq ft
- Acoustic foam: roughly $1 to $4 per sq ft
- Fabric-wrapped adhesive panels: roughly $8 to $20 per sq ft
- Decorative wood-slat panels: roughly $10 to $25 per sq ft
For a typical 12 x 12 ft home office, treating 15 to 25 percent of the wall area (about 70 to 110 sq ft of panels) is usually enough to remove the echo. That works out to roughly $150 to $600 in felt or foam, or $600 to $2,000 for fabric-wrapped or slatted panels. Installation is a DIY afternoon, so labor costs are rarely a factor.
Pairing Panels With Other Soft Surfaces
Wall panels work best as part of a room that already has some soft finishes. A thick area rug with a felt pad over hardwood or LVP absorbs floor reflections that wall panels cannot reach. Lined curtains over large windows, an upholstered chair, and a full bookshelf all add absorption or scattering. If you have hard flooring and bare windows, fix those first, then use peel and stick acoustic panels to fine-tune what remains. Your room will sound finished, and your spend will go further.