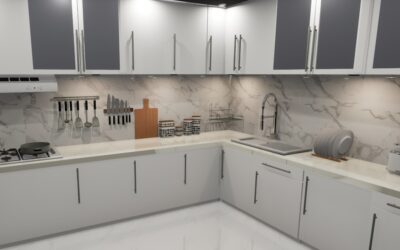
Peel and stick backsplash tiles promise a kitchen upgrade in a single afternoon with no thinset, no grout, and no contractor invoice. That pitch sounds too good to be true, and in some situations, it is. Understanding the peel and stick backsplash pros and cons before you tear open that first box will help you decide whether this shortcut delivers a result worth keeping or a frustration you will regret within a year.
Part of our Kitchen Remodeling guide — explore the full guide →
What Peel and Stick Backsplash Actually Is
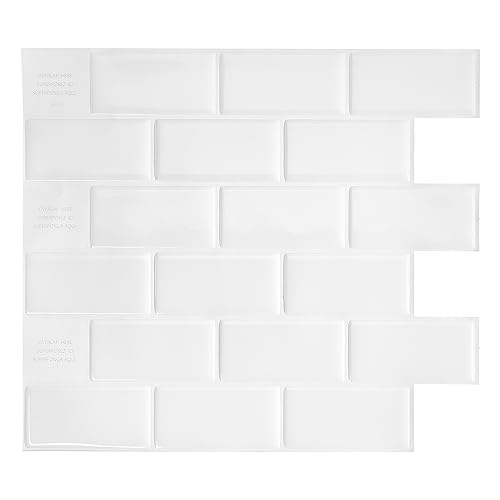
These products use a self-adhesive backing on tiles made from vinyl, PVC composite, metal, gel resin, or real stone veneer. You peel off a protective film, press the tile against the wall, and trim edges with a utility knife or scissors. No mortar, no wet saw, no special tools. Most products come in sheets ranging from 10 by 10 inches to 12 by 24 inches, with a thickness of 1.5mm to 4mm.
Popular brands include Smart Tiles, Tic Tac Tiles, Art3d, and Aspect. Prices range from $5 to $20 per square foot depending on the material. Real stone and metal peel-and-stick products sit at the higher end, while vinyl and gel options are the most affordable.


The Pros: Where Peel and Stick Shines
For the right application, peel and stick backsplash offers genuine advantages over traditional tile.
- Speed: A full kitchen backsplash takes 2 to 4 hours to install, compared to 1 to 2 days for traditional tile with grout cure time.
- Cost: Total installed cost runs $3 to $15 per square foot for a DIY project. Traditional tile with professional installation costs $15 to $40 per square foot.
- No special skills needed: If you can measure, cut with a utility knife, and press firmly, you can install these tiles. No wet saw, no mixing, no grouting.
- Renter-friendly options: Some products peel off cleanly without damaging drywall or paint, making them viable for rental kitchens and apartments.
- Easy replacement: Damaged tiles pull off and get replaced individually in minutes. Try that with cemented subway tile.
- Minimal mess: No grout haze, no thinset cleanup, no dust from cutting. The workspace stays clean throughout installation.
The Cons: Where Peel and Stick Falls Short
The drawbacks are significant enough that many homeowners eventually replace peel and stick with traditional tile.
- Adhesion problems: Tiles can peel away from textured walls, humid environments, and areas exposed to heat above 140 degrees F. Directly behind a stove is the highest-risk zone.
- Appearance gap: Even premium peel and stick products lack the depth, texture, and visual weight of real ceramic, porcelain, or stone. The difference is obvious up close.
- Limited lifespan: Expect 3 to 7 years from a quality product in ideal conditions. Traditional tile lasts 20 to 50 years.
- Edge curling: Heat and moisture cause edges to lift over time, especially on vinyl products. Once an edge lifts, the entire tile often follows.
- Resale perception: Real estate agents and home buyers recognize peel and stick immediately. It reads as a temporary fix, not a permanent upgrade, which can hurt perceived home value.
- Surface prep matters: Despite the “just peel and stick” marketing, the wall must be clean, smooth, dry, and free of texture. Adhesive fails on orange peel or knockdown textures without priming.
Best Applications for Peel and Stick
Peel and stick backsplash makes practical sense in specific scenarios where the trade-offs work in your favor.
- Rental properties: Upgrade the look without losing your deposit, provided you test a small area first for clean removal
- Laundry rooms and utility areas: Low heat, low moisture, and low scrutiny make these ideal locations
- Temporary updates: Planning a full kitchen remodel in 1 to 2 years? Peel and stick buys you an improved look now without wasting money on tile that will get demolished anyway
- Behind bathroom vanity mirrors: Low exposure to water and heat with minimal close inspection
Installation Tips That Prevent Failure
Most negative reviews trace back to poor installation technique rather than product defects. Follow these steps for the best result.
Start with surface prep. Clean the wall with isopropyl alcohol or TSP substitute to remove grease, dust, and residue. Let it dry completely. If your wall has orange peel texture, sand it smooth and apply a bonding primer. Some installers apply a thin coat of contact adhesive to both the wall and the tile backing for areas near stoves.
Work from the center of the backsplash outward, using a level line as your guide. Press each tile firmly for 30 seconds with a J-roller or the flat of your hand. Avoid installing in cold rooms below 60 degrees F, as the adhesive needs warmth to bond properly. After installation, avoid heavy cleaning or water exposure for 48 hours while the adhesive cures fully.
Peel and Stick vs Traditional Tile: The Real Math
A 30 square foot kitchen backsplash costs roughly $150 to $300 in peel-and-stick materials for a DIY install. That same backsplash in ceramic subway tile costs $100 to $200 in materials plus $300 to $600 in labor if you hire a tile setter. The cost savings are real but narrow when you factor in the shorter lifespan.
Over 15 years, you might install peel and stick 3 times at $225 average per round ($675 total) versus one ceramic tile installation at $600 total. Traditional tile wins the long-term cost comparison while delivering a better appearance and higher home value at every point along the timeline.
Final Verdict
Peel and stick backsplash is a legitimate product for temporary, low-stakes, or budget-constrained situations. It is not a permanent replacement for real tile in a kitchen you plan to own for more than a few years. Go in with realistic expectations about lifespan and appearance, and the product will deliver exactly what it promises: a fast, affordable improvement that buys you time.