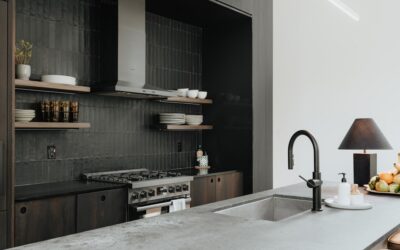
Scroll through a design feed and you will notice tile counters are back, and not in the dated pink-and-brown way you remember from a 1980s kitchen. Homeowners searching for pictures of tile countertops today are finding crisp handmade zellige, oversized porcelain slabs, and bold patterned surfaces that look nothing like the grout-lined counters of decades past. Tile is affordable, endlessly customizable, and one of the few countertop materials a determined DIYer can install over a weekend. This guide translates the best of those images into practical choices, so you can plan a counter that looks intentional rather than accidental.
- Why Tile Countertops Are Making a Comeback
- Popular Tile Countertop Styles
- Handmade Zellige Counters
- Large-Format Porcelain
- Classic Square and Subway
- Patterned and Encaustic Looks
- Choosing Your Tile Material
- Layout and Pattern Ideas
- Edge Details That Elevate the Look
- Grout: The Detail That Makes or Breaks It
- Sealing, Care, and Longevity
- Turning Pictures Into a Real Plan
Why Tile Countertops Are Making a Comeback
Tile fell out of favor when solid slabs of granite and quartz took over, but it never lost its core advantages. It costs a fraction of stone, resists heat better than almost any surface, and lets you replace a single cracked piece instead of an entire slab. The new wave of designs leans into those strengths while solving the old complaints about busy grout lines and dated colors.
What you see in modern pictures of tile countertops is a more restrained, architectural look. Designers use larger tiles, tighter and color-matched grout, and edge details that mimic the clean lines of stone. The result feels custom and current, with the personality that a uniform slab simply cannot offer.
Popular Tile Countertop Styles
Most of the counters catching attention online fall into a handful of recognizable looks. Knowing the vocabulary helps you describe what you want to a supplier or installer.
Handmade Zellige Counters
Moroccan zellige in white, sage, or terracotta gives a counter a warm, artisanal glow. The slightly uneven, glossy surface catches light differently across the day, and each four-inch square is unique. These counters read organic and high-end, and they pair beautifully with unlacquered brass faucets and open wood shelving.
Large-Format Porcelain
Oversized porcelain tiles, some measuring 24 by 48 inches or larger, create the seamless look of a stone slab with minimal grout. Marble-look and concrete-look prints dominate this category, giving you the appearance of luxury materials at a lower price and with better durability.
Classic Square and Subway
A grid of white four-inch squares or a running-bond subway pattern delivers a timeless farmhouse or cottage feel. This is the most budget-friendly look and the easiest to install, which makes it a favorite for first-time DIY counters.
Patterned and Encaustic Looks
For a statement, patterned cement-look tiles turn the counter itself into the focal point of the kitchen. These work best on smaller surfaces like an island top or a coffee bar, where the pattern reads as intentional art rather than visual noise.
Choosing Your Tile Material
The pictures show the look, but the material determines how the counter performs. Porcelain is the most practical choice: dense, nonporous, scratch-resistant, and it never needs sealing. Ceramic costs less and works well for lighter-use counters, though it chips more easily on exposed edges.
Natural stone tile, such as marble or granite squares, brings real depth and veining but requires regular sealing and careful handling of acids like lemon juice and vinegar. Glass tile offers a sleek, reflective surface for a bar or accent area, but it scratches under knives and is best kept off primary prep zones. Match the material to how hard the counter will work.
Layout and Pattern Ideas
How you arrange the tile matters as much as the tile itself. A straight grid feels clean and modern, while a diagonal layout adds movement and can make a small counter look larger. Running-bond, where each row shifts by half a tile, softens the look and hides minor size variations in handmade pieces.
Plan your layout around the sink and cooktop so cut tiles land in less visible areas. A full tile at the front edge and along the backsplash line looks deliberate, while awkward slivers at the most-seen spots read as an amateur job. Dry-lay the entire surface before you set a single tile, and adjust until the pattern balances.
Edge Details That Elevate the Look
The edge is where a tile counter either looks finished or unfinished, and it is the detail most people overlook in photos. A few options define the profile.
- Bullnose tile: a rounded edge piece that wraps the front for a soft, traditional finish.
- Wood trim: a stained hardwood strip that frames the tile for a warm farmhouse look.
- Metal edge profiles: a Schluter-style aluminum or brass rail for a crisp, modern line.
- Mitered porcelain: two tiles joined at a 45-degree angle to mimic a thick stone slab edge.
- V-cap tile: a specialized L-shaped piece that caps the front and contains spills.
The edge choice sets the entire tone. A mitered porcelain edge on a large-format counter looks strikingly like a solid slab, while a wood edge signals cozy and handmade.
Grout: The Detail That Makes or Breaks It
Grout is the single biggest reason old tile counters looked dated, and the reason new ones look clean. The move today is toward color-matched grout in a tight joint, which lets the tile field read as one continuous surface instead of a busy grid. A white tile with white grout looks seamless; the same tile with dark grout emphasizes every line.
On a working countertop, always use an epoxy grout rather than standard cement grout. Epoxy resists stains from wine, coffee, and cooking oils, and it does not need sealing, which solves the classic complaint about grimy counter grout. It costs more and sets faster, but on a surface that sees food prep every day, it is worth every penny.
Sealing, Care, and Longevity
The old knock against tile counters was grimy grout, and it is entirely avoidable with the right products. If you choose epoxy grout, there is nothing to seal, and the surface wipes clean with a damp cloth and a mild cleaner. If you use natural stone tile, plan to reseal the stone once or twice a year and wipe up acidic spills quickly to prevent etching. Porcelain and glazed ceramic fields need no sealing at all.
Day-to-day care is simple. Use a cutting board rather than slicing directly on the tile, set hot pans down without worry since tile shrugs off heat, and avoid dragging heavy cookware across a glazed surface that could chip an edge. Handled this way, a tile counter easily lasts fifteen to twenty years, and the modular nature means a single damaged tile can be popped out and replaced without touching the rest of the surface.
Turning Pictures Into a Real Plan
Once a few pictures of tile countertops have caught your eye, translate them into a shopping list. Note the tile size, the grout color, and the edge detail in each image you love, because those three elements do most of the work. Order samples and lay them on your actual cabinets under your kitchen lighting, since color and sheen shift dramatically away from a showroom.
Budget realistically. Materials for a tile counter often run $10 to $40 per square foot depending on the tile, far below the cost of a stone slab, and a confident DIYer can handle the install with a wet saw, thinset, and epoxy grout. Take your time on layout and edges, choose a stain-proof grout, and the finished counter will look like the inspiration photos that started the whole project, custom, durable, and unmistakably yours.