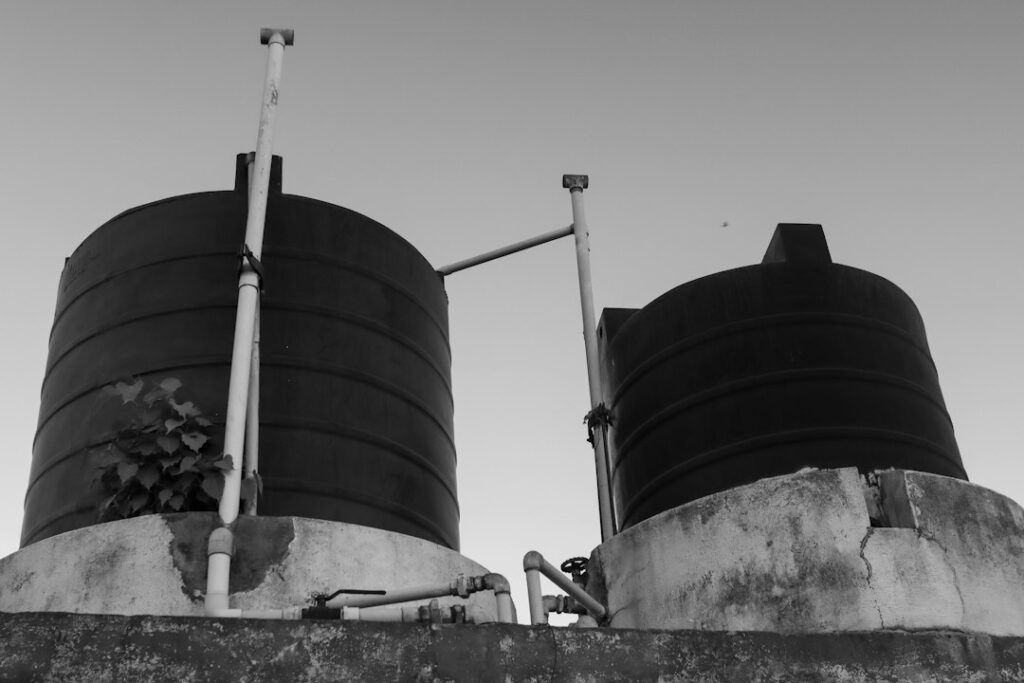
One inch of rain on a 1,000 square foot roof produces about 620 gallons of water. A single barrel fills in minutes and the rest pours onto the ground. That is why homeowners who get serious about capturing rain move up to rainwater collection tanks: larger poly, steel or slimline vessels that hold hundreds to thousands of gallons for garden irrigation, washing and other non-drinking uses.
To size a tank, multiply your roof catchment area in square feet by 0.62 to get gallons per inch of rain, then compare that against how much water you plan to use between storms. Set the tank on a level, compacted pad strong enough for its full weight, route overflow safely away from the foundation, screen every opening against mosquitoes and debris, and treat the water as non-potable unless a properly designed treatment system is installed.
- Sizing Rainwater Collection Tanks
- Tank Types and Materials
- Placement and Building the Pad
- Installation Steps
- Linking Multiple Tanks
- Mosquito and Algae Control
- Water Quality and Safe Uses
- Winter Care and Maintenance
- Troubleshooting
- Choosing Between Tank Options
- Cost Ranges
- When to Call a Professional
- Frequently Asked Questions
A single rain barrel is a fine starting point, but a tank system changes the planning: weight, foundations, overflow volume and plumbing all scale up. Sizing, materials, placement, installation and maintenance each deserve a careful look before you buy.
Sizing Rainwater Collection Tanks
Start with catchment area, not the total roof surface. Measure the footprint of the roof section that drains to the downspouts you will connect (length times width as seen from above; pitch does not matter). Then use this formula:
Gallons collected = catchment area (sq ft) x rainfall (inches) x 0.62 x efficiency
Efficiency accounts for splash, evaporation and first-flush diversion; 0.8 to 0.9 is a reasonable figure for metal roofs and smooth gutters, a bit lower for rough surfaces. A 1,500 square foot catchment in a 1 inch storm at 0.85 efficiency gives about 790 gallons.
Next, decide what you want the water to do. A vegetable garden of a few hundred square feet might use 1 inch of water per week, around 0.62 gallons per square foot. If your area has dry stretches of three or four weeks, you need enough storage to cover that gap. Many homeowners land between 300 and 1,500 gallons for garden use, while people supplying livestock or larger landscapes go to several thousand gallons. Bigger is not always better: a huge tank that never fills is wasted money, and one that overflows every storm is undersized.
Tank Types and Materials
Polyethylene tanks
Roto-molded polyethylene is the most common material for rainwater harvesting tanks. Poly is lightweight, affordable and available from about 50 to 10,000 gallons or more. Choose UV-stabilized, opaque tanks in dark colors (green, black, gray) to block light that would grow algae. Translucent white tanks let sunlight in and encourage growth.
Steel tanks
Galvanized or coated corrugated steel tanks, often with a food-grade liner, suit larger storage from about 1,000 to tens of thousands of gallons. They resist UV and fire, look attractive in rural settings and last for decades with intact coatings and liners, but they cost more and need a well-built base.
Slimline tanks
Slimline or wall tanks are tall and narrow, designed to sit along a house wall or fence where a round tank would not fit. Capacities range from about 100 to 1,000 gallons. They cost more per gallon but solve tight side-yard problems.
Other options
Underground or bladder tanks hide storage but require excavation, pumps and careful engineering. Fiberglass and concrete tanks are used for large or buried systems. For most yards, above-ground poly or slimline rainwater storage tanks are the practical choice.
Placement and Building the Pad
Water weighs about 8.34 pounds per gallon. A 1,000 gallon tank holds over 8,300 pounds of water when full, all concentrated on its footprint. A soft or uneven base lets the tank settle, crack fittings or even tip. Plan the location and pad with care:
- Place the tank close to the downspout that will feed it and near where you will use the water.
- Keep it on level ground away from slopes that could erode, and away from septic fields and drain lines.
- Do not set heavy tanks on decks, retaining walls or near basement walls unless an engineer confirms capacity.
- Check local rules and HOA guidelines on placement, height and screening.
A good pad for smaller tanks is several inches of compacted crushed gravel contained by a timber or block border, extending a few inches past the tank on all sides. For larger tanks or soft soils, a reinforced concrete slab is safer. Use the tank maker’s pad specification, and call 811 before digging for any base. Raising a tank on a platform adds gravity pressure at the spigot, but the stand must be engineered for the full weight and protected against tipping.
Installation Steps
- Clean and guard gutters. Leaf screens or gutter guards reduce debris entering the system.
- Install a first-flush diverter. This sends the first few gallons off the roof, which carry most of the dust and droppings, to waste before water flows to the tank.
- Add an inlet screen. Fine mesh at the inlet keeps out debris and mosquitoes.
- Connect the downspout. Use smooth pipe with a gentle slope to the tank inlet.
- Plumb the overflow. The overflow outlet should match or exceed the inlet size and carry water at least several feet from the house, into a rain garden, dry well or swale.
- Fit an outlet and valve. Mount the spigot a few inches above the tank floor to avoid drawing sediment.
- Add a pump if needed. Gravity pressure is low; a small pump helps with drip lines and hoses. Outdoor pumps need GFCI-protected outlets, and any new outdoor circuit should be installed by a licensed electrician.
Linking Multiple Tanks
When one tank cannot hold enough, you can connect two or more rainwater collection tanks side by side. Linking them near the bottom with a pipe and shutoff valves lets them fill and drain together, acting as one larger reservoir. Set all linked tanks on the same level pad so they share an equal water line, and make sure each one is vented and screened. Another approach is to place a second tank downstream of the first tank’s overflow, which keeps the first tank clean because sediment settles there before water moves on. Linking smaller tanks also lets you expand storage over time instead of buying one large tank on day one, and smaller units are easier to move through gates and into tight yards.
Mosquito and Algae Control
Every opening must be screened: inlet, overflow and vents. Mosquitoes can breed in a few days in standing water, and a single gap is enough. Fine stainless or fiberglass mesh works well. Keeping the tank opaque and the lid sealed prevents algae. If you see larvae, find and fix the gap, then flush the water. Avoid adding chemicals that are not labeled for rainwater storage or that could harm plants.
Water Quality and Safe Uses
Roof runoff picks up bird droppings, dust, roofing particles and sometimes chemicals. Treat stored rainwater as non-potable. It works well for garden beds, lawns, washing cars and tools, and filling ponds. Do not drink it or use it for cooking unless the system includes appropriate filtration and disinfection designed for drinking water and tested regularly. If you connect stored rainwater to indoor plumbing such as toilets, local plumbing codes typically require backflow protection and separate, labeled piping; that work belongs with a licensed plumber. Some states also regulate how much rainwater can be collected or how rainwater collection tanks must be installed, so check local rules.
Winter Care and Maintenance
- Inspect screens and gutters monthly during the rainy season.
- Clean the first-flush diverter after storms.
- Drain or partially empty tanks before hard freezes in cold climates and disconnect hoses and pumps.
- Remove sediment every year or two by draining and rinsing.
- Check the pad for settling and fittings for leaks.
Troubleshooting
- Tank never fills: small catchment, clogged gutters or a diverter set too large.
- Overflow floods the yard: undersized overflow pipe or no dedicated outlet area.
- Bad smell: organic debris rotting inside; clean the tank and improve screening.
- Weak hose pressure: raise the tank on a rated stand or add a pump.
Choosing Between Tank Options
Match the tank to the job. For a suburban garden with a modest roof catchment, one or two poly tanks of 300 to 800 gallons usually cover irrigation needs. For a narrow side yard, slimline rainwater collection tanks along the wall fit where round tanks will not. Rural properties with large barns or shop roofs and long dry seasons often justify steel tanks of several thousand gallons. Whatever you pick, confirm the tank is rated for outdoor use and UV exposure and that its fittings match your inlet, overflow and outlet plans.
Cost Ranges
Poly tanks generally cost less per gallon as size increases: small tanks run a few hundred dollars, while 1,000 to 2,500 gallon tanks often fall in the low thousands. Slimline tanks cost more per gallon. Steel tanks with liners are typically higher still. Budget extra for a pad, diverter, screens, fittings, pump and labor.
When to Call a Professional
Call a pro for underground tanks, systems feeding indoor plumbing, raised tanks over several hundred gallons, concrete pads for large tanks, pump wiring and any setup intended for drinking water.
Frequently Asked Questions
How many gallons does 1 inch of rain give?
About 0.62 gallons per square foot of catchment area, or roughly 620 gallons per 1,000 square feet, before efficiency losses.
Is rainwater from a tank safe to drink?
Not without a properly designed filtration and disinfection system plus regular testing. Treat stored rainwater as non-potable for gardens and outdoor cleaning.
What color rainwater storage tank is best?
Dark, opaque colors such as green, black or gray block sunlight and limit algae growth better than translucent tanks.
How do I keep mosquitoes out of a rain tank?
Screen every opening with fine mesh, keep lids sealed and check screens regularly for tears or gaps.
Do rain capture tanks need a concrete base?
Smaller tanks often sit on compacted gravel pads, while large tanks or soft soils usually need a reinforced concrete slab. Follow the tank maker’s base requirements.