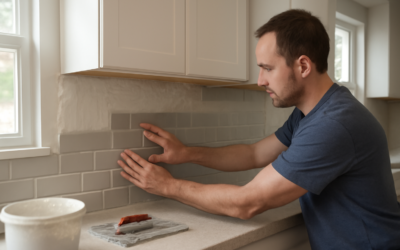
Whether you inherited dated 4-inch squares or a busy mosaic that no longer suits your kitchen, removing tile backsplash is one of the most satisfying weekend projects a homeowner can tackle. It requires only modest tools and a bit of patience, and doing it yourself saves the $300 to $600 a contractor would charge for demolition alone. The challenge is not breaking the tile off; it is doing so without destroying the drywall behind it.
Part of our Kitchen Remodeling guide — explore the full guide →
This guide covers the tools you need, a careful step-by-step method, how to protect the wall for the next backsplash, and the mistakes that turn a simple job into a drywall replacement project.
- What You're Really Removing
- Tools and Materials You'll Need
- Step-by-Step: The Careful Method
- Protecting the Drywall Behind It
- Handling Outlets and Obstacles
- How Long It Takes and What It Costs
- Dealing With Different Adhesives
- Cleanup and Debris Disposal
- Common Mistakes to Avoid
- Preparing for the New Backsplash
What You’re Really Removing
A backsplash is thin tile bonded to the wall with either thinset mortar or mastic adhesive over drywall, greenboard, or cement board. The bond is what determines how hard the job will be. Mastic, a pre-mixed glue common in older kitchens, releases more easily. Thinset mortar grips much harder and often tears the paper face off the drywall as it comes.
Because you are prying material off a fragile surface, the realistic goal is not perfection but manageable damage. Expect to skim-coat or patch the wall afterward. If the tile sits on cement board, you may choose to remove the board entirely and start fresh.
Tools and Materials You’ll Need
- Safety glasses and heavy work gloves (tile shards are razor sharp)
- Dust mask or respirator
- A stiff 3- to 5-inch putty knife and a wider drywall taping knife
- A cold chisel or a flat pry bar
- A hammer and a rubber mallet
- An oscillating multi-tool with a rigid scraper blade (the single most useful tool)
- A utility knife to score caulk and paint lines
- Drop cloths, painter’s tape, and contractor trash bags
- Joint compound and mesh tape for repairs
Step-by-Step: The Careful Method
Step 1: Prep and protect. Turn off power to outlets in the backsplash area at the breaker and remove outlet and switch cover plates. Lay drop cloths across the countertop and tape plastic over the range and sink. Backsplash demolition throws grit everywhere.
Step 2: Score the edges. Run a utility knife along the top edge where tile meets the wall and along the caulk line at the countertop. This prevents the removal from peeling paint or lifting drywall paper above the tile line.
Step 3: Find a starting point. The easiest entry is a cut edge, usually near an outlet, the end of a run, or under an upper cabinet. Work a putty knife or chisel behind one tile and tap gently with the hammer until it pops loose. That first tile is always the hardest.
Step 4: Work in sections. Once you have an opening, slide the putty knife or oscillating scraper blade behind adjacent tiles at a low angle, keeping the blade flat against the wall to shear the adhesive rather than gouging inward. Let the tool do the work; prying too aggressively is what tears drywall.
Step 5: Clear the adhesive ridges. After the tile is off, hardened thinset or mastic remains on the wall. Knock down the high spots with a wide taping knife or the oscillating tool. You do not need it perfectly smooth, only flat enough for the next material.
Protecting the Drywall Behind It
The reason most DIYers hate this job is torn drywall paper. Two habits prevent the worst of it. First, keep every blade at a shallow angle, nearly parallel to the wall, so you are scraping the bond line rather than digging into the gypsum. Second, warm mastic softens; a heat gun on a low setting can loosen stubborn adhesive so it releases instead of ripping.
If the paper does tear, it is not a disaster. Seal any exposed gypsum with a coat of oil- or shellac-based primer once repairs dry, which stops the paper from bubbling when you apply new adhesive. For badly chewed-up walls, screwing a fresh sheet of 1/4-inch backer or drywall over the area gives you a clean, flat canvas.
Handling Outlets and Obstacles
Electrical outlets in a backsplash are mounted in boxes set for the original wall thickness plus tile. When the tile comes off, the outlet may sit proud of the wall. This is normal. If you plan a thinner backsplash or none at all, you can add box extenders (about $2 each) or reposition the outlet’s mounting screws. Always confirm the circuit is dead with a voltage tester before working near boxes.
How Long It Takes and What It Costs
A standard kitchen backsplash of 25 to 40 square feet takes a motivated DIYer four to eight hours, including cleanup. Your only real costs are consumables: blades, joint compound, primer, and trash bags, typically $40 to $100. Renting a small dumpster bag is worthwhile because tile debris is heavy and can crack ordinary trash cans.
Compare that to a contractor, who charges $2 to $6 per square foot for demolition plus disposal fees. On a typical kitchen, doing the tear-out yourself keeps $300 to $600 in your pocket, and it is genuinely within the reach of a first-timer.
Dealing With Different Adhesives
The adhesive behind your tile largely dictates the difficulty, so it pays to identify it early. Mastic, the pre-mixed organic glue common in kitchens built or updated from the 1970s through the 2000s, is tan or off-white and slightly rubbery. It softens with gentle heat and releases relatively cleanly, which is the best-case scenario. Thinset mortar is gray and rock-hard; it grips the drywall paper so tenaciously that tiles often come off with a layer of paper still attached to their backs.
If you hit thinset, do not fight it tile by tile with brute force. Instead, accept that the drywall face will suffer and plan to skim-coat or overlay the wall afterward. For small mastic jobs, a heat gun held a few inches from the tile for 20 to 30 seconds warms the glue enough that a putty knife slides behind the tile with far less prying. Keep the heat moving so you do not scorch the wall or release fumes, and wear your respirator.
Cleanup and Debris Disposal
Backsplash demolition generates sharp, heavy debris and a surprising amount of fine dust, so plan disposal before you start. Tile shards will slice through standard kitchen trash bags, so double-bag debris in contractor-grade 3-mil bags or, better, load it into a five-gallon bucket you can carry, since a full bag of tile becomes too heavy to lift safely. Many municipalities do not accept construction debris in regular curbside pickup, so check your local rules; you may need to haul it to a transfer station or use a disposal bag service.
Control the dust as you go by misting the work area lightly with a spray bottle and running a box fan in a nearby window blowing outward. A shop vacuum with a fine-dust filter beats a broom for the constant grit. Wipe down cabinets, countertops, and nearby surfaces with a damp cloth at the end, because the fine gypsum and tile dust settles everywhere and scratches surfaces if you dry-wipe it.
Common Mistakes to Avoid
- Skipping the score cut. Failing to score the top edge tears paint and paper well above the tile line, enlarging your repair.
- Prying straight out. Levering tiles outward digs the tool into the drywall. Always shear from the side at a low angle.
- Leaving thick adhesive. New tile or a peel-and-stick panel will not sit flat over lumpy old thinset; knock it down first.
- Forgetting the power. Working around live outlets is a genuine shock hazard. Kill the breaker.
- Rushing the first tile. Cracking tiles into shards mid-wall creates sharp edges and more dust. Patience at the start pays off.
Preparing for the New Backsplash
Once the wall is clear and any tears are primed, decide what goes back up. If the drywall is flat and sound, you can tile directly over it with new thinset. If you want a fast, low-mess upgrade, peel-and-stick tile or thin porcelain panels forgive minor wall imperfections. For a wet zone behind a sink, consider replacing the substrate with cement board for water resistance.
Removing tile backsplash is messy but genuinely beginner-friendly when you respect the drywall behind it. Score your edges, work at a shallow angle, take the first tile slowly, and you will have a clean wall ready for whatever style comes next, all in a single Saturday and for a fraction of a contractor’s price.
Prefer to explore on your own?
See how new flooring looks in your actual room in seconds — free, no signup.
Try the free Floor Studio →