Learning how to do backsplash tile is one of the highest-payoff DIY projects in the whole house, because a kitchen backsplash is small enough to finish in a weekend but visible enough to transform the room. A pro will charge $600 to $1,500 to tile an average kitchen backsplash, and a large share of that is labor you can do yourself with basic tools. Done carefully, a DIY backsplash looks every bit as good as a hired job, and the mistakes that trip up beginners are all avoidable if you follow the right sequence.
Part of our Kitchen Remodeling guide — explore the full guide →
This is a step-by-step guide from prep to sealing. Read the whole thing before you start so you understand the flow, then work through it one stage at a time without rushing the setup, because a backsplash lives or dies on the prep and layout.
Step 1: Gather Tools and Materials
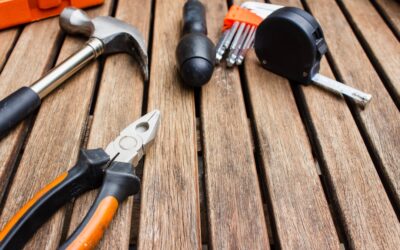
Before you touch a tile, assemble everything so you’re not running to the store mid-job with thinset drying on the wall. You’ll need your tile plus about 10 percent extra for cuts and breakage, thinset mortar or premixed mastic adhesive, a notched trowel, tile spacers, grout, a grout float, a wet saw or tile cutter, a sponge and bucket, a level, a tape measure, painter’s tape, and a caulk gun with color-matched caulk.
For most kitchen backsplashes, premixed mastic in a tub is beginner-friendly and grabs quickly, though for natural stone or a wet area you’ll want proper thinset. Renting a wet saw for the day, usually $40 to $60, makes cutting far cleaner than a hand cutter, especially around outlets. Having the right tools staged and ready is half the battle.
Step 2: Prep the Wall
Turn off power to the kitchen outlets at the breaker, then remove the outlet and switch cover plates and loosen the outlets so they can later sit proud of the new tile. Clean the wall thoroughly of grease and grime, since adhesive won’t bond to a dirty surface, and sand any glossy paint so it has some tooth. Fill big gouges and let them dry.
Now find and mark your layout. Measure to find the center of your main wall or the focal area behind the stove, and use a level to draw a plumb vertical line and a level horizontal reference line. Dry-lay a row of tile along the counter to see how the cuts will fall at the ends, and adjust your starting point so you don’t end up with a sliver of tile in a visible corner. This planning step is what separates an amateur result from a clean one.
Step 3: Apply Adhesive and Set the Tile
Using the flat side of the notched trowel, spread a thin layer of adhesive on the wall, then comb it with the notched edge held at a 45-degree angle to create even ridges. Only cover about three to four square feet at a time so the adhesive doesn’t skin over before you can set tile into it. Working in small sections keeps you in control.
Press each tile firmly into the adhesive with a slight twist to seat it, and insert spacers between tiles to keep your gaps consistent. Sheet-mounted mosaics go up fast since the spacing is built in; individual tiles take more attention. Check your work with the level every few tiles and step back frequently to eye the lines, because small drifts compound across a wall. Leave a 1/8-inch gap where the tile meets the countertop for caulk later, and don’t tile all the way tight to it.
Step 4: Cut Tile Around Outlets and Edges
The cuts around outlets and at the ends of walls are where beginners slow down, and that’s fine, precision matters here. Measure each cut individually rather than assuming they’re identical, mark the tile, and cut it on the wet saw. For outlet openings, you’ll often make two straight cuts and nibble out the corner, or cut the tile in two pieces that frame the box. Dry-fit every cut piece before buttering it with adhesive and setting it.
Let the tile set undisturbed for the time your adhesive specifies, usually 24 hours, before grouting. Rushing to grout while the adhesive is still wet is a classic mistake that pulls tiles loose. Use this curing time to clean tools and pull spacers once the tile is firm enough that it won’t shift.
Step 5: Grout, Clean, and Seal
Mix your grout to a peanut-butter consistency, or open the premixed tub, and pack it into the joints by dragging the grout float diagonally across the tile at a 45-degree angle. Working diagonally forces grout into the gaps without dragging it back out. Fill every joint completely, then let the grout haze up for 15 to 20 minutes.
Wipe the tile faces with a damp, well-wrung sponge in gentle circles, rinsing often and changing the water frequently, until the tile is clean and the joints are smooth. Don’t drown the joints or you’ll wash out the grout. After it dries, a light haze may remain, which buffs off with a dry cloth. Finally, run a bead of color-matched caulk, not grout, in the seam where the tile meets the countertop, since that joint flexes and rigid grout would crack there. If you used cement grout or natural stone, seal it after it fully cures. That’s the complete process for how to do backsplash tile, and following it in order is what delivers a finish you’ll be proud to show off.
How Long It Takes and What It Costs to DIY
Realistically, a first-timer should budget a full weekend for an average kitchen backsplash rather than expecting to finish in an afternoon. Plan on the prep and tile-setting taking most of the first day, then a mandatory overnight wait for the adhesive to cure, and grouting, cleaning, and caulking on the second day. Rushing the cure time between setting and grouting is the mistake that undoes an otherwise careful job, so build that pause into your schedule from the start.
On cost, doing it yourself is where the real savings live. Tile for an average backsplash runs anywhere from $100 to $400 depending on what you choose, adhesive and grout add maybe $40 to $80, and a wet-saw rental is $40 to $60 for the day. All in, a DIY backsplash often lands between $200 and $500 in materials, versus the $600 to $1,500 a pro would charge for the same project once labor is added. That gap is exactly why this is one of the most popular beginner tile projects. Just remember to buy about 10 percent extra tile so you have matching pieces for future repairs, and keep a few spare tiles and a little leftover grout after the job for touch-ups down the line.