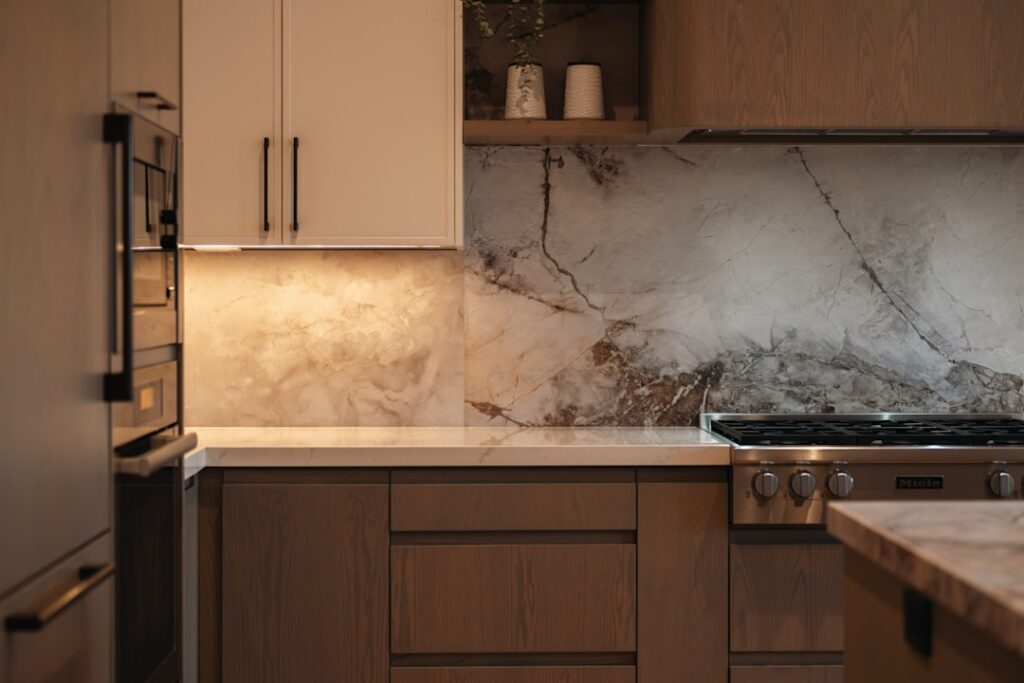
Nothing warms up a kitchen quite like the rugged, organic texture of natural stone climbing the wall behind your range. A rock backsplash trades the flat uniformity of subway tile for depth, shadow, and the one-of-a-kind character that only real stone delivers. Whether you choose stacked ledger panels, river-rock pebbles, or tumbled travertine, the look reads as both rustic and high-end at once.
Part of our Kitchen Remodeling guide — explore the full guide →
The texture that makes stone so striking also makes it a bit more demanding to install and maintain than a smooth tile. This guide walks through your material options, the installation process, sealing, and what it costs so you can decide whether stone is right for your space.
Popular Rock Backsplash Materials
The term covers several distinct looks, each with its own personality and price point:
- Stacked stone ledger panels: thin strips of natural stone bonded onto mesh-backed panels that snap together into a dramatic, dimensional wall. The most popular choice for a modern rustic look.
- River rock and pebble tile: smooth, rounded stones set on mesh sheets, giving a spa-like, organic feel often seen behind sinks.
- Tumbled travertine and marble: softened-edge stone tiles with a warm, old-world appearance.
- Slate: flat, layered stone with rich charcoal, rust, and green tones.
- Faux stone panels: lightweight polyurethane or composite panels that mimic stone at lower cost and weight, ideal if real stone is impractical.
Why Choose Stone Over Standard Tile
The biggest draw is texture and uniqueness. No two stone panels are identical, so your backsplash becomes a genuine focal point rather than a repeating grid. Stone pairs especially well with rustic, farmhouse, transitional, and contemporary kitchens, and it bridges beautifully to butcher-block or granite counters.
Durability is another advantage. Natural stone shrugs off heat from the range and lasts indefinitely when sealed. The trade-offs are weight, which demands a sound wall and strong adhesive, and the textured surface, which catches grease and cooking splatter more readily than glass or glazed ceramic.
Tools and Materials You Will Need
- Stone panels or tile sheets, plus 10 to 15 percent extra for cuts and breakage
- Polymer-modified thinset mortar or a heavy-duty construction adhesive rated for stone
- A notched trowel and a grout float, if your style uses grout
- An angle grinder or wet saw with a diamond blade for cutting stone
- A penetrating stone sealer
- A level, tape measure, and painter’s tape
Installation Step by Step
Stacked stone panels and pebble sheets differ slightly, but the fundamentals are the same. Always start with a clean, dry, structurally sound wall.
- Turn off power and remove outlet covers. Plan your layout so panel seams and outlet cuts fall logically.
- Mark a level baseline. Even a small slope at the counter compounds across the run, so do not trust the countertop to be perfectly level.
- Spread thinset or apply adhesive with the notched trowel, working in small sections so it does not skin over.
- Press each panel firmly into place, staggering seams on stacked stone so joints interlock and disappear.
- Cut pieces to fit around outlets and at the ends using the diamond blade. Keep cut edges toward corners where possible.
- For pebble and tumbled tile, grout the joints once the adhesive cures; most stacked-stone panels are designed to be installed dry without grout.
- Let everything cure fully before sealing, typically 24 to 48 hours.
Sealing Is Essential
Natural stone is porous, and a kitchen backsplash sees grease, tomato sauce, and water daily. Apply a quality penetrating sealer after installation and after any grouting cures. Stacked stone with its many crevices may need two coats to fully protect the surface. Reseal once a year, or whenever water stops beading on the stone.
Skipping this step is the most common regret homeowners report. Unsealed stone absorbs cooking oils, darkens unevenly, and becomes nearly impossible to clean. A few dollars of sealer protects a substantial investment.
Cost and Budgeting
Material costs vary with the stone. Stacked stone ledger panels generally run $8 to $20 per square foot, pebble and river rock sheets often $10 to $25, and tumbled travertine or marble $5 to $15. Faux stone panels can drop the material cost considerably and weigh a fraction as much. Add adhesive, sealer, and blade wear, and a DIY backsplash for a typical 30-square-foot kitchen often lands between $300 and $700 in materials.
Hiring a tile setter adds labor, frequently $40 to $70 per square foot installed for natural stone, because the cutting and fitting take skill and time. The savings from doing it yourself are real if you are comfortable with a wet saw.
Cleaning and Maintenance
The textured surface needs a gentle touch. Wipe spills and grease promptly with a soft cloth and a pH-neutral stone cleaner. Avoid vinegar, lemon, bleach, and abrasive scrubbers, all of which etch stone and strip sealer. For stubborn grease in crevices, a soft brush works better than scrubbing pads.
Behind the range, where splatter is heaviest, wipe down regularly so oils do not build up in the rough surface. With routine cleaning and annual sealing, a stone backsplash stays striking for the life of the kitchen.
Lighting and Design Considerations
Stone is all about texture, and lighting is what reveals it. Flat, overhead light can wash out the dimension that makes a rock backsplash special, so plan for grazing light that skims across the surface. Under-cabinet LED strips angled down the wall create dramatic shadows in the crevices of stacked stone, turning the backsplash into a textured feature even at night. Without that raking light, the same wall can look surprisingly flat.
Color coordination matters too. Pull a tone from the stone, the rust, gray, or cream running through it, and echo it in your countertop, cabinet hardware, or paint to tie the kitchen together. Because stone tends to be busy, keep the surrounding finishes calmer so the backsplash stays the star rather than fighting with patterned counters or bold cabinetry.
Common Mistakes to Avoid
The biggest regret homeowners report is skipping the sealer, which lets grease and water stain the porous stone within weeks. A close second is underestimating the weight: heavy stone needs the right adhesive and a sound wall, not a quick mastic meant for light tile. Other pitfalls include trusting the countertop to be level instead of snapping a true line, failing to stagger seams on stacked stone so the joints become obvious, and rushing the cure before sealing. Take the time to prep the wall, pick the correct adhesive for the material, and seal thoroughly, and your stone backsplash will reward you with years of striking, low-trouble service.
Final Thoughts
A rock backsplash rewards you with texture, warmth, and a genuinely custom look that flat tile cannot replicate. The keys to success are a sound wall, the right adhesive for the weight, careful seam staggering, and diligent sealing. Match the stone style to your kitchen, commit to the maintenance, and you will have a focal wall that turns heads and lasts for decades.