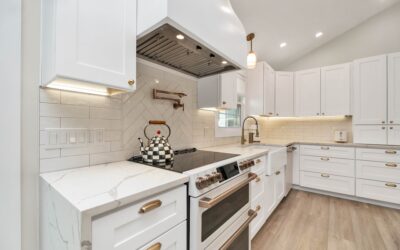
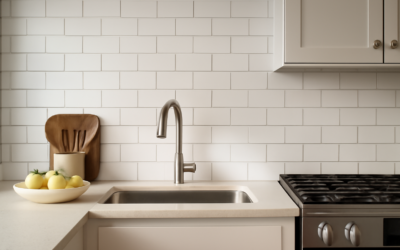
A white glass backsplash is one of the fastest ways to make a kitchen feel brighter, cleaner, and more expensive than it actually was. That glossy, reflective surface bounces light around the room and wipes down in seconds, which is why it has stayed popular through every kitchen trend cycle. I have installed dozens of them, and a white glass backsplash is a project many confident homeowners can tackle over a weekend if they understand a few things glass does differently from ceramic.
Part of our Kitchen Remodeling guide — explore the full guide →
This guide covers the tile options, what it costs, how to handle glass-specific installation quirks, and how to keep it looking like the showroom for years.
Why Choose Glass Over Ceramic or Stone
Glass has real advantages behind the sink. It is nonporous, so it never absorbs grease, wine, or tomato sauce. Nothing stains it. A quick wipe with glass cleaner leaves it spotless. It reflects light in a way matte ceramic and stone simply cannot, which is a genuine gift in a kitchen with limited windows.
The trade-offs are cost and installation difficulty. Glass runs more per square foot than basic ceramic subway tile, and because many glass tiles are translucent, everything behind them shows through, including the adhesive and the wall color. That single fact drives most of the installation decisions below.
Types of White Glass Tile
“White glass” covers a wide range of looks. The main styles:
- Glossy white subway tile (3×6 or 3×12 inches). The classic. Clean, bright, timeless, and the most affordable glass option, often $8 to $15 per sq ft.
- Frosted or satin white glass. A softer, matte-look surface that hides fingerprints and water spots better than high gloss.
- White glass mosaics. Small squares or pennies on mesh sheets, easy to cut around outlets, great for a textured feel.
- Back-painted glass panels. Large sheets of glass painted white on the back for a seamless, grout-free wall. Premium look, premium price, usually installed by a pro.
- Arabesque and picket shapes. White glass in lantern or elongated hexagon shapes for a more custom, modern look.
What a White Glass Backsplash Costs
Budget in two parts: materials and labor. For a typical kitchen backsplash of 30 to 40 sq ft:
- Glass tile: $8 to $30 per sq ft depending on style and brand.
- White thinset (mandatory for glass): $30 to $50 per bag.
- Grout and sealer: $25 to $50 total.
- Tools (trowel, spacers, sponge, wet saw rental): $75 to $150 if you do not own them.
- Professional labor: $10 to $25 per sq ft, so $300 to $1,000 for install alone.
All in, a DIY white glass backsplash typically lands between $400 and $900, while a professional job runs $700 to $2,000. Back-painted glass panels can run $50 to $100 per sq ft installed.
Installation: What Glass Does Differently
Glass is not ceramic. Skip the following steps and you will see problems through the tile.
Use White Thinset, Not Gray
Because most white glass is translucent, gray thinset shows through and dulls the color to a dirty, cloudy tone. Always use a white polymer-modified thinset rated for glass, such as Laticrete 254 Platinum or Mapei Ultraflex LFT. Read the bag; it should specifically say it is approved for glass tile.
Prime and Match the Wall
With very clear glass mosaics, even the wall color can show. A coat of white primer behind the tile keeps the field bright and even. It also improves adhesion on painted drywall.
Cutting Glass Cleanly
Glass chips easily. Use a wet saw with a diamond blade made for glass, feed the tile slowly, and go easy at the exit edge to avoid blowout. For mosaics, a good pair of wheeled glass nippers handles curves around outlets. Wear safety glasses; glass shards are no joke.
Set and Grout
Back-butter larger glass tiles for full coverage so no trowel ridges telegraph through. Use 1/16 to 1/8 inch spacers. Let the thinset cure the full 24 hours before grouting. For grout, an unsanded grout protects the polished surface from scratching; a white or clear glass grout keeps the seamless look, though many people like a light gray for subtle definition.
White Grout or Not?
This is the biggest design decision after the tile itself. White grout on white glass gives a nearly seamless, monolithic wall that reads modern and clean. Light gray grout defines each tile and creates that classic subway-tile grid, and it hides kitchen grime better than white. My advice: if the wall is behind a stove where grease splatters, go a shade darker than pure white so it stays looking clean. For a display area or bar backsplash, white-on-white looks stunning.
Cleaning and Long-Term Care
This is where glass earns its keep. Because the surface is nonporous, routine care is almost nothing:
- Wipe with glass cleaner or a vinegar-and-water mix and a microfiber cloth. Streaks disappear instantly.
- For dried-on grease, a drop of dish soap in warm water cuts it fast.
- Avoid abrasive pads and powders that can scratch the gloss.
- If you used cement grout, reseal the joints once a year to keep them clean; the glass itself never needs sealing.
Fingerprints and water spots show more on high gloss than on frosted glass. If you cook a lot and want low maintenance, satin-finish white glass is the smarter pick.
Design Tips to Make It Look Custom
A few choices separate a builder-basic wall from a designer one:
- Run subway tile in a vertical stack or herringbone instead of the standard offset for a fresh take.
- Carry the tile all the way to the underside of the upper cabinets, and behind the range up to the hood, for a finished look.
- Pair bright white glass with warm brass or matte black hardware and fixtures for contrast.
- Use a Schluter metal edge trim on outside corners and exposed edges rather than trying to bullnose glass.
Common Mistakes to Avoid
Most white glass backsplash failures trace back to a handful of shortcuts I see over and over. Learn from other people’s headaches:
- Using gray thinset under clear glass. It shows through as a dingy shadow and there is no fixing it after the fact short of tearing it out.
- Skipping full coverage. Voids behind translucent glass appear as dark blotches. Back-butter and press each piece firmly.
- Grouting too soon. Wet thinset trapped behind glass stays dark and can cloud the tile. Wait a full 24 hours.
- Forcing the wet saw. Pushing glass fast into the blade chips the polished edge. Slow, steady feed rates give clean cuts.
- Wrong grout width. Glass expands and contracts with temperature, so joints that are too tight can crack. Keep at least a 1/16 inch gap.
None of these are hard to avoid once you know about them, and dodging all five is the difference between a wall that looks professional and one that quietly nags at you every time you walk into the kitchen.
Final Thoughts
A white glass backsplash delivers a bright, easy-clean, timeless kitchen wall that fits nearly any style, from farmhouse to modern. The keys to a great result are picking the right white thinset so the color stays true, cutting glass carefully, and choosing a grout color that matches how hard you use the space. Spend a little more on quality tile and adhesive, take your time on the cuts, and you will have a surface that looks brand new a decade from now with almost no upkeep. For most kitchens, it is one of the best-value upgrades you can make.