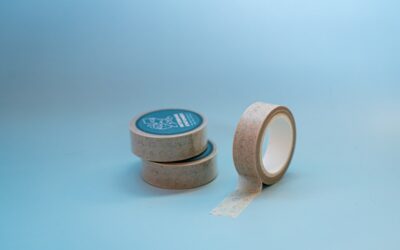
Choosing rug tape for hardwood floors is a balancing act between a rug that stays put and a finish that stays intact. The wrong rug tape for hardwood floors can pull the topcoat off a polyurethane surface or leave a gummy shadow you fight for weeks. After years of laying rugs over site-finished oak and prefinished maple, I have learned which tapes belong on wood and which belong nowhere near it.
This guide breaks down the tape types, the real residue risks, how to apply and remove tape without lifting your finish, and the pad-based alternatives that often work better. Whether your floor is freshly refinished or 40 years old, the goal is the same: grip without damage.
- Why Tape Type Decides Everything
- The Main Types of Rug Tape
- The Real Residue Risk on Finishes
- Safe Versus Unsafe Adhesives
- How to Apply Rug Tape Without Damage
- How to Remove Tape and Clean Up Residue
- Better Alternatives to Tape
- Matching Tape to Rug and Traffic
- Common Mistakes to Avoid
- Extra Caution on Refinished Floors
Why Tape Type Decides Everything
Not all double-sided rug tape is built for wood. The adhesive that grips carpet loop is often too aggressive for a cured polyurethane or oil finish. When the bond to the floor is stronger than the bond between the finish and the wood, you peel the finish, not the tape.
The safest products are engineered to grip the rug firmly while releasing cleanly from a hard surface. That asymmetry, strong on fabric, gentle on floor, is exactly what you want, and it is why reading the label for a hardwood-safe rating matters more than the price.
The Main Types of Rug Tape
Three adhesive families dominate the shelf, and they behave very differently on wood.
Cloth Tape
Cloth-backed double-sided tape uses a woven carrier with rubber-based adhesive. It holds well and conforms to uneven rug backs, but the rubber adhesive is the one most likely to transfer and leave residue on a warm floor. Reserve it for low-value rugs on sealed concrete, not your best oak.
PVC and Film Tape
Thin PVC or polyester film tapes run cheap, roughly $6 to $10 a roll, and grip aggressively. That strength is a liability on hardwood; the film can bond hard and tear the finish on removal. If you use one, test a small hidden patch first and never leave it down for months.
Silicone-Gel Tape
Reusable silicone or gel-grip tape is the modern answer for wood. It clings by surface tension rather than a curing glue, holds a rug in place, peels off with no residue, and rinses clean for reuse. Expect $12 to $20 a roll. For most hardwood, this is the tape I recommend first.
The Real Residue Risk on Finishes
Residue is not just cosmetic. A rubber-adhesive tape left on a floor for a summer can chemically interact with the polyurethane, softening it and leaving a haze that no cleaner removes without abrasion. Heat from sun through a window accelerates the process.
Oil-finished and wax floors are the most vulnerable because their surface is porous compared with a hard poly shell. On those, avoid any solvent-based or strong rubber adhesive entirely. Water-based polyurethane, the most common modern finish, tolerates gel tapes well but still reacts badly to aggressive PVC film left down long term.
Safe Versus Unsafe Adhesives
Keep this short list in mind when you read a package.
- Safe: Silicone gel grips, acrylic-based removable adhesives, and tapes explicitly labeled hardwood-safe or removable.
- Use with caution: Cloth rubber tapes, only on cured poly, only short term, always patch-tested.
- Unsafe: Industrial carpet tape, duct-style tape, and any product warning against use on finished surfaces.
When a label stays vague about surfaces, treat that silence as a warning and pick something clearly rated for wood.
How to Apply Rug Tape Without Damage
Preparation prevents most problems. Clean the floor and the rug back before you start so the adhesive bonds to the surface you intend, not to trapped dust.
- Vacuum the rug back and wipe the floor with a barely damp cloth; let both dry fully.
- Apply tape to the rug back first, not the floor, running strips a few inches in from each edge and one across the middle.
- Peel the second liner, then set the rug down and press by hand; do not stomp it in.
- Wait 24 hours before testing the grip so any adhesive can reach full tack.
Taping the rug rather than the floor means the tape travels with the rug when you move it, sparing your finish repeated adhesive contact.
How to Remove Tape and Clean Up Residue
Slow is safe. Peel tape back on itself at a low angle rather than straight up, which reduces the pull on the finish. If it resists, warm the strip gently with a hair dryer on low to soften the adhesive before lifting.
For leftover residue, start with the mildest option: a cloth dampened with warm soapy water. Step up only if needed to a dab of mineral spirits on a rag, tested in a corner first, and never a harsh acetone that will strip poly. Rub with the grain, wipe dry, and buff. Avoid scraping with anything metal.
Better Alternatives to Tape
Tape is not always the right tool. For large area rugs, a non-slip rug pad usually outperforms tape and carries zero adhesive risk. A quality felt-and-natural-rubber pad, around $30 to $70 depending on size, cushions the rug, protects the finish, and grips through friction alone.
Avoid cheap PVC foam pads that off-gas and can discolor a floor over time; the plasticizers in them are known to leave yellow marks on polyurethane. Felt-backed rubber is the safe pick. Where a rug corner keeps flipping, pair a rug pad with a small piece of silicone gel tape at that one corner rather than taping the whole perimeter.
Matching Tape to Rug and Traffic
The rug itself changes the equation. A thin flatweave or kilim has little mass to hold it down and benefits most from tape at the corners, which are the parts that curl and catch a toe. A heavy wool rug often needs only a good pad, since its own weight resists sliding, and tape at the corners is enough to stop flipping.
Traffic matters too. A runner in a hallway takes directional shoving every time someone walks it, so run silicone gel tape in continuous strips down both long edges rather than a few dots. Under a dining table, where chairs slide in and out, tape the corners and add a pad to keep the rug from creeping with each pull.
Common Mistakes to Avoid
The errors that damage floors are predictable, and knowing them keeps you clear.
- Leaving tape down for years: Even a hardwood-safe adhesive can cure hard over time. Refresh or remove tape annually.
- Taping the floor instead of the rug: This doubles the finish’s exposure to adhesive every time you reposition.
- Using carpet tape as a shortcut: Industrial carpet tape is the single most common cause of finish damage from rugs.
- Skipping the patch test: Five minutes in a closet corner saves a costly refinish.
Treat every new product as unproven on your specific finish until a hidden test says otherwise, and you will rarely go wrong.
Extra Caution on Refinished Floors
A newly refinished floor needs time before any tape touches it. Water-based poly reaches a workable cure in about a week but full hardness in 21 to 30 days; oil-based needs 30 days or more. Lay tape or even a rug pad too early and you can imprint the pattern into soft finish permanently.
Wait the full cure window, then start with a silicone gel tape or a felt-rubber pad, the two gentlest options. Doing that protects the investment you just made in sanding and coating, and it keeps your rug exactly where you want it without a single mark on the wood.
Prefer to explore on your own?
See how new flooring looks in your actual room in seconds — free, no signup.
Try the free Floor Studio →