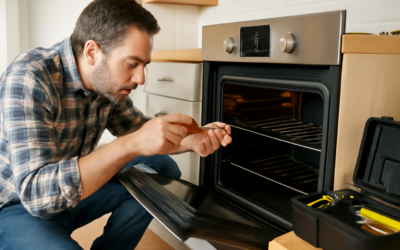
A Samsung oven not heating — or heating unevenly, slowly, or not reaching temperature — usually traces to one of a handful of parts, and several are within reach of a careful DIYer. Whether you have an electric or gas Samsung range or wall oven, the diagnosis follows a logical order. This guide walks the common causes, the fixes you can do yourself, and the hard line where you stop and call a professional.
Safety first, every time. For electric ovens, shut off the circuit breaker before touching any component. For gas ovens, be aware that any work involving the gas supply, gas valve, or a gas leak is a professional job — more on that below. Never assume power is off; verify it.
- Start Here: Rule Out the Simple Stuff
- Electric Oven: The Bake Element
- Electric Oven: Broil Element and Bake/Broil Balance
- Gas Oven: The Igniter (Most Common Cause)
- The Oven Temperature Sensor
- Control Board, Wiring, and Error Codes
- When to Call a Professional
- Tools and Parts for the Job
- Preventing Heating Problems
- The Bottom Line
Start Here: Rule Out the Simple Stuff
Before condemning any part, eliminate the easy explanations. Confirm the oven has power — a tripped breaker or a half-tripped 240-volt double breaker can leave the display working while the heating elements get no juice. Reset the breaker fully off, then on.
Check that a delayed-start, timer, or Sabbath mode isn’t engaged, and that the oven isn’t stuck in a demo or showroom mode (common on new units — hold the specific button combo in your manual to exit). Make sure the door latch isn’t stuck in the locked/self-clean position, which prevents heating. And verify the control-panel settings — a child lock or an accidental setting can block operation. These take two minutes and solve a surprising number of “not heating” calls.
Electric Oven: The Bake Element
On an electric Samsung oven, the most common heating failure is a burned-out bake element — the coiled heating element across the bottom of the oven. A healthy element glows bright orange when heating. If it stays dark, has a visible break, blister, or burn spot, or the oven only heats from the broil element up top, the bake element has failed.
This is a genuine DIY fix. With the breaker off, remove the two screws holding the element to the back wall, pull it forward to expose the wire terminals, disconnect them (don’t let the wires fall behind the panel), and connect the new element. You can confirm the diagnosis with a multimeter — a good element shows continuity (a low resistance reading); a failed one reads open. Replacement elements run $30–$80 and the swap takes about 30 minutes.
Electric Oven: Broil Element and Bake/Broil Balance
If the oven heats but food browns unevenly or only the top cooks, check the broil element at the top of the cavity the same way — visual inspection and a continuity test. A failed broil element won’t stop baking but will ruin broiling and can throw off overall heat distribution. It replaces just like the bake element, from inside the oven, for a similar $30–$80.
If both elements test good but the oven still underheats, the problem is likely upstream — the temperature sensor or control board, covered below.
Gas Oven: The Igniter (Most Common Cause)
On a gas Samsung oven, the number-one reason it won’t heat is a weak or failed igniter. The igniter has two jobs: it glows hot to light the gas, and it draws enough current to open the safety gas valve. As igniters age, they weaken — they may still glow but no longer pull enough current to open the valve, so you get a glow but no flame, and no heat.
A telltale sign: the igniter glows for more than 90 seconds without the burner lighting, or glows dimly. Replacing the igniter is a moderate DIY, but here is the critical safety caveat — you are working on a gas appliance. Shut off both the electrical power and, if you’re comfortable and it’s accessible, the gas supply to the oven before you start. The igniter itself (typically $40–$100) is accessible at the burner, but if you are not fully confident working around the gas burner and valve, stop and call a professional. A mistake here risks gas leaks.
The Oven Temperature Sensor
Both gas and electric Samsung ovens use a temperature sensor (a thin probe protruding into the upper rear of the cavity) to tell the control board the actual temperature. If it fails or drifts, the oven may not heat, heat to the wrong temperature, or shut off early. Symptoms include an oven that runs far too cool or hot, or throws a temperature-related error code.
Test the sensor with a multimeter measuring resistance — at room temperature a typical oven sensor reads around 1,080–1,100 ohms; a reading way off that (open or shorted) means it’s bad. Replacement is straightforward: unscrew the sensor from the back wall, unplug its connector (accessible behind the oven or through the back panel), and install the new one. Sensors run $20–$50.
Control Board, Wiring, and Error Codes
If elements or igniter and the sensor all test good but the oven still won’t heat, suspect the electronic control board (the brain that switches power to the heating components) or a failed relay on it. Samsung ovens throw error codes for many of these faults — look yours up in the manual, as codes point directly at the sensor, a stuck relay, a communication fault, or the door lock.
A burned relay or a cracked solder joint on the control board stops the oven from energizing the elements even when everything downstream is fine. Control boards run $150–$350 and are a plug-and-swap replacement, but confirm the diagnosis first — boards are the most expensive part to guess wrong on. Also inspect wiring connections at the elements and igniter for burnt or loose terminals, a common and cheap-to-fix cause.
When to Call a Professional
Draw the line clearly. Call a licensed tech or gas professional for: any repair involving the gas supply line, gas valve, or a suspected gas leak (if you smell gas, shut off the supply, ventilate, and leave — don’t diagnose); any 240-volt wiring you’re not certain about; and control-board diagnoses you can’t confirm. Gas oven work in particular is worth a pro if you have any hesitation — the cost of a service call is trivial next to the risk of a gas mistake. When in doubt, call.
Tools and Parts for the Job
You can handle most electric-oven fixes with a modest kit. A digital multimeter is essential — it’s how you confirm whether an element, sensor, or igniter has failed instead of throwing money at parts. Add nut drivers (1/4-inch and 5/16-inch), Phillips and flat screwdrivers, and needle-nose pliers to disconnect terminals. A pair of insulated gloves and a flashlight round it out.
Before ordering, find your oven’s model and serial number, usually on a sticker around the door frame or on the side of a drawer. That number gets you the correct bake element, sensor, igniter, or board, since parts vary across Samsung’s lineup. For a gas igniter, note whether yours is a “flat” or “round” style — they’re not interchangeable. Photograph the old part’s label before you buy, and lean toward genuine or reputable OEM-equivalent parts for the control board and igniter, where cheap versions tend to fail early.
Preventing Heating Problems
A little care extends the life of an oven’s heating components. Avoid slamming the door, which can crack the temperature sensor or jar wiring connections loose over time. Don’t line the oven floor with foil — it traps heat against the bottom element and can cause it to burn out prematurely, and on some models it disrupts airflow and confuses the sensor. Clean up spills promptly rather than letting them carbonize.
Use the self-clean cycle sparingly. The extreme heat it generates is the single hardest thing you can do to an oven’s electronics — the intense temperatures stress the control board, sensor, and door lock, and a surprising number of “oven died after self-clean” calls trace directly to that cycle. When you do run it, make sure the kitchen is ventilated. Manual cleaning with a damp cloth and a little baking soda is gentler on the oven and will keep it heating reliably for years longer.
The Bottom Line
A Samsung oven not heating is usually a bake element (electric) or a weak igniter (gas), with the temperature sensor and control board as the next suspects. Rule out power, settings, and modes first, then test parts with a multimeter in order of likelihood. Cut power before any service, treat all gas work as pro-territory if you’re not fully confident, and you’ll fix most electric-oven cases yourself for under $80 — and know exactly when to hand it off.