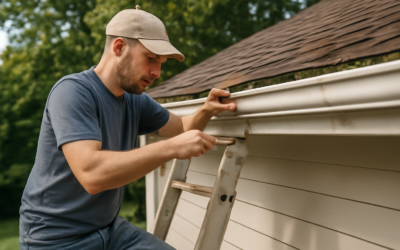
Most gutter leaks don’t come from rusted-out troughs. They come from joints. Sealing gutter seams at corners, end caps, and section splices fixes the majority of drips you see during a storm, and the job usually costs less than $30 in materials. The catch is preparation: sealant smeared over dirt, old caulk, or damp metal will peel within a season, and you’ll be back on the ladder next spring.
Part of our Roofing guide — explore the full guide →
The short answer: find the exact leak point with a hose, scrub the seam down to bare metal, let it dry completely, then apply a gutter-rated sealant (or butyl seam tape for wider gaps) from the inside of the gutter so water pushes the patch tighter instead of lifting it. Holes smaller than a nickel can be sealed the same way; larger holes need a metal patch bedded in sealant.
- Sealing Gutter Seams: Why Joints Fail in the First Place
- Ladder Safety Before You Start
- Tools and Materials
- Step 1: Find the Exact Leak
- Step 2: Clean and Dry the Seam
- Step 3: Choose the Right Repair Method
- Step 4: Seal the Joint
- How to Handle Hole in Gutter Repair
- Fixing Leaking Corners, End Caps, and Seamless Gutters
- Troubleshooting a Repair That Still Leaks
- Typical Costs
- When to Call a Pro
- Fixing Leaky Gutters Safely: A Ladder Work Plan for Multi-Joint Repairs
- Frequently Asked Questions
Below you’ll find how to diagnose a leaking gutter joint, which repair material fits which problem, step-by-step instructions, and the point where a replacement section or a pro makes more sense than another tube of caulk.
Sealing Gutter Seams: Why Joints Fail in the First Place
Aluminum and steel gutters expand and contract with temperature. A 30-foot run of aluminum can grow and shrink by roughly a quarter inch between a hot August afternoon and a January night. Every seam, miter, and end cap flexes a little with each cycle, and cheap or aged caulk eventually cracks along that movement line. Add ice dams, clogged downspouts that leave standing water in the trough, and pop-riveted joints that loosen over time, and you have a recipe for a leaky rain gutter.
Common failure points include:
- Inside and outside corners (miters): the most common leak spot because they collect debris and carry the most water.
- End caps: crimped on and sealed, but the sealant bead shrinks and pulls away.
- Section splices: sectional gutters overlap every 10 or 20 feet, and each overlap is a potential leak.
- Downspout outlets: the drop outlet is riveted and sealed into a hole cut in the trough.
- Fastener holes: hanger screws or old spike holes that were never sealed.
Seamless gutters are not immune. Seamless gutter repair usually focuses on the corners and end caps, since those are still joints even when the long runs are one continuous piece.
Ladder Safety Before You Start
Falls from ladders send thousands of homeowners to the emergency room every year, and gutter work is a leading cause. Set an extension ladder on firm, level ground at roughly a 4-to-1 angle (one foot out from the wall for every four feet of height), extend it at least 3 feet above the gutter edge if you’ll step off, and never lean the ladder directly on the gutter itself — use a ladder standoff that bears on the roof or wall. Keep three points of contact, move the ladder instead of overreaching, and avoid working in wind or on wet rungs. Have someone foot the ladder and hand up materials.
For two-story homes, steep lots, or gutters near power lines, hire a gutter contractor. The repair itself is simple; the height is what makes it dangerous. Never place an aluminum ladder where it could contact the service drop.
Tools and Materials
- Extension ladder with standoff, work gloves, safety glasses
- Garden hose and a helper
- Gutter scoop or trowel, bucket
- Putty knife, stiff wire brush or abrasive pad
- Rubbing alcohol or mineral spirits and clean rags
- Gutter sealant (a solvent-based or hybrid polymer sealant labeled for gutters and flashing)
- Butyl or aluminum-backed gutter seam tape (for gaps and splices)
- Aluminum flashing scrap for patches, tin snips
- Pop-rivet tool and aluminum rivets, or short stainless sheet-metal screws
- Caulk gun
A tube of dedicated gutter sealant is worth the extra few dollars over general-purpose silicone. Gutter formulas are designed to stay flexible across wide temperature swings, bond to painted aluminum and galvanized steel, and can often be applied to slightly damp surfaces. Standard 100% silicone sticks poorly to old silicone residue and can’t be painted, which makes future repairs harder.
Step 1: Find the Exact Leak
Don’t guess. A drip at the fascia can travel several inches along the underside of the gutter before it falls. To fix a gutter leak reliably, you need the real source.
- Clean the gutter first. Scoop out leaves and grit so you can see the bottom of the trough.
- Have a helper run a hose into the gutter at the high end at moderate flow.
- Watch the underside of every joint, corner, and outlet. Mark the spot with a grease pencil or tape.
- Check the downspout while the water runs. If water backs up and overflows at a corner, you have a clog, not a seam problem.
Also check the slope. Standing water more than a quarter inch deep after the hose stops suggests the run has sagged; water that sits on a seam will find its way through almost any sealant. Gutters should fall about 1/4 inch per 10 feet toward the downspout. Re-hang or add hangers before sealing if you see a belly.
Step 2: Clean and Dry the Seam
This is the step that determines whether your repair lasts one season or ten. Scrape off all old caulk and sealant with a putty knife. Use a wire brush or abrasive pad to remove oxidation, loose paint, and grime about 2 inches on either side of the seam. Wipe with rubbing alcohol or mineral spirits to remove oils, then let it dry.
Plan the repair for a dry day with temperatures above about 40°F, or whatever minimum the sealant label lists. If the metal is dewy in the morning, wait until afternoon. Moisture trapped under the sealant is the most common reason sealing gutter leaks fails early.
Step 3: Choose the Right Repair Method
Match the material to the gap. Here’s a quick decision guide.
| Problem | Best Fix | Notes |
|---|---|---|
| Hairline crack or pinhole at a joint | Gutter sealant bead | Apply inside the trough |
| Gap up to about 1/8 inch | Sealant, tooled flat | Tighten rivets first |
| Wider gap or loose splice | Rivets plus seam tape | Tape over the full seam |
| Hole larger than 1/2 inch | Flashing patch in sealant | Overlap 1 inch each side |
| Rusted-through section | Replace the section | Patching buys little time |
Step 4: Seal the Joint
Sealing Gutter Joints With Sealant
- If the joint has loose rivets or screws, drill them out and replace them so the metal pieces sit tight. Sealant is not a structural fastener.
- Cut the sealant nozzle to a small opening, about 1/4 inch.
- Working from inside the gutter, run a continuous bead along the full seam, including up the front lip and back wall where the pieces meet.
- Tool the bead flat with a gloved finger or plastic spoon, feathering it about 1/2 inch onto the metal on both sides. A flat, feathered bead doesn’t dam water or catch debris.
- Seal each rivet head on the inside as well.
- Let it cure per the label — often 24 hours before heavy rain, sometimes longer in cool weather.
Using Gutter Seam Tape
For section splices, wider gaps, or corners where old sealant keeps failing, seam tape often works better. Cut a strip long enough to run up the back wall, across the bottom, and over the front lip. Peel the backing, press it into place starting from the center, and roll or rub it firmly to remove air bubbles. Some pros apply a thin skim of sealant underneath and a bead around the tape edges for extra insurance.
How to Handle Hole in Gutter Repair
Small holes from old spikes, rust pits, or a dropped tool are easy to fix. For anything smaller than about 1/2 inch, clean the area and cover it with sealant on the inside, spreading it an inch past the hole. For larger holes, cut a patch from matching aluminum flashing that overlaps the hole by at least an inch on all sides. Bed the patch in a layer of sealant inside the gutter, press it flat, and seal around the edges. Rivet the patch in two or more spots if it sits on the bottom where water flows hard.
If rust holes are spreading along a steel gutter, stop patching. Once the metal is thin, new holes appear faster than you can seal them. That’s the time to replace the run.
Fixing Leaking Corners, End Caps, and Seamless Gutters
Corners: Miters take the brunt of flow. After cleaning, check that the corner is fully riveted. Seal the entire inside of the miter seam, not just the visible crack. If a corner has been resealed several times and still drips, a new pre-formed miter piece is inexpensive and often a better long-term gutter leak repair.
End caps: Tap the cap lightly with a rubber mallet to make sure it’s seated, then add a couple of rivets or crimp it with a crimping tool. Seal the full inside perimeter where the cap meets the trough.
Seamless gutters: Treat corners and end caps exactly as above. Along long runs, leaks usually point to a fastener hole, a crack from ladder damage, or a hanger screw that loosened. Seamless gutter repair on a damaged spot can use a flashing patch, but a crushed or kinked section is best cut out and spliced by a gutter installer with the matching profile.
Troubleshooting a Repair That Still Leaks
- Sealant peeled off: The surface was dirty, damp, or had old silicone residue. Scrape, clean with solvent, and redo.
- Leak moved to the next seam: Water is standing in the trough. Correct the slope and clear the downspout.
- Drips behind the gutter, not at a joint: Water may be running behind the gutter from the roof edge. Missing drip edge flashing or a gutter apron is the usual cause, and it can rot fascia boards.
- Overflow at corners during heavy rain: The gutter or downspout may be undersized for the roof area. A 3-by-4-inch downspout or a second outlet can help.
- Joint separates again: Fasteners are loose or hangers are too far apart. Space hangers every 24 to 36 inches, closer in snow country.
Typical Costs
DIY sealing gutter seams usually runs $10 to $40 for sealant, seam tape, and rivets. A replacement corner or end cap costs roughly $5 to $25. Hiring a gutter company to reseal leaking joints often falls in the $100 to $350 range for a service call, depending on height and the number of joints. Replacing a section of sectional gutter or splicing a seamless run typically costs a few hundred dollars, while a full re-gutter on an average home can reach into the low thousands.
When to Call a Pro
Call a gutter contractor if the gutters are on a second story or higher, if the fascia board behind the gutter is soft or rotted, if multiple runs are sagging, or if rust has perforated the metal in several spots. A pro can also re-pitch long runs, add downspouts, and install drip edge. If your sealed seams keep failing year after year, ask about replacing sectional gutters with seamless ones to cut the number of joints to just the corners and outlets.
Fixing Leaky Gutters Safely: A Ladder Work Plan for Multi-Joint Repairs
A single seam repair takes one climb. Fixing leaky gutters around a whole house often means cleaning, scraping, sealing, and retesting a dozen joints, which adds up to many trips up and down the ladder. Fatigue and hurried ladder moves cause more falls than the first climb of the day, so organize the work to cut down on both.
Plan the Route From the Ground
Walk the house during your hose test and mark each leaking joint with tape on the siding directly below it. Number the spots in the order you will reach them so you can set the ladder once per location and finish every task there before moving on. Grouping cleaning, prep, and sealing at each spot means far fewer climbs than doing each step across the whole house.
Keep Your Hands Free
- Hang a bucket from a ladder hook for scraped sealant, grit, and rags.
- Carry the caulk gun, putty knife, and wire brush in a tool belt, not in your hands or pockets.
- Pre-cut seam tape and flashing patches on the ground, where snips are safer to use.
- Have a helper pass up anything you forgot rather than climbing with it.
Watch for Hazards Specific to Gutter Repair
Look under the eaves for wasp and hornet nests before setting the ladder, since a sudden sting on the top rungs is dangerous. Wear gloves for cut metal edges and old rivet stubs. Solvent-soaked rags and wet sealant make gloves slippery, so wipe your hands before gripping the rails. If the ground is soft from your hose test, move the ladder feet to dry footing or use a ladder leveler on a board.
Stop Before You Get Tired
Sealant work goes quickly, which tempts people to finish one more corner late in the afternoon. Quit while you still feel steady, since the joints you have already sealed need curing time before testing anyway. Resume the next dry day with a fresh hose test to confirm which repairs held.
If the plan involves working off the roof itself, standing above the second rung from the top, or reaching joints over a porch roof or steep slope, that section of the repair belongs to a gutter contractor with proper fall protection.
Frequently Asked Questions
What is the best sealant for sealing gutter seams?
Use a sealant specifically labeled for gutters and flashing. These stay flexible through temperature swings, bond well to aluminum and steel, and resist UV. General-purpose silicone is a poor choice because it bonds weakly to old residue and cannot be painted.
Should I seal gutters from the inside or outside?
Seal from the inside. Water pressure pushes an inside patch against the metal, while a bead applied only on the outside gets pushed away by water trying to escape. A thin exterior bead is fine as a backup but not the main seal.
Can I seal a leaking gutter joint when it is wet?
Some gutter sealants tolerate damp surfaces, but results are always better on clean, dry metal. Wait for a dry day above about 40°F, and let the seam dry fully after cleaning.
How long does gutter sealant last?
A properly applied gutter sealant often lasts 5 to 10 years or more, depending on sun exposure, standing water, and how much the joint flexes. Failures in under a year usually point to poor surface prep or a sagging run.
Is gutter seam tape better than caulk?
Seam tape covers wider gaps and splices more evenly and is less affected by joint movement, while sealant is better for small cracks, rivet heads, and tight corners. Many repairs use both.
When should I replace a gutter instead of patching it?
Replace the section when rust has made multiple holes, the metal is crushed or kinked, or you have resealed the same joint several times. Patching thin or corroded metal rarely lasts more than a season.