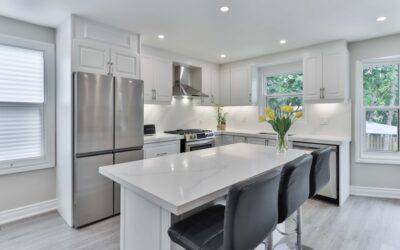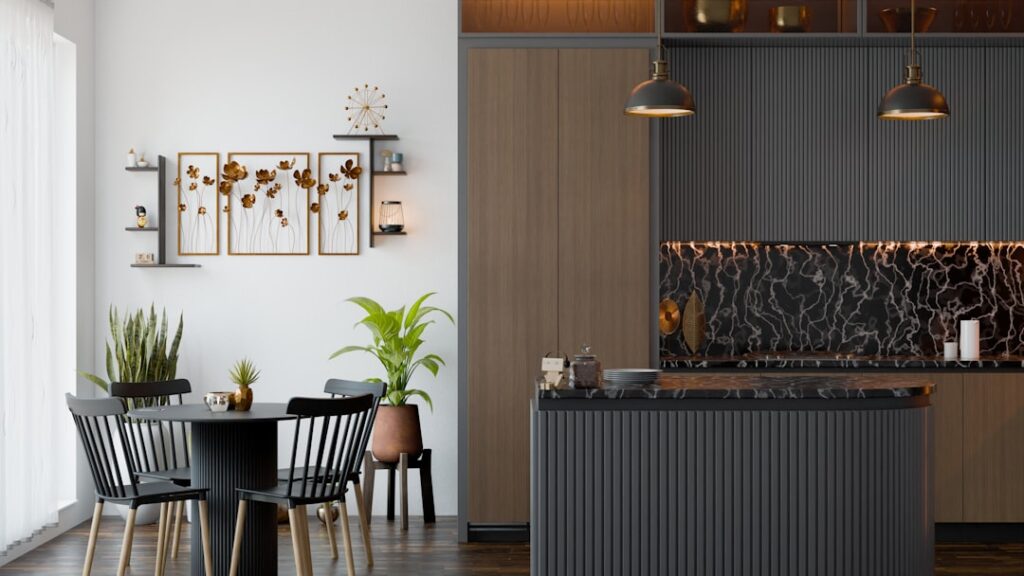
The single biggest complaint homeowners have about their kitchens is not the cabinets or the appliances, it is the lack of counter space to actually work. A stand alone kitchen island solves that problem without tearing into your floor or hiring a contractor, giving you a movable block of prep surface, storage, and seating that you can position exactly where you need it. Unlike a built-in island bolted to the subfloor and wired for outlets, a freestanding island rolls in, does its job, and can move out again when your needs change. Here is how to choose one that fits your space, your workflow, and your budget.
Part of our Kitchen Remodeling guide — explore the full guide →
Freestanding vs. Built-In
The core difference is permanence. A built-in island is anchored to the floor, often plumbed for a sink and wired for outlets, and typically requires a contractor and permits. A stand alone island sits on the floor or rolls on locking casters, needs no electrical or plumbing work, and can be moved or removed entirely. For renters, for people who like to rearrange, and for anyone who wants an upgrade this weekend rather than next quarter, the freestanding route wins on flexibility.
You give up a few things in exchange. A freestanding island usually offers less storage than a full built-in, and it will not have a sink, dishwasher, or built-in cooktop. But for the core jobs, chopping, mixing, serving, and stashing pots and small appliances, a well-chosen stand alone island covers 90 percent of what most cooks actually need.
Sizing and Clearances
Clearance is the rule that makes or breaks an island. You want at least 36 inches of walkway on every side, and 42 to 48 inches if two cooks work at once or if the island sits along a main traffic path. Skimp on this and the island turns your kitchen into an obstacle course; every trip to the fridge becomes a squeeze past a hard corner.
Measure your open floor before shopping. A common mistake is buying an island sized for a magazine kitchen and cramming it into a galley. As a starting point:
- Small kitchens (under 100 sq ft): a cart-style island around 24 by 36 inches
- Medium kitchens (100 to 200 sq ft): a 24-by-48-inch island with a shelf and drawers
- Large kitchens (200+ sq ft): a 36-by-60-inch island with seating for two or three
Standard counter height is 36 inches, which works for prep and pairs with counter-height stools. If you want a raised eating bar, look for a 42-inch bar-height model. Confirm the island height matches your existing counters if you plan to use them as a continuous workspace.
Materials and Countertops
The countertop is where you spend your durability budget. Solid hardwood or butcher block, usually maple or acacia, is the most common surface on freestanding islands. It looks warm, doubles as a cutting surface, and can be sanded and re-oiled when it wears. Oil it with food-safe mineral oil every month or two to keep it from drying and cracking.
Other surfaces trade character for maintenance. Stainless steel tops shrug off heat and stains and give a professional-kitchen look, though they scratch and show fingerprints. Granite or quartz tops on higher-end carts resist heat and knives but add significant weight, which is worth checking against your caster rating. The cabinet base is typically rubberwood, MDF with a laminate finish, or solid pine. Solid wood costs more and lasts longer; laminate over MDF keeps the price down but can swell if water sits on it.
Storage and Features That Earn Their Keep
The best islands work hard in a small footprint. Look for a mix of storage types rather than one big cabinet, because varied storage matches how a kitchen actually gets used. A drawer for utensils, an open shelf for a stand mixer or cookbooks, a towel bar, and a spice rack together do more than a single deep cabinet where everything gets lost in the back.
Features worth paying for include locking casters so the island stays put while you knead dough, a drop-leaf extension that adds prep space and folds away in a tight kitchen, and a built-in wine rack or knife block if those match your cooking. Skip gimmicks you will not use. A pull-out trash bin and a couple of deep drawers deliver far more daily value than a decorative hanging rack you will only fill with clutter.
Cost and Where to Buy
Prices span a wide range depending on materials and size. A basic rolling cart with a wood top runs $120 to $300 and suits a small kitchen or a starter setup. A mid-range island with butcher block, drawers, and a shelf lands between $350 and $800. Solid-wood islands with stone tops and seating climb from $900 to $2,500 or more.
If you are handy, building your own is a genuine option. A base cabinet from a home center topped with a $150 butcher block slab and finished with casters can produce a custom-sized island for $250 to $450 in materials. Cut the counter to leave a comfortable overhang for stools, seal the wood, and you have an island sized precisely to your kitchen for a fraction of a custom build.
Placement and Real-World Use
Where you park the island shapes how useful it is. The classic spot is centered in the open floor between the sink, stove, and refrigerator, keeping it inside the work triangle so it saves steps rather than adding them. In a smaller kitchen, position the island against the end of a counter run to extend your continuous prep space without blocking a walkway.
Think about your most common tasks and place the island to serve them. If you bake, keep it near the oven and a power outlet for the mixer. If it is mostly a serving and gathering spot, position it toward the dining side so guests can perch on stools without crowding the cook. Because a stand alone kitchen island moves, you can experiment for a week and settle on the spot that genuinely works before committing.
Seating and Overhang Math
If you want stools at your island, the overhang and spacing rules decide whether people can actually sit comfortably. For counter-height seating at 36 inches, plan on a 12-inch overhang so knees have room under the counter, and for bar-height at 42 inches, a 12-inch overhang works as well. Allow roughly 24 inches of linear counter width per stool so diners are not bumping elbows, which means a 48-inch island edge seats two comfortably and a 60-inch edge can squeeze in three.
Not every freestanding island is built to carry an overhang with weight leaning on it, so check the construction before you count on seating. A cart with a thin top and no support bracket under the overhang can sag or tip if someone leans hard on it. Look for an island with a countertop supported by the base along its full depth, or one that includes corbels or steel brackets under the seating overhang. If seating is a priority, this structural detail matters more than the finish, because an island that wobbles when someone sits at it will frustrate you every day.
Mobility, Locking Casters, and Flooring
The whole appeal of a freestanding island is that it moves, and the casters are what make that work or fail. Look for locking casters on at least two of the four wheels, and ideally all four, so the island stays rock-solid while you knead dough, roll pastry, or lean into a cutting task. Cheap fixed glides that just slide across the floor scratch hardwood and vinyl, while quality rubber or soft-tread casters roll without marking the floor.
Match the caster type to your flooring. Hard plastic wheels can dent and scuff softer floors like luxury vinyl plank or finished hardwood, so choose soft rubber treads or add felt-bottomed glides on a stationary island. On tile, almost any caster works, but confirm the wheels clear the grout lines smoothly. If your island will stay in one spot most of the time, you can even remove the casters on some models and set the base directly on the floor with felt pads, which lowers it slightly and makes it feel more built-in while still leaving the option to move it later.
The Bottom Line
A stand alone kitchen island is one of the highest-value upgrades you can make to a kitchen without a renovation. It adds the prep space, storage, and casual seating that so many kitchens lack, and it does so with zero demolition and full flexibility to move or remove it later. Measure your clearances first, buy the largest island your walkways can comfortably handle, choose a durable top you will actually maintain, and you will wonder how you cooked without it.